Growing your first crop of potatoes is something you’ll never forget.
I mean … placing food in the ground and producing MORE food? It’s incredible!
That’s right, you can literally place an organic potato from the grocery store into the ground, and it will produce more potatoes with very little effort on your part. (The “organic” part is important, by the way; more on that below.)
So whether you’re a seasoned gardener or just getting started, we hope this guide to growing potatoes from potatoes (thanks to their extraordinary, sprouting eyes!) will pave your path from planting to harvesting.
Plant Potatoes in Early Spring
In early spring, the recently thawed soil holds just the right warmth for kick-starting life underground. But seasoned gardeners know that this season holds a delicate balance.
As the frost retreats, leaving behind manageable coolness, potatoes find their perfect haven. It’s go time.
Plant too early, and the lingering cold might nip your ambitions in the bud. Wait too long, and the scorching summer heat will thwart the tubers’ growth.
Early spring offers a snug window where conditions align “just right” for potato planting.
Most potato varieties can handle a light frost so, by choosing the early season, you ensure your potatoes are going in the ground during this narrow window of opportunity.
For more details, here’s our complete guide to timing your potato planting.
How to Plant Potatoes from Eyes
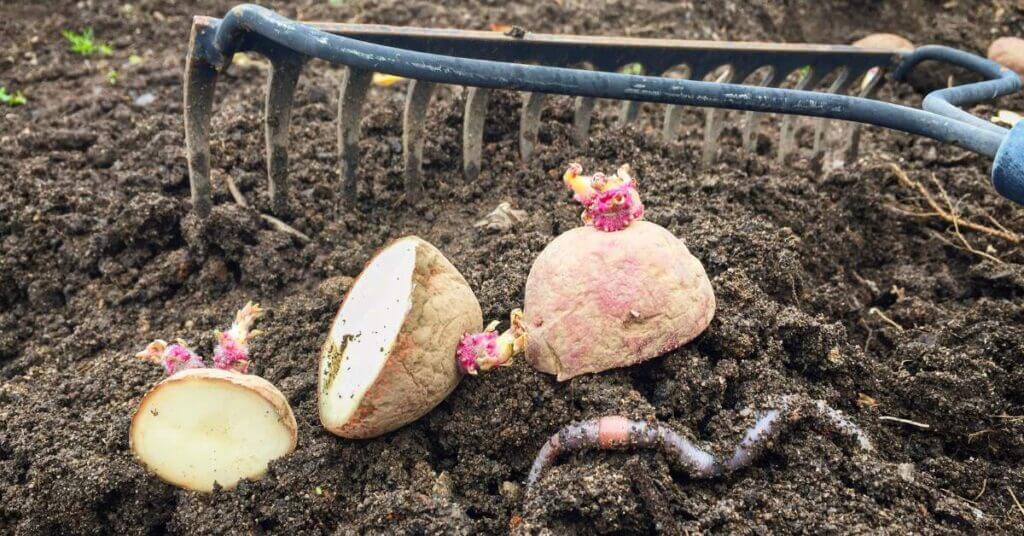
If you’ve ever left a bag of potatoes in your pantry for too long, you probably noticed that they produced tiny buds along the surface of their skin.
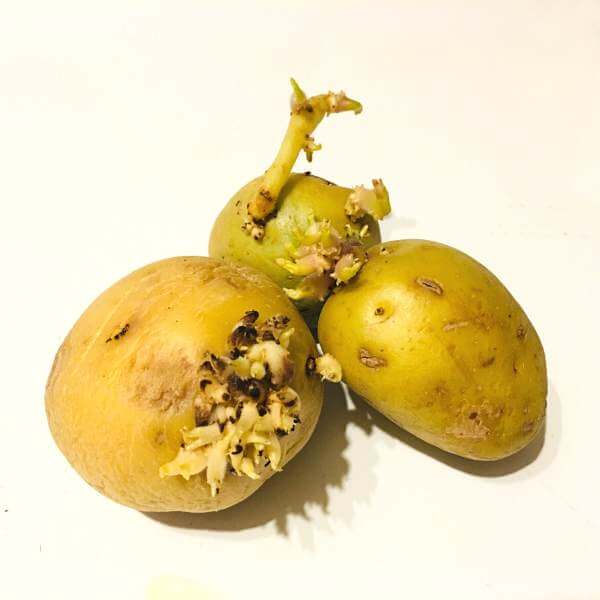
These are known as “eyes.” These eyes—or baby sprouts—are what will become your future potato plants.
This is true whether you grow store-bought potatoes or use “potato seeds”—which aren’t actually seeds; they are simply potatoes produced by the maincrop from the previous year.
To keep things simple, we’ve broken down the potato growing process into nine steps.
Step 1: Choose the Best Potato Varieties for Your Area
Garden Potatoes come in a variety of types, each with its own unique characteristics and flavors. From the classic Russets to the vibrant Reds and the creamy Whites, there’s a potato variety to suit every palate and purpose.
While potatoes aren’t difficult to grow, choosing the right variety for your climate can make or break your success.
For early harvests, consider planting early potatoes. These varieties, such as Yukon Gold or Red Norland, mature quickly and produce smaller, tender tubers perfect for roasting or boiling.
If you prefer larger, more mature potatoes, opt for maincrop potatoes like Russet Burbank or Kennebec. These potatoes take longer to grow but offer a bountiful harvest of larger tubers ideal for baking or mashing.
When selecting potato varieties, it’s essential to consider your local climate and growing conditions. Some varieties, like the Colorado potato beetle-resistant Yukon Gold, thrive in cooler climates with shorter growing seasons.
Others, such as the heat-tolerant Red Pontiac, perform well in warmer regions like Central Florida.
Step 2: Decide if You Want to Use Grocery Store Potatoes or Seed Potatoes
Wondering if you should start your garden with spuds from the grocery shelf or opt for certified seed potatoes?
Grocery store potatoes often carry growth inhibitors, sprayed to prevent them from sprouting on the shelves. This factor could delay or inhibit their growth in your garden, leading to disappointment.
That said, organic potatoes are not sprayed (or, at least they shouldn’t be).
I’ve grown pounds of potatoes from organic ones purchased from the grocery store with no issues.
On the other hand, certified disease-free seed potatoes are specifically bred for planting. They come with a guarantee of being disease-free, ensuring a robust start for your crop.
Step 3: Pre-Sprout Your Potatoes (Known As Chitting)
You might have heard whispers about chitting potatoes before you plant them. This process, simply put, wakes up the eyes of potatoes to sprout.
You’ll start by taking your potatoes and setting them in a bright, yet cool location.
This environment is the perfect awakening call. Sunlight coaxes the sprouts into action, while the cool temperature keeps the growth slow and steady.
As the eyes begin to sprout, you might wonder if this extra step truly matters. It does! Pre-sprouting decreases the time it takes for shoots to emerge from the soil.
An earlier harvest becomes more than just a possibility; it turns into a likely outcome. (If you have a short growing season, this is especially important.)
Step 4: Cut the Potatoes to Increase Plant Production
You’ll need a clean knife for this job. First, take your whole seed potatoes and cut them into smaller pieces. Make sure your pieces of tubers contain at least one ‘eye’.
Let these pieces dry for up to a week, allowing time for the cut surfaces to cure. This curing process forms a protective layer that shields them from mold and diseases, which is crucial.
That said, this technique is not just about division; it’s about multiplication.
Each piece now has the potential to become its own plant. By increasing the pieces, you amplify the possible yield.
It’s a straightforward yet effective strategy to boost your garden’s productivity!
Dream of Filling Your Pantry with Homegrown Staples?
Plan your garden with our FREE PRINTABLE—Staples Garden: What to Plant to Feed Your Family for a Year!
Step 5: Prep Your Garden Bed
Alright, it’s time to get your garden bed ready for some serious spud action! Let’s dive in and make sure your patch is primed for potato perfection.
First things first, assess your soil situation. Potatoes need well-drained soil that’s rich in organic matter. This sets the stage for healthy growth and prevents waterlogged tubers, which mold easily.
If your soil needs a little TLC, now’s the time to amend it with compost, nitrogen, and bone meal.
Check the soil temperature—aim for around 45 to 55 degrees Fahrenheit. It’s like Goldilocks and the Three Bears … not too hot, not too cold, just right for happy potatoes.
Next, find the sunniest spot in your garden. Potatoes thrive in full sun. Aim for at least 6 to 8 hours of sunlight a day.
Now, let’s talk spacing. Give your potatoes plenty of room to stretch out by planting them about 12 inches apart in rows spaced 2 to 3 feet apart. This ensures they have space to grow and helps prevent overcrowding.
If you’re planting in a raised bed or large pots, make sure they have plenty of drainage holes to prevent waterlogging. Good drainage is key to healthy roots and happy potatoes.
Step 6: Plant Potatoes Sprout-Side Up
The moment to plant arrived! Position each potato piece with the sprout(s) pointing upwards. I help myself remember this with the phrase “Eyes to the sky.”
The upward facing sprouts seek the sun, helping them break through the soil.
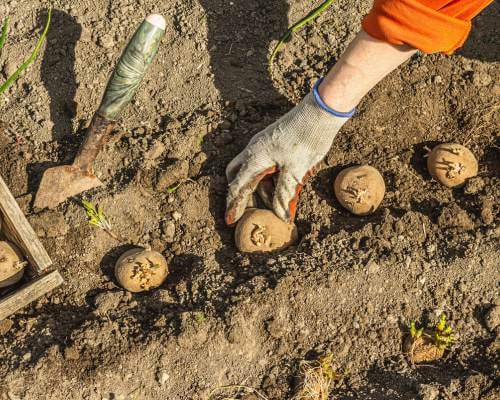
As for soil depth, you can plant them two ways:
- Dig a trench, place your potatoes, and back fill with about 4 inches of soil minimum.
- Or, place the potatoes directly on top of the ground and cover with 6-12 inches of hay, straw, or composted wood chips. (This is known as the deep mulch method.)
Within two weeks, you should see tiny green tendrils peeking through the soil or mulch.
Throughout the growing process, ensure your potato tubers get about two inches of water per week. For many areas of the world, this will naturally happen with rain water. If it doesn’t, just be sure to water your garden soil thoroughly for the best results.
Master Potatoes From Seed to Table
Get growing & preserving faster with no-fluff tutorials for every step from plant to plate!
Step 7: Hill the Potatoes As They Grow
Hilling potatoes is a simple yet effective technique that can significantly boost your yield. When the plants reach a height of about 6 to 8 inches, mound the soil (or hay or whatever mulch you’re using, if using the deep mulch method) around the base of the plant.
Be sure to leave a few inches of the plant exposed above the soil line to allow for continued growth.
As the plants continue to grow, repeat the hilling process every few weeks or as needed to maintain a hill of soil around the base of each plant. This gradual buildup of soil provides support to the developing stems and growing tubers.
In addition to providing support, hilling also helps protect the developing tubers from exposure to sunlight. When potato tubers are exposed to sunlight, they can develop a green color that makes them toxic and bitter.
Besides these benefits, hilling encourages the formation of additional roots along the buried stems, which will improve their ability to absorb water and nutrients, leading to stronger, healthier plants.
Step 8: Protect Your Potato Plants from Pests and Diseases
As your potato plants grow, they may face threats from pests like the Colorado potato beetle and diseases like potato blight.
One effective method of pest control is the use of row covers. These lightweight fabric covers create a physical barrier that prevents pests like the Colorado potato beetle from reaching your plants.
Additionally, row covers can help regulate temperature and humidity, creating a microclimate that promotes healthy growth.
For organic growers, biological controls like beneficial insects can also help manage pest populations. Ladybugs, for example, feed on aphids and other pests that can damage potato plants.
By attracting these natural predators to your garden, you can reduce the need for chemical pesticides and promote a balanced ecosystem.
In addition to pest control, it’s important to monitor your potato plants for signs of disease, such as potato blight. This fungal disease can quickly spread and decimate your crop if left unchecked.
To prevent potato blight, avoid planting potatoes in the same area two years in a row, as the spores can overwinter in the soil.
Instead, practice crop rotation and choose disease-resistant potato varieties whenever possible.
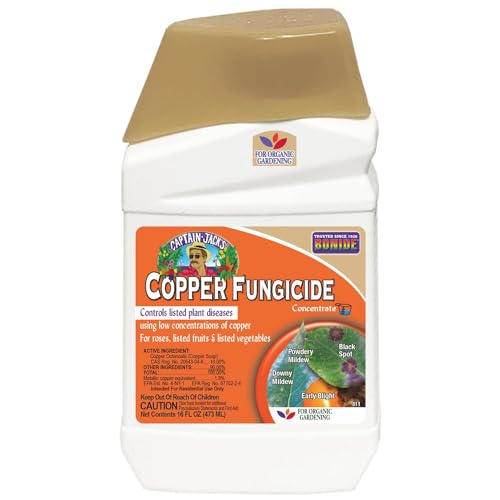
If you notice brown spots on the potato leaves that seem to spread rapidly, spray with copper fungicide as soon as possible.
Prices pulled from the Amazon Product Advertising API on:
Product prices and availability are accurate as of the date/time indicated and are subject to change. Any price and availability information displayed on [relevant Amazon Site(s), as applicable] at the time of purchase will apply to the purchase of this product.
It’s possible to save your potato crop if applied at the first sign of blight.
Step 9: Harvest Your Potatoes
After about 90 days or so, you’ll notice the leaves of your potato plants begin to yellow and wither—but don’t harvest quite yet.
From the time that you notice yellowing and wilting, wait 1-2 weeks before harvesting.
To harvest, consider using your bare hands to avoid piercing the potatoes, but you can certainly use a shovel or garden fork (just move carefully).
Start by probing the soil a few inches away from the plant’s base. Gently lift the soil, feeling for the resistance of your hidden treasures!
Here a few additional tips for harvest day:
- Harvesting should be done on a dry day, allowing you to brush off the soil easily instead of washing the tubers. Washing may shorten storage life by inviting moisture and potential diseases.
- Storage demands a cool, dark place; temperatures too high will stimulate sprouting, while light exposure turns potatoes green and toxic.
- Inspect the tubers before storage, setting aside any with damage or signs of disease. These should not be stored but can still be enjoyed immediately.
By the way, if you accidentally harvest your potatoes too early, don’t worry. They’re still usable. Check out the guide at that link for more info!
How to Store Potatoes for Use As Seed Potatoes Next Year
At the end of the growing season, it might sound weird, but consider thinking ahead to next year’s planting season.
You can save some money by using a portion of this year’s harvest as your seed potatoes for next year!
For the best results, only save the best of the bunch.
Look for potatoes that are nice and healthy without any funky spots or signs of disease. Those are your keepers.
Now, find a cool, dark spot with good airflow to store them at around 45 to 50 degrees Fahrenheit.
Pro Tip: Avoid storing your potatoes near fruits that give off ethylene gas, which speeds up sprouting. Such fruits include apples, avocadoes, bananas, and melons.
Follow these simple steps, and you’ll have your seed potatoes all set for next year’s planting adventure.
We hope this potato growing guide answered all of your questions! If not, let us know in the comments below, and we’ll do our best to provide a quick answer.