


Today, we’re making homemade pizza dough that will last us for a couple of months.
By preparing eight crusts at once, we can set ourselves up for quick and easy pizza nights whenever we want them. Let’s dive right in!
Ingredients for Homemade Pizza Dough
Here are the ingredients you’ll need:
- 6 cups of warm water
- 1/4 cup of sugar
- 3 tablespoons of instant yeast
- 1/2 cup of olive oil
- 14 cups of flour
- 4 teaspoons of salt
Video Tutorial: Making Dough for Pizza Crusts
If you’d rather watch than read, here’s our video tutorial:
How to Make the Dough
First things first, let’s proof our yeast by combining warm water, sugar, and instant yeast together. We store our yeast in bulk for years at a time, so I like to do this just to ensure my yeast is active.
If you’re using fresh yeast, feel free to skip this step as it won’t be necessary.
Once the yeast is nice and bubbly with a foamy texture (indicating its activation), add half a cup of olive oil into the mixture.
Next, add all fourteen cups of flour into a very large bowl (like a 16 qt or higher) along with four teaspoons of salt.

Prices pulled from the Amazon Product Advertising API on:
Product prices and availability are accurate as of the date/time indicated and are subject to change. Any price and availability information displayed on [relevant Amazon Site(s), as applicable] at the time of purchase will apply to the purchase of this product.
You may notice that I don’t bother sifting the flour for this recipe. Since we’re making pizza crust, a light and airy texture isn’t our goal here. If that’s important to you, by all means, sift the flour first.
Give everything a good stir. If you prefer to use a stand mixer, just divide the mixture into groups of 2 or 3, depending on the size that your mixer can handle.
Knead the Dough
At this point, I like to get my hands dirty (quite literally) and start mixing the dough together.
Flour your hands before diving into the sticky mess! Don’t be alarmed if it’s still very sticky—that’s completely normal.
Transfer the dough onto a floured surface and begin kneading for about five minutes or until you achieve a smoother, less sticky consistency.
Keep in mind that environmental conditions can affect how much flour your dough will need. So keep some extra flour nearby for adjustments as needed.
(If you knead for 5 minutes straight, and it’s not getting any smoother or less sticky, add more flour.)
As you continue kneading, aim for a soft and smooth texture similar to marshmallows. This indicates that your dough is ready!
Dividing and Freezing Your Pizza Dough
Now comes an important step: dividing our dough into four balls.
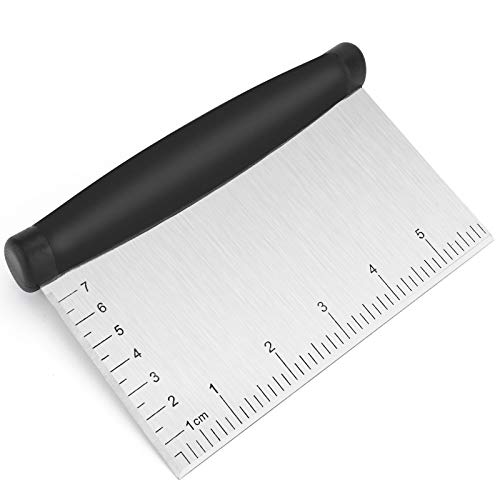
You can use a knife or, even better, a dough cutter:
Prices pulled from the Amazon Product Advertising API on:
Product prices and availability are accurate as of the date/time indicated and are subject to change. Any price and availability information displayed on [relevant Amazon Site(s), as applicable] at the time of purchase will apply to the purchase of this product.
Remember when I mentioned making eight pizza crusts earlier? Well, since my family needs two pizzas per meal, each ball creates two medium-large pizza crusts—a perfect size between medium and large pizzas.
If you only need one pizza at once, feel free to divide it into eight balls now instead of four.
To ensure our future meals stay fresh while stored away in the freezer for up to two months, let’s coat each individual crust with olive oil before packaging them up:
- Pour some olive oil onto your hands
- Spread it evenly over each pizza crust
- Slide each coated crust into a freezer-safe Ziploc bag
- Don’t forget to add a little olive oil inside the bag as well before sealing it shut
Since I do a lot of meal prep and don’t like one-use plastics, I use these reusable freezer bags:

Prices pulled from the Amazon Product Advertising API on:
Product prices and availability are accurate as of the date/time indicated and are subject to change. Any price and availability information displayed on [relevant Amazon Site(s), as applicable] at the time of purchase will apply to the purchase of this product.
These pizza crusts are now ready for the freezer! No need to let them rise or sit just yet—straight into the freezer they go.
When you’re ready to use, simply take a dough ball out in the morning and let it thaw on the counter throughout the day. This will give it plenty of time to both thaw and rise a bit.
I hope this guide has been helpful in your meal prep journey.
Making homemade pizza crusts in bulk is an excellent way to save time and enjoy delicious meals whenever you want.
If you want a quicker pizza crust recipe, check out this Crazy Crust Pizza.
Feel free to experiment with different toppings and sauces for endless flavor combinations. We even use our dehydrated & canned foods for toppings—onions, mushrooms, peppers, and more. Enjoy!
Print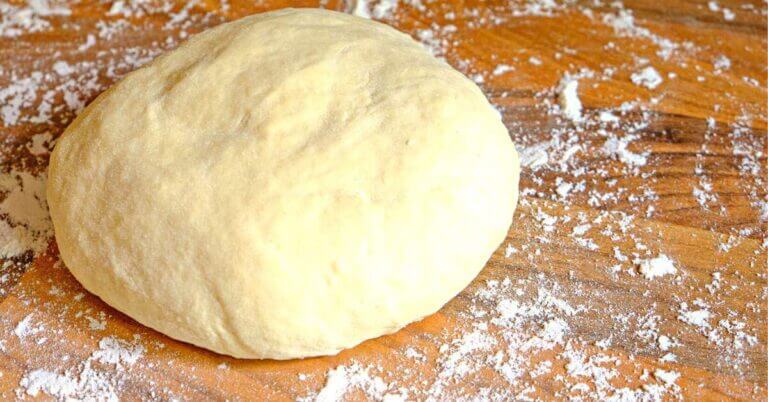
Homemade Pizza Dough: Big-Batch Style
This pizza crust recipe creates a delightfully soft, chewy dough with a light, marshmallow-like texture that crisps up beautifully in the oven.
- Total Time: 25 minutes
- Yield: 8 pizza crusts 1x
Ingredients
- 6 cups warm water
- ¼ cup sugar
- 3 tablespoons instant yeast
- ½ cup olive oil
- 14 cups flour (unsifted, adjust as needed during kneading)
- 4 teaspoons salt
Instructions
- In a large bowl, mix 6 cups of warm water with ¼ cup sugar.
- Add 3 tablespoons instant yeast and let it proof until bubbly and foamy (optional if using fresh yeast).
- Stir in ½ cup olive oil.
- Gradually add 14 cups of flour and 4 teaspoons salt, mixing thoroughly as you go.
- Begin mixing the dough by hand (or use a stand mixer for smaller batches).
- Once the mixture starts coming together, transfer it to a floured surface.
- Knead the dough for about 5 minutes, adding small amounts of flour as needed until it becomes soft, smooth, and slightly sticky with a marshmallow-like texture.
- Perform the finger poke test: press your finger into the dough, and it should bounce back quickly. If not, knead with a bit more flour until the desired consistency is achieved.
- Divide the dough into 4 portions (or 8 if you want individual pizza crusts).
- Each portion creates two medium-to-large pizza crusts.
- Coat your hands with olive oil and rub each dough portion lightly.
- Add a small amount of olive oil inside each Ziploc bag and rub it around to coat the interior.
- Place each dough ball into a bag, seal, and freeze.
- To use, thaw dough overnight in the fridge or leave it on the counter to thaw and rise for 30 minutes to 1 hour.
- Once thawed and risen, the dough is ready to be shaped into pizza crusts and baked.
Notes
- If using fresh yeast, you can skip the proofing step
- For best results, allow the dough to thaw completely and rise slightly before shaping into pizza crusts.
- Prep Time: 25 minutes


Could you please make this pizza dough recipe printable? It would be much appreciated.
Hi, we just added the printable. Refresh the page, and you should see it. Merry Christmas!