

You may be aware that one of the goals of canning is to create a vacuum seal, and you may have heard—or even used—a vacuum sealer to seal bags.
But did you know that there are ways to seal Mason jars without canning, heat, or boiling water?
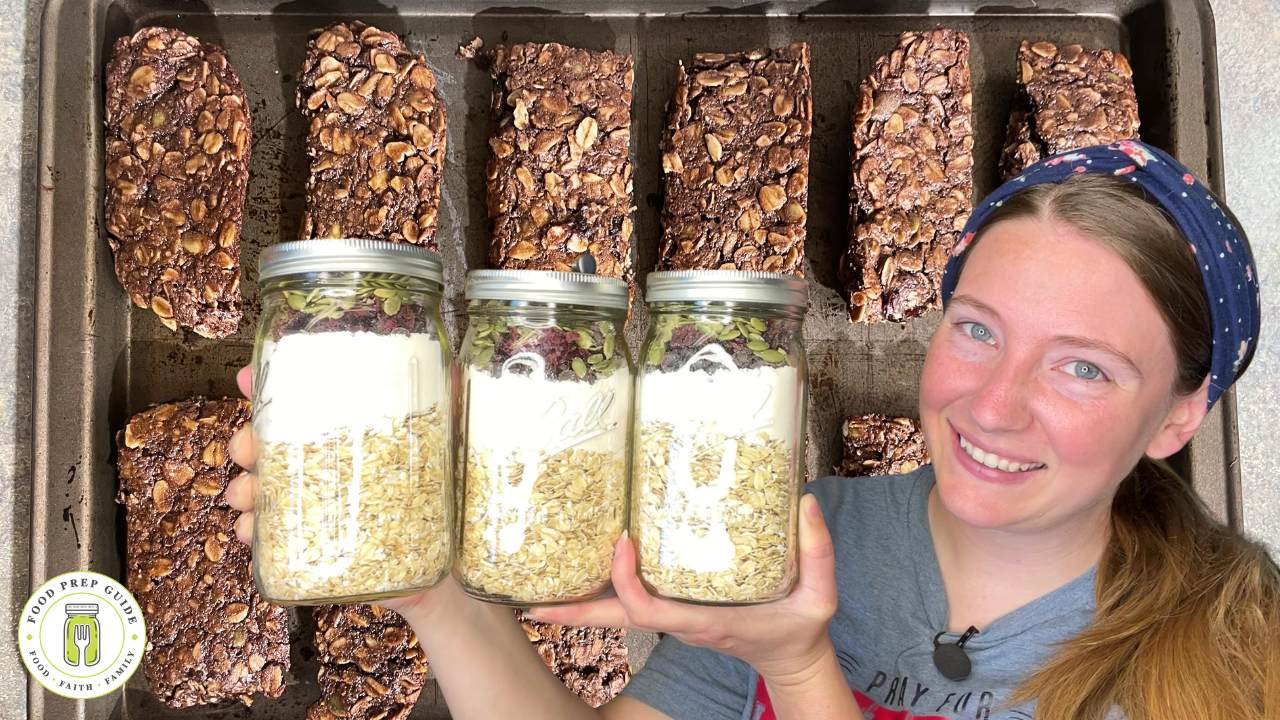
Today, we’ll show you how to vacuum seal a Mason jar without resorting to heat or canning the contents.
*Important: For safety purposes, you can only use this method to vacuum seal dry goods—nothing with liquid.
First, You’ll Need a Mason Jar Vacuum Lid
The most common way to create an airtight seal is with a vacuum sealer system and a Mason jar vacuum lid (pictured below). The vacuum lid covers the metal lid of your jar and uses suction through a hose to remove all the air, creating an airtight seal.

Prices pulled from the Amazon Product Advertising API on:
Product prices and availability are accurate as of the date/time indicated and are subject to change. Any price and availability information displayed on [relevant Amazon Site(s), as applicable] at the time of purchase will apply to the purchase of this product.
Next, Here Are Ways to Vacuum Seal Glass Jars at Home
Let’s start with the most popular method—the electric vacuum sealer.
Want to watch instead of read? Check out our video tutorial:
Sealing Jars with a FoodSaver
One way to vacuum seal a Mason jar without heat is by using a traditional vacuum sealer.
Perhaps the most popular brand you may have heard of is FoodSaver. In fact, the term “FoodSaver” is sometimes used interchangeably with “vacuum sealer”—similar to how “Kleenex” is now a generic word for “tissue.”

Prices pulled from the Amazon Product Advertising API on:
Product prices and availability are accurate as of the date/time indicated and are subject to change. Any price and availability information displayed on [relevant Amazon Site(s), as applicable] at the time of purchase will apply to the purchase of this product.
The process is simple and straightforward:
- Fill your jar.
- Center the metal jar lid over the rim, and ensure it’s seated properly.
- Secure the Mason jar vacuum accessory over the metal lid using a straight, downward motion.
- Attach the suction hose to both the machine and the vacuum lid, and then lock the machine.
- Press the button marked Vac/Seal (or Accessory) and let it run until it stops on its own. Unlock the machine.
- Remove the Mason jar attachment by pulling straight up. You can wiggle it a little bit if you need to.
FREE FOOD STORAGE PLAN!

Does gathering and storing a year’s worth of food for your family seem overwhelming and unachievable?
Make it easy with our step-by-step plan. Subscribe to our weekly newsletter & we’ll send it to you FREE!
Sealing Jars Without a FoodSaver Using Oxygen Absorbers
If you don’t own a FoodSaver, you can achieve similar results for dry goods with oxygen absorbers.
Oxygen absorbers are easy to use. Simply place one into the jar with the food. It will soon activate and being absorbing all the oxygen from the jar.

Prices pulled from the Amazon Product Advertising API on:
Product prices and availability are accurate as of the date/time indicated and are subject to change. Any price and availability information displayed on [relevant Amazon Site(s), as applicable] at the time of purchase will apply to the purchase of this product.
Used with a tight-fitting metal lid and ring over the jar, you should achieve an airtight seal.
If I only have one or a few jars to seal, I still stick with my favorite non-electric option….
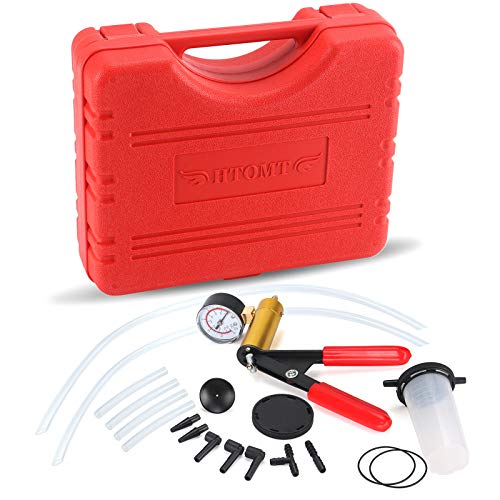
Sealing Jars the DIY, Non-Electric Way with a Brake Bleeder
Last but not least, you can actually just use a hand pump to remove the air. It requires a tool used primarily in auto repair called a brake bleeder.
Prices pulled from the Amazon Product Advertising API on:
Product prices and availability are accurate as of the date/time indicated and are subject to change. Any price and availability information displayed on [relevant Amazon Site(s), as applicable] at the time of purchase will apply to the purchase of this product.
This piece of equipment is usually used to remove trapped air from brakes, but it can do the same for your Mason jar. You’ll also still need the vacuum seal attachment that covers your jar lid, but instead of attaching a suction hose to your FoodSaver appliance, you’ll be attaching it to the brake bleeder.
If you’re in a situation with no electricity, it’s nice to know you can still preserve your dry goods.
Testing Your Seal
Now that you’ve run your FoodSaver until it shuts off or pumped your brake bleeder until you have arms Arnold would envy, you’ll want to test the seals of your jars before storing them.
Here are a few ways to test the vacuum seal on your:
- Is the lid firm, or does it go up and down when you push down in the middle with your finger? It should be unyielding and probably indented (imagine the jar lid is being pulled from the inside by a really strong plunger—that’s what you want).
- Pick up the jar by the lid only (without the band). Does it fall out of your hands and explode all over the floor? Then it’s not sealed. I’m kidding/not kidding—obviously, be careful doing this just in case it’s not sealed, but lifting the jar by its lid is a definite indicator you’ve got a great seal.
- Alternately, you can tap the lid to see if the jar sounds hollow. Hollow is bad. You want to hear a high-pitched ping noise. I don’t like this method as much because I doubt myself. I’m also really bad at choosing watermelons and finding wall studs by thumping, so take that with a grain of salt.
How to Break the Vacuum Seal On Your Mason Jar
As you can tell by the ability to pick the jar up by the lid only, that seal is strong. So, when it’s time to consume the food you worked so hard to grow, dehydrate, and store, how do you break the seal on your canning jar?
No sweat … you just need to wedge something in between the lid and the jar rim. Long fingernails usually suffice, but using your nails this way is how you end up with short fingernails.
Instead, pry it up with a thin edge, like a butter knife. Or you can use a bottle opener, also called a “church key.” The church key minimizes the possibility of damaging the lid with a knife.

Prices pulled from the Amazon Product Advertising API on:
Product prices and availability are accurate as of the date/time indicated and are subject to change. Any price and availability information displayed on [relevant Amazon Site(s), as applicable] at the time of purchase will apply to the purchase of this product.
FAQS
Still have questions about vacuum-sealing glass jars? We’ve answered a few common ones below.
What foods can be stored in vacuum-sealed Mason jars?
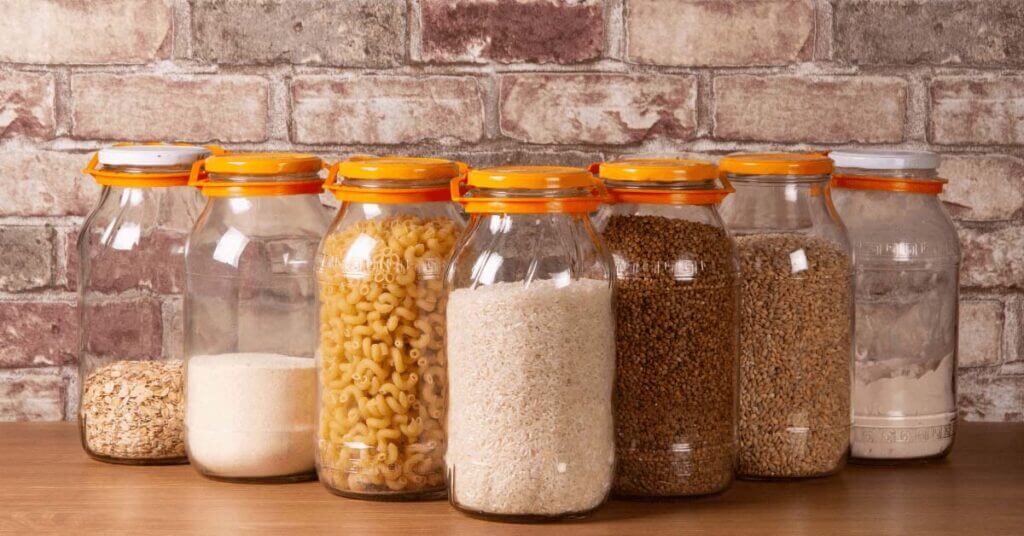
Only dry goods can safely be preserved this way. This includes fruits and veggies you’ve dehydrated or freeze-dried, as well as commercial goods such as flour, rice, spices, and the like.
Flour and other powders are a little trickier, though, because the fine grains can get trapped between the lid and rim and prevent a seal. However, to remedy this, you can place a folded, disposable coffee filter inside your jar to help achieve a good seal.
Is there anything I should NOT vacuum seal in a jar?
Vacuum-sealing is NOT a substitute for canning. It’s simply a way to inhibit deterioration caused by oxygen over time.
If you use oxygen absorbers to remove the air, then it’s important never to use them with brown sugar as this can cause a toxic reaction. Although the FoodSaver site says it’s okay to vacuum seal sugar, I’ve found that it creates a giant, jar-shaped, indestructible sugar cube.
Why didn’t my Mason jar vacuum seal properly?
The best thing about vacuum sealing is that, if your Mason jar comes unsealed, you can try again. Unlike canning, your contents aren’t ruined. But to save frustration, you may want to troubleshoot the problem before you redo the process.
Here are a few reasons why your seals may not have sealed properly:
- The jar rim (or the gasket inside the attachment’s lid) may be dirty. Any food particles trapped between the two will prevent a proper seal. This happens more often with powdery foods. I recommend laying a piece of parchment paper (or coffee filter) on top of the food inside the jar to prevent the particles from rising during the vacuum process.
- Your jar or your lid (or both) is wonky. The lid might be bent from overuse or just manufactured poorly, and/or the jar may be minutely chipped or have a wavy rim. To avoid such issues, stick with name brand jars such as Ball and Kerr.
- The jar attachment wasn’t properly centered over the jar’s lid, or the jar’s lid wasn’t properly seated on the jar’s rim. Either of these can happen if your hand shakes while you’re attaching the elements, so try to be quick and sure in your movements.
Need help managing your food storage?


Will used seals/lids work or should I use brand new lids as I do with pressure canning?
Used seals work well with vacuum sealing, and it’s an excellent way to get more use out of them! 🙂
Do I need to store freeze dried goods that have been vacuum sealed with the rings on? In canninh usually they are left off to detect bad seals later one, is it the same for vac sealing?
Great question! For vacuum sealed goods, you DO want to leave the rings on. In canning, if a lid comes unsealed, you don’t want the ring holding the lid down, making it appear sealed. However, with vacuum sealing, the food isn’t going to spoil suddenly just because the seal came loose. In this case, the ring helps keep the jar sealed (even if it has lost its vacuum).
What about jams and jellies.. are they save to use a jar sealer ? And is so do you seal them hot or allow them to cool some before sealing?
No, jams & jellies need to be water bath canned in order to be shelf-stable. The jar sealer is for sealing dried goods only. 🙂
what happens if i get fluid in unit?
Since this comment is posted on the “How to Vacuum Seal a Mason Jar” article, I just want to clarify that the the Mason jar vacuum sealer attachment is intended for use with dried goods only. As for getting liquid in your unit when sealing other things, I will refer you to the manufacturer of whatever machine you’re using. The user manual should tell you what to do if you get liquid in your machine.
Can you vacuume seal a jar with different kinds of nuts?? Or what’s the best way to preserve nuts?
Yes, you can! That’s how we store our nuts for about a year—in vacuum-sealed jars in a cool, dark place.
What is your process for using an opened jar? If you don’t need all the contents right away, do you re-vacuum seal it or just leave it alone and work on using it up? Thank you!
If I’m going to be working through that open jar within a few weeks, I don’t reseal it.
If it will be several months before I need to get into that opened jar again, I will re-vacuum seal it. 🙂
When vacuum sealing do you need to make sure the jar is completely full or leave the 1 inch head space, or is it still ok to vacuum seal if the jar is only say 3/4 full because you don’t have anymore of that item to put in the jar?
It’s totally fine to vacuum seal a jar at any point of fullness. 🙂
Hello ! Do you put the screw on rings and tighten before you vacuum seal a Mason jar ? Or do you just vacuum seal the flat part and then screw the ring on after it has been sealed ? Thank you
You just vacuum seal the flat part, then screw the ring on after. 🙂
Should I also put an Oxygen absorber in with a mason jar that I will be vacuum sealing with my food saver sealer or is this not necessary? Also how long will white rice last being sealed in mason jar with food saver?
You can for the sake of redundancy, but it’s not necessary. (I don’t.)
Your mileage will vary with food storage as there are many factors that play into its shelf-life, but white rice will easily last a year minimum when properly vacuum sealed.
Often, much longer. Hope that helps! 🙂