

Welcome back, friends! Today, I am thrilled to share with you a big goal of mine—growing enough onions to string and preserve throughout the year.
Well, this was one of those goals for me.
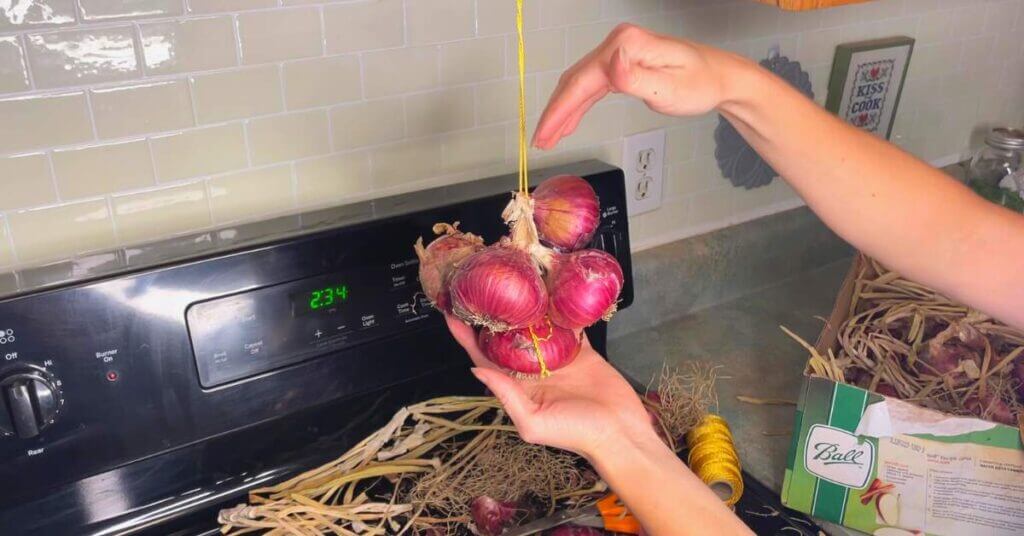
Stringing onions is not only aesthetically pleasing but also an excellent way to preserve them without the need for canning, freezing, or dehydrating. By stringing your onions, you allow airflow on all sides, which helps prevent mold.
It’s important to note that stringing onions is different than braiding them. While braided garlic and onions look beautiful too, it can be challenging to remove just one onion without disturbing the rest.
With the stringing method we’ll discuss today, grabbing an onion is as easy as a simple tug.
So let’s dive into how to string onions!
What You’ll Need
To get started with the onion-stringing process:
- Approximately 4-foot piece of string
- Cabinet knob or hook (for vertical working)
- Onions (choose ones with a strong neck)
Step 1: Tying the Base Onion
Begin by tying a knot at the bottom end of your string using the slip knot technique. This will serve as the anchor point for your first onion on the string.
It’s important to choose a strong base onion. Long story short, you want a larger onion with a sturdy neck:
To test its suitability as an anchor point, gently wiggle and pull on its neck. If it doesn’t break off easily, it’s perfect!
Next comes forming another slip knot around this base stem:
- Cross two strands of strings.
- Pull one string through the hole created by the crossing.
- Hold the hole and push the stem of your base onion through it, bringing it all the way down to its base.
- Slide down the slip knot tightly over the stem for secure attachment.
This process can be hard to adequately communicate in words. If there’s any confusion, please watch the video demonstration below.
Video Tutorial for Stringing Onions
Step 2: Building Your Onion String
Now that you have a solid foundation with your base onion securely attached, it’s time to add more onions onto your string.
Follow these steps:
- Clean up each new onion by removing excess roots and trimming any loose layers.
- Use your fingers to separate the two strands of strings.
- Push the stem of an onion through this gap between the strands from front to back.
- Wrap the stem around both strings, bringing it back through the gap.
- Slide down this wrapped section towards the previous onion on the string; as you do so, notice how these strings tighten around each other and hold everything in place.
Keep repeating these steps until you reach desired length or number of onions on your string. Remember to fill any gaps along the way by positioning new onions strategically.
Step 3: Finishing Touches
Once you’ve strung enough onions:
- Trim off any extra stems or roots if necessary, but leave some room for slight settling over time due to gravity.
- To prevent excessive spinning during storage, create another slip knot near where your last onion is placed on top of others.
You can choose different ways to hang your completed onion string based on available options:
- Leave it as a loop if already hanging,
- Add another slip knot at one end for easy hooking,
- Hang on clothes hangers (balance it out by hanging one string on each side).
Remember that proper storage is crucial for prolonging the shelf-life of onions.
Store your strings in a cool, dry, dark area such as a closet without direct sunlight exposure.
Using Your Onion String
When it’s time to use an onion from your string:
- Start at the top of the string.
- Hold the string steady and gently pull out an onion without disturbing others beneath it.
Congratulations on successfully stringing your onions! This method not only adds beauty to your pantry but also ensures you have a supply of fresh onions throughout the year.


This was exciting! It never occurred to me to try this, but this year I definitely am. Thanks for all you contribute.
I would think this should work well for garlic too! Perf3ct timin* to see this. Thank you 🤗