Want to grow the biggest and best garlic heads you’ve ever grown? You’re in the right place!
Today, we’re sharing tips for how and when to fertilize your garlic plants.
Let’s get started!
Fertilize with Heavy Nitrogen Source
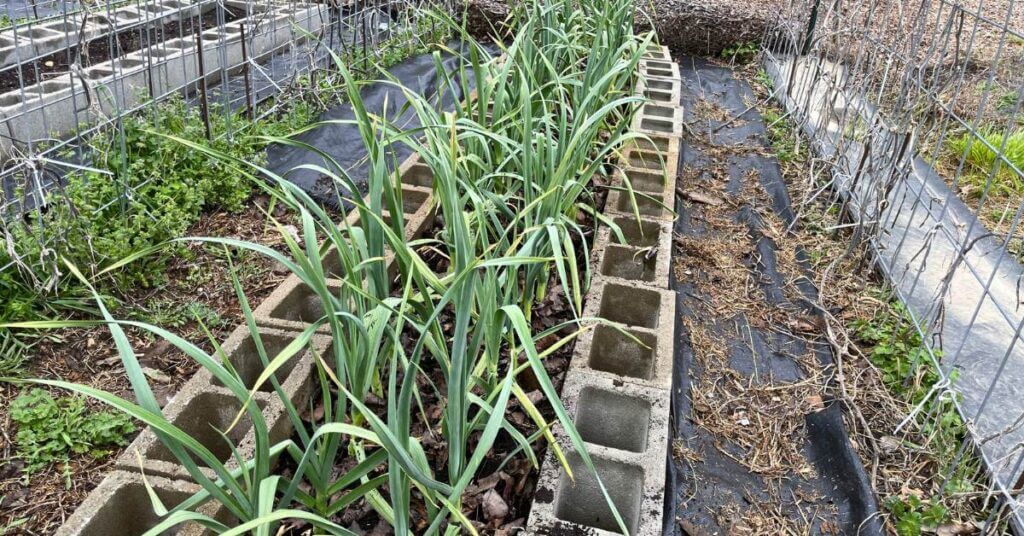
One of the key components to growing large garlic bulbs is fertilizing them with a heavy nitrogen source in early spring, usually in April.
During this time, just before the garlic starts bulbing, it requires more nitrogen. You can identify this stage by the yellowing of the tips of the garlic leaves, which indicates that it’s “hungry” for more nitrogen.
There are various options for nitrogen sources. Synthetic fertilizers like ammonium sulfate with a high NPK (nitrogen, phosphorus, potassium) ratio can be used. However, if you prefer natural sources, cotton bur compost and blood meal is highly recommended.

Prices pulled from the Amazon Product Advertising API on:
Product prices and availability are accurate as of the date/time indicated and are subject to change. Any price and availability information displayed on [relevant Amazon Site(s), as applicable] at the time of purchase will apply to the purchase of this product.
It is an excellent nitrogen source and can significantly enhance the growth of your garlic.
Timing and Weather Considerations
It’s important to consider timing and weather conditions when fertilizing your garlic. Ideally, you should fertilize before a heavy rain so that the nitrogen gets properly absorbed into the soil.
In this case, the heavy rain will help distribute the nitrogen effectively.
How to Apply the Fertilizer
To apply your fertilizer, simply top dress the soil. There’s no need to dig it in, as disturbing the bulbs can be counterproductive.
Aim for a 2-inch layer if using cotton bur compost or aged manure (whether it be horse or cow).
If using synthetic fertilizer, follow the instructions on the package for the recommended quantity. As for liquid fertilizer, it’s best to apply after rain as liquid fertilizer absorbs more quickly in damp soil.
Dream of Filling Your Pantry with Homegrown Staples?
Plan your garden with our FREE PRINTABLE—Staples Garden: What to Plant to Feed Your Family for a Year!
Maintaining the Garlic Bed
If you’ve covered your garlic bed with leaf mulch or straw during winter, gently push it aside to expose the soil before applying the nitrogen amendment.
This allows the compost or fertilizer to come into direct contact with the soil.
Keeping the soil covered is beneficial for moisture retention, nutrient preservation, and preventing soil erosion. After fertilizing, scatter the mulch back around the garlic plants to maintain a healthy environment for your garlic to thrive.
After fertilizing, you don’t need to do much else for your garlic plants.
Monitor the soil moisture levels, and ensure they receive adequate moisture. Garlic is relatively low-maintenance and requires minimal watering, especially if you practice water-retaining techniques like mulching.
In the next two to three months, watch for the emergence of garlic scapes. These are green shoots that appear in the center of each garlic plant.
Garlic scapes are not only delicious but also indicate that the garlic bulbs are nearing maturity.
Once the scapes appear, it will be approximately two to three weeks before you can harvest your garlic.
Note: If you planted a softneck garlic, they won’t form scapes. In this case, simply look for the garlic leaves to dry out and fall over, which signals that it’s time to harvest.
Side Note: Beware of Snakes in Your Garden Beds
During April, snake season begins, and organic matter like mulch can provide a haven for snakes.
While working in your garlic bed, be cautious and aware of the possibility of encountering snakes.
Bonus Tip: Bigger Cloves = Bigger Garlic Bulbs
At planting time, select the largest garlic cloves in order to grow big garlic heads.
Whether you are using your own garlic, grocery store garlic, or seed garlic, only plant the largest cloves.
By combining this tip with the fertilization method mentioned earlier, you increase your chances of growing impressive garlic heads.
Enjoy the process and the delicious results of your efforts!