Today we’re diving into the wonderful world of canning beans.
Canning beans is a great way to stock up on this versatile pantry staple—and save money while doing it.
In this guide, I’ll walk you through my process for canning a large batch of beans efficiently, so you don’t have to spend your entire day in the kitchen. Let’s get started!
Soaking the Beans
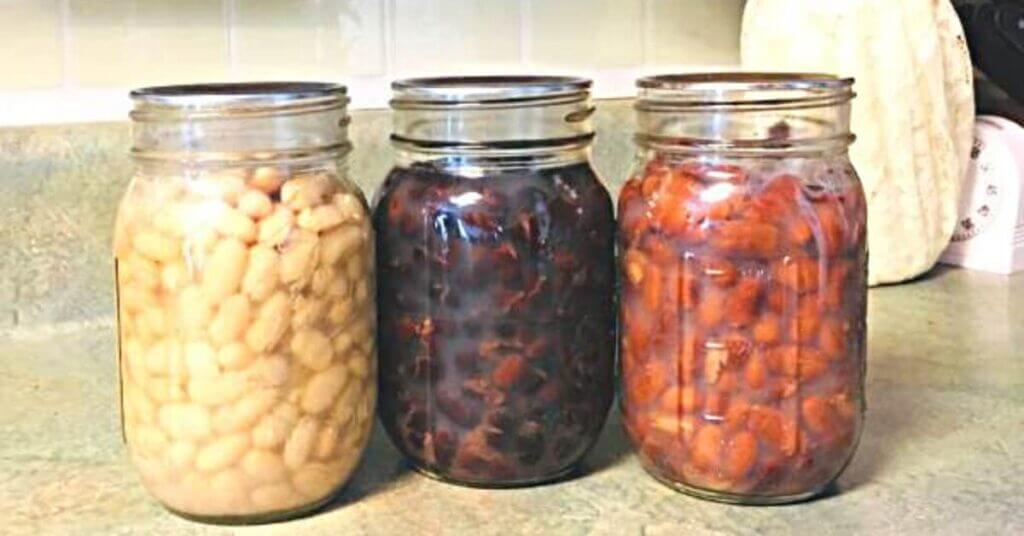
The first step in our bean-canning adventure begins the night before with soaking the dried beans. For today’s batch, we’ll be using black beans, pinto beans, and Northern beans.
I typically measure out about half a cup per pint jar or 1 cup per quart.
If you have space in your fridge, feel free to soak them overnight there. But, if not, setting them out on your counter works just fine.
Before soaking them overnight, it’s important to give the dried beans a rinse and remove any rocks or low-quality ones that may be present (somewhat common with bulk-bag purchases).
Once they’ve soaked overnight, check for any debris or floating beans, which indicate spoilage.
Rather Watch Than Read? Video Tutorial for Canning Dry Beans
Preparing Your Equipment
While your soaked beans are resting comfortably on your countertop, take advantage of this time by preparing your equipment. Start by washing and sterilizing 24 pint jars (or adjust according to how many batches you plan to make) using your dishwasher or other preferred method.
I let my dishwasher run overnight, so I have a full load of clean jars ready for canning in the morning!
Boiling the Beans
On the next day, after our soaked beans are nice and plump, we need to boil them for a bit before pressure canning.
Drain the soaking water and give the beans a good rinse with cold water. This step helps remove any residual enzymes that can cause digestive issues.
Then, cover the beans with fresh water, submerging them by about two inches.
Bring your pot of beans to a boil and let them simmer for 30 minutes. Keep an eye on your timer as we’ll be moving onto the next step once this boiling process is complete.
By the way, if you decide you don’t want to can your beans, you can dehydrate them instead! Learn all about dehydrating beans here.
Preparing the Pressure Canner
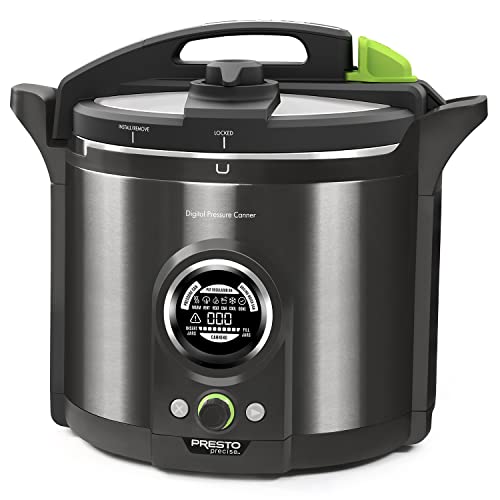
While our beans are happily bubbling away in their pot, it’s time to prepare our pressure canner for action! I personally use the Presto digital electric canner, but feel free to adapt these steps to whatever pressure canner you’re using.
Prices pulled from the Amazon Product Advertising API on:
Product prices and availability are accurate as of the date/time indicated and are subject to change. Any price and availability information displayed on [relevant Amazon Site(s), as applicable] at the time of purchase will apply to the purchase of this product.
Select pressure can mode on your canner and set the processing time according to recommended guidelines:
- 75 minutes for pints
- 90 minutes for quarts
Adjustments may be necessary based on your elevation level; consult an online chart if needed.
To ensure proper heat distribution during processing, fill your pressure canner with three quarts of water. If you have hard water or well water like me, add a splash of vinegar to prevent cloudiness or film from forming on your jars.
Retrieve those clean pint jars from the previous day … remember how convenient it was having them ready overnight?
Fill each jar halfway with hot tap water before placing them inside the canner to warm up. If you have the Digital Presto Canner, it will beep to let you know when the preheating phase is done.
If you’re using a traditional stovetop pressure canner, just let your jars warm on low heat until you’re ready to fill them with beans.
In either case, you’ll dump out the water before loading with beans.
Filling Your Jars
At this stage, you have lots of options for flavoring your canned beans. While I usually stick with salt when making large batches (since I don’t know how I’ll use them), dried herbs such as garlic and onion also work well.
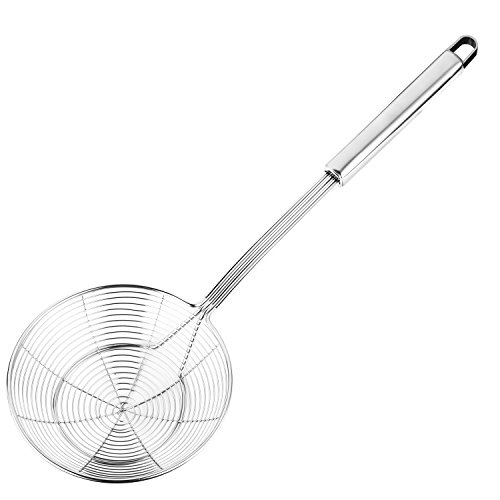
Add half a teaspoon of canning salt per pint jar (or adjust accordingly) as well as any desired dried herbs or spices into each jar. Use a slotted or strainer spoon to carefully ladle the beans into the jars, leaving about an inch of headspace at the top.
Prices pulled from the Amazon Product Advertising API on:
Product prices and availability are accurate as of the date/time indicated and are subject to change. Any price and availability information displayed on [relevant Amazon Site(s), as applicable] at the time of purchase will apply to the purchase of this product.
Then, fill with hot or boiling water to one-inch headspace.
Sealing and Processing
Once your jars are filled, wipe the rims of each jar clean using a damp cloth or paper towel.
Place a new, clean lid on top and secure it in place with a ring until fingertip tight—meaning, you tighten it just enough to feel resistance but not too much.
(If you’re interested, check out our stance on when it’s okay to reuse canning lids.)
With all your jars loaded into the canner, lock the lid in place and click the Next button to start the pressure canning cycle. It will beep to let you know when to place the regulator on the vent pipe.
If using a stovetop canner, you will place the regulator (also known as a weight) on your canner once you achieve a steady stream of steam for 10 minutes straight.
This is the moment that you start your processing time—75 min for pints, 90 min for quarts.
Repeating for Multiple Batches
Now for some tips if you’re canning multiple batches….
Keep track of what time you started the canning process.
Around 30 minutes before your pressure canner is done processing, begin preparing your next set of soaked beans by bringing them to a boil as well.
By coordinating these steps effectively, you’ll maintain an efficient workflow throughout the day without feeling overwhelmed.
Please see the video tutorial above if any of this sounds confusing.
FREE FOOD STORAGE PLAN!
Does gathering and storing a year’s worth of food for your family seem overwhelming and unachievable?
Make it easy with our step-by-step plan. Subscribe to our weekly newsletter & we’ll send it to you FREE!
Checking Seals and Labeling
After the processing time is over, let the pressure canner come down in pressure completely before opening the lid. (If using the Presto Digital Canner, it will beep to let you know when it is safely depressurized.)
Use a jar lifter to carefully remove each jar, and place them in an area where they can sit undisturbed for 12 to 24 hours.
After that time period, check that all lids have sealed properly by gently pressing down on their centers. If they don’t pop back when pressed, and you can hold the jar by its lid, your canned beans are officially ready for storage.
To stay organized and rotate through your stock efficiently, label each jar with the date. (I usually just do month and year.)
And there you have it—easy peasy canned dried beans! With this simple process, you can stock up on a variety of beans to enjoy in your favorite recipes for months to come.