

Welcome back, friends! Today, we’re going to dive into another preservation tutorial in the kitchen.
This time, we won’t be canning or dehydrating our ingredients. Instead, we’ll learn how to freeze homemade broths and stocks.
If you’ve always wanted to make your own flavorful broths but don’t know how to pressure can them, this guide is for you.
Gather Your Supplies
To get started with freezing your broth or stock, here’s what you’ll need:
1. Gallon-sized baggie
2. Large bowl of water
3. Your delicious broth or stock
Now that we have everything ready let’s jump right into the process!
Measure and Prep Your Broth for the Freezer
When it comes to freezing broth or stock, I prefer measuring it out into one-quart portions beforehand. However, feel free to adjust this according to your needs and preferences.
Take a moment now to fill up a quart-sized jar with your chosen broth. Today I’m using onion broth as an example.
Rather Watch Than Read? Video Tutorial for Freezing Broth
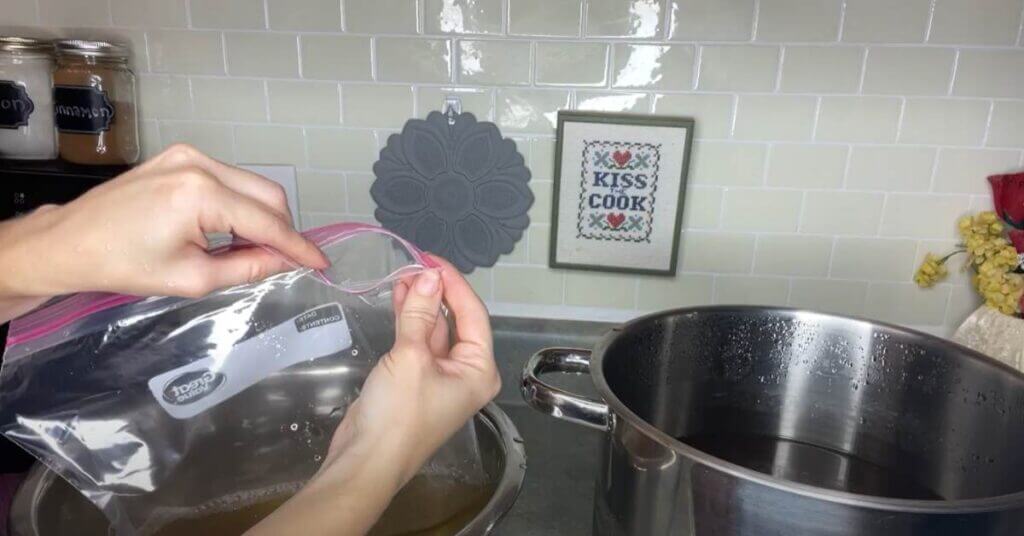
Remove Air from the Bag
One challenge when freezing liquids is removing as much air as possible without creating a vacuum seal like when canning food items. But worry not! I have a little trick up my sleeve that will help us achieve just that.
Open up the gallon-sized baggie and carefully pour in the prepared broth from the jar.
Next, place the baggie inside the large bowl of water while leaving just a small opening at one end unsealed. Be careful not to submerge this open tip in water so that no liquid gets inside our precious broth.
Slowly lower the baggie until it is completely submerged under water while keeping that tiny opening above water level (take a look at my side view shot on camera in the video above).
Finally, zip up the baggie tightly once the water has reached the opening. And voila! You’ll notice how effectively we have removed air from the baggie without creating a vacuum seal.
Freezing and Storing Broth
Now that our broth is securely sealed, it’s time to freeze it for future use. Lay the baggies flat in your freezer. They may not lay perfectly flat due to their shape, but this will help them thaw quickly when needed.
Repeat these steps with any remaining broth you have prepared until all of it is safely stored in the freezer.
Enjoy Your Homemade Broths Anytime
By following this simple method, you can now enjoy homemade broths and stocks whenever you need them. Whether you’re making soups, stews, or adding flavor to your favorite recipes, having frozen broth on hand makes cooking a breeze.
Remember, freezing broths and stocks using this technique allows for an approximate three-month shelf life in the freezer. If you plan on using them within a month or so, there’s no need to worry too much about removing every last bit of air.


Like. Very clear & easy directions.
That’s a great tip. What I usually do: When my broth has cooled a bit, I distribute it into silicone cubes, which go into my freezer. I know how many cubes make a cup, half cup, etc. After the cubes are solidly frozen, I pop them out and put them in gallon or even 2 gallon-size freezer bags. (This frees-up the silicone cubes to use again.) I’ve been putting parchment paper between the 2-3 layers of broth cubes, so they won’t all stick to each other in a major way. But I’m starting to think that may not be necessary, if the cubes were solidly frozen when they went into the bag. I always use the broth quickly enough that freezer burn is not a problem.