

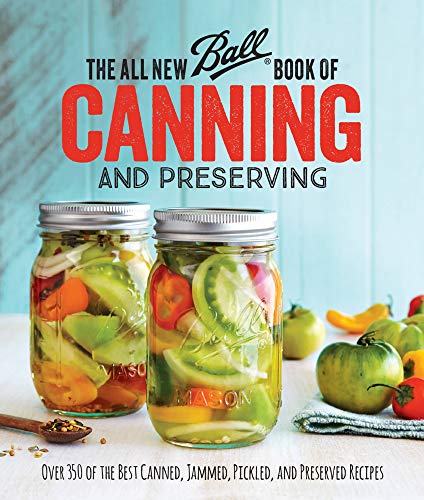
Today, we’re pressure canning herbed potatoes using a recipe from the Ball Book of Canning.
This particular recipe falls under their “Simple One Jar Meals” section, which I absolutely love. It’s all about creating delicious meals in jars without any cooking involved.
With raw-packed vegetables and flavorful seasonings, it’s incredibly easy to prepare these ready-made meals and side dishes.
Let’s get started!
Prices pulled from the Amazon Product Advertising API on:
Product prices and availability are accurate as of the date/time indicated and are subject to change. Any price and availability information displayed on [relevant Amazon Site(s), as applicable] at the time of purchase will apply to the purchase of this product.
Doubling the Recipe
The original herbed potato recipe makes two quarts, but today we are going to double it because we want to fill up our Presto canner with four quarts.
Rather Watch Than Read? Here’s the Video Tutorial
Prepare Potatoes for Canning
First things first, make sure you have five pounds of freshly washed and scrubbed potatoes on hand.
Once they’re clean, go ahead and peel them carefully.
After peeling them, quarter each potato.
Safety First: Warm Your Jars
Safe canning principles dictate that hot liquid or food should always go into hot jars.
Although this is a raw-pack recipe where no cooking is required initially, we will be topping off the jars with hot broth.
To ensure warm jars were available when needed, I took them out of my dishwasher after running them through the wash & heat dry cycle earlier.
They’ve been sitting there with the door shut, waiting for me to be ready. Also, I prepared a tea kettle filled with chicken broth (you can use vegetable or beef broth as well) and got it heated up just before peeling my potatoes.
Using a tea kettle makes pouring much easier later on, but you can certainly use a regular pot for heating.
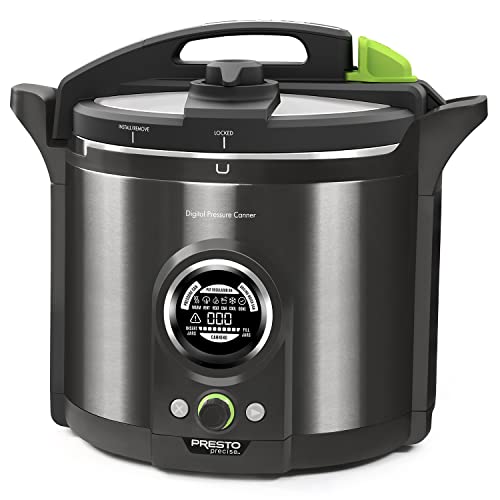
We’ll also want to have our canner prepped and ready.
I’m using the Presto Digital Pressure Canner, so I need add three quarts of water into the canner, along with my rack, and get the water pre-heated.
Prices pulled from the Amazon Product Advertising API on:
Product prices and availability are accurate as of the date/time indicated and are subject to change. Any price and availability information displayed on [relevant Amazon Site(s), as applicable] at the time of purchase will apply to the purchase of this product.
Be sure to follow the manufacturer’s instructions that came with your pressure canner if you’re using a different one.
Fill the Jars
Now that our potatoes are prepped, take out four quart jars and line them up for filling.
(Be sure they are clean and warm.)
Place the quartered potatoes straight into the jars until they reach one inch headspace (which is right at the bottom ring).
Repeat this process until all your jars are filled.
Add Seasonings
It’s time to add some delicious seasonings to our herbed potatoes!
To each quart, we’ll add:
- one teaspoon of salt (canning salt—non-iodized and additive-free)
- half a teaspoon of pepper
- half a teaspoon of Rosemary (or Thyme if you prefer)
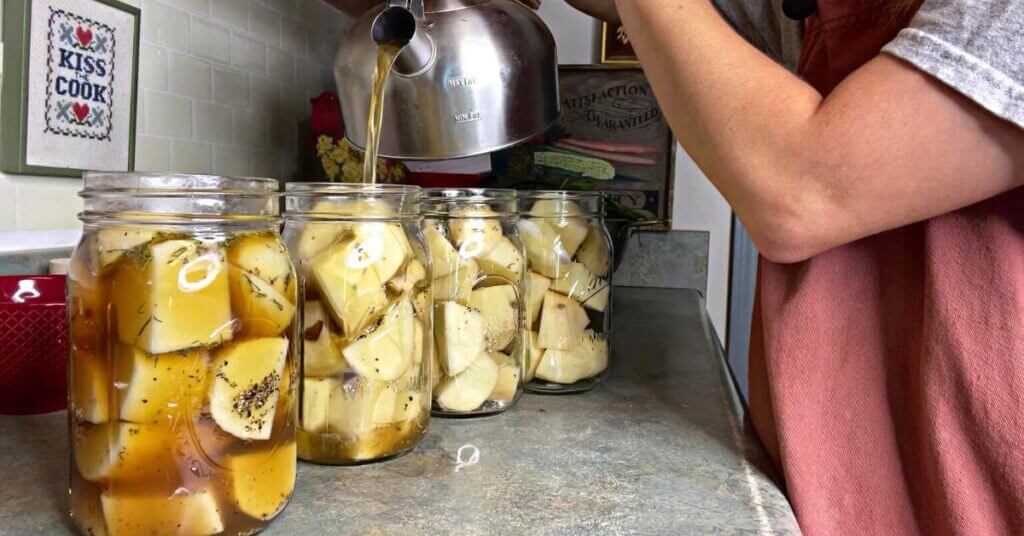
Top with Broth
Remember that heated chicken broth from earlier? Now it’s time to put it into action!
Fill each jar with hot broth up to 1-inch headspace.
De-Bubble and Adjust Headspace
To remove any trapped air bubbles inside the jars and help settle down those potatoes even further, use a tool to gently stir and wiggle things around so they settle.
This is known as de-bubbling. (You can use an actual de-bubble tool, chopstick, or butter knife.)
After de-bubbling, check your headspace once again just to make sure nothing has changed. You can add more broth to reach 1-inch headspace if needed.
Wipe Rims and Apply Lids
Before sealing the jars, wipe the rims with a damp paper towel or cloth to ensure a good seal.
Next, place new, clean lids on each jar and secure them with clean rings.
Remember to tighten the rings only fingertip tight—do not overtighten.
Load Jars into the Canner
The filled and sealed jars are now ready for their pressure canning, so load them into your canner.
Our herbed potatoes need to process for 40 minutes (for quart-sized jars).
In the Presto canner, I have to enter the processing time of 40 minutes at the very beginning, so I’ve already done that step.
I’ll simply click the next button on the canner’s control panel, and it will notify me in about 10 to 15 minutes when it’s time to put on the weight.
If you’re using a traditional, stovetop pressure canner, you will:
- Load the jars
- Secure the canner lid & lock it
- Turn up the heat so that the canner comes to a boil
- Wait for a steady stream of steam to spew from the vent
- Add the pressure regulator, and hold pressure at 11 psi (Check this chart for adjustments if you live 1,000+ ft above sea level.)
- Process for 40 minutes for quarts (35 minutes if you’re using pints)
FREE FOOD STORAGE PLAN!
Does gathering and storing a year’s worth of food for your family seem overwhelming and unachievable?
Make it easy with our step-by-step plan. Subscribe to our weekly newsletter & we’ll send it to you FREE!
Post-Canning Steps
If using the Presto Digital, the canner will beep 10 times and say “Done” to let you know when it’s safe to open it.
That said, check if the pressure valve has dropped by looking at its position next to a green indicator. If it has dropped, you’re safe to open up your canner. (Do NOT open it if the pressure valve hasn’t dropped yet.)
If using a stovetop canner, turn off the heat after the process time, and let your canner de-pressurize.
Carefully remove your jars from the canner using a jar lifter.
Place your beautiful herbed potato jars in an area of your house where they can sit undisturbed for 12-24 hours as they cool completely.
Check your seals. If any jars didn’t seal, place them in the refrigerator and enjoy within a few days.
Wipe down your jars with a clean cloth, label and date the lids, and on the shelf they go!
Canning herbed potatoes is not only easy but also incredibly rewarding when you see those perfectly preserved jars lined on your shelves.
With just a little preparation and a few simple steps, you’ll have convenient ready-made side dishes whenever you need them!
Print
Home-Canned Herbed Potatoes
These herbed potatoes are loaded with flavor thanks to being cooked in broth (instead of water) and seasoned with thyme and rosemary. The result is ready-to-use, shelf-stable potatoes that are perfect for quick meals and long-term storage!
- Total Time: 1 hour 20 minutes
- Yield: 5 quarts 1x
Ingredients
- 5 pounds potatoes (washed, scrubbed, and peeled)
- Chicken broth (at least 6 cups but have more on hand, if needed)
- 4 quart jars
- 4 teaspoons canning salt
- 2 teaspoons black pepper
- 2 teaspoons dried rosemary
- 2 teaspoons dried thyme
Instructions
-
Prepare the Potatoes: Wash, scrub, and peel 5 pounds of potatoes, then quarter them.
-
Prepare the Jars: Warm 4 clean quart jars. (You can do this by washing them in the dishwasher with the heat cycle and keeping them warm until ready to use.)
-
Fill the Jars: Place the quartered potatoes into the warm quart jars, filling each jar to a 1-inch headspace. Add 1 teaspoon of canning salt, 1/2 teaspoon of black pepper, 1/2 teaspoon of dried rosemary, and 1/2 teaspoon of dried thyme to each jar.
-
Add Broth: Heat the chicken broth (or your chosen broth) in a tea kettle. Pour the hot broth into each jar, maintaining a 1-inch headspace.
-
De-bubble: Use a de-bubbling tool to remove any air bubbles from the jars. Wiggle the tool around to help the potatoes settle and fill any gaps. Check the headspace again and adjust back to 1 inch if necessary. Wipe the rims of the jars with a clean, damp towel. Screw rings on to fingertip tight.
-
Prepare the Canner: Pour 3 quarts of water into the Presto digital electric pressure canner and heat it up. Load the jars into the canner. Set the pressure canner to process the quart jars for 40 minutes.* (If using a different canner, follow your canner’s instructions for preparing the canner.) Once the processing time is complete, allow the canner to cool down and release pressure naturally.
-
Cool the Jars: Carefully remove the jars from the canner. Place them in an area where they can sit undisturbed for 12 to 24 hours. After the jars have cooled, check the seals to ensure they sealed properly. Any unsealed jars should be refrigerated and used within a few days.
Notes
*IMPORTANT: If you live above 1000 feet above sea level, you need to increase your canner pressure (PSI) if using a traditional, stovetop pressure canner. Refer to this chart: https://nchfp.uga.edu/how/can/canning-vegetables-and-vegetable-products/potatoes-white-cubed-or-whole/#gsc.tab=0
- Prep Time: 40 minutes
- Cook Time: 40 minutes


I do not have a pressure cooker canner. Could I do a water bath canning with the herbed potatoes?
No, unfortunately. Potatoes are low-acid foods and therefore must be pressure canned.
I am only able to can in pints. Would you reduce the time at all? I’m trying today and doing it at 40minutes to be safe!
Pints of canned potatoes can for 35 minutes. 🙂
Here’s a chart where you can check your pounds of pressure (if you’re not using the digital Presto): https://nchfp.uga.edu/how/can/canning-vegetables-and-vegetable-products/potatoes-white-cubed-or-whole/
Thanks so much Jordan
Can I leave the rosemary out or substitute something.?
Yes, either one. 🙂