If you have pumpkins sitting around as fall decorations, don’t toss them when the season ends!
Those seeds inside are a fantastic snack—crunchy, nutritious, and easy to customize with your favorite seasonings.
What You’ll Need
- Seeds from 1-2 pumpkins (any variety works)
- Water
- Salt
- 1-2 tablespoons olive oil or melted butter
- Baking sheet
- Parchment paper or foil
- Colander
Step 1: Extract and Clean the Seeds
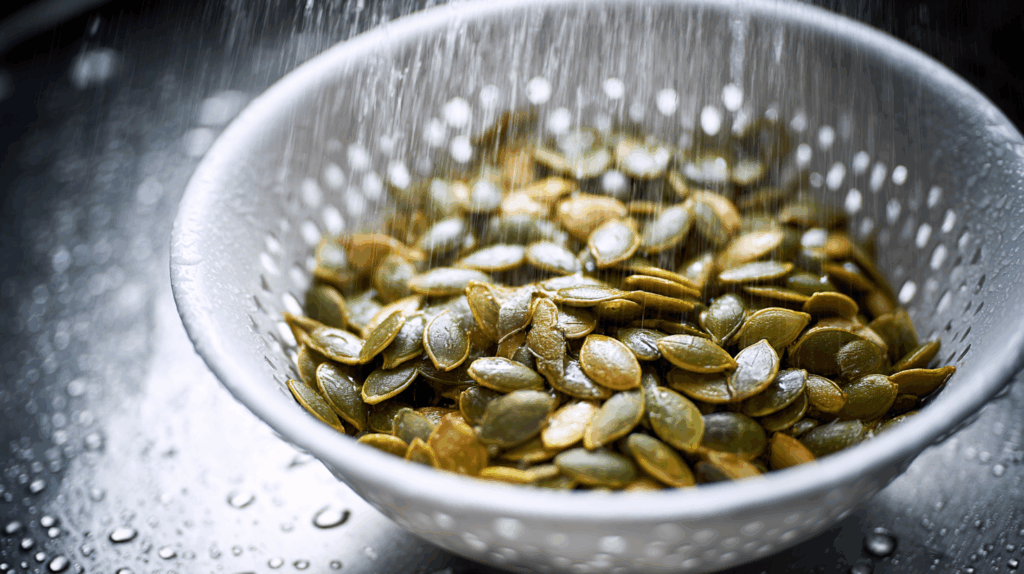
Cut open your pumpkin and scoop out the seeds along with all that stringy pulp. The easiest way to separate the seeds is to place everything in a large bowl of water.
The seeds will float to the top while the pulp sinks. Use your hands to separate any stubborn bits, then scoop out the seeds with a slotted spoon or small strainer.
Rinse the seeds thoroughly in a colander under running water, removing any remaining pulp. Pat them dry with a clean kitchen towel or paper towels.
Step 2: Boil the Seeds (Optional but Recommended)
This step makes the seeds extra crunchy and helps the seasonings stick better. Bring a pot of salted water to a boil (about 2 cups water with 1 tablespoon salt). Add your seeds and simmer for 10 minutes. Drain and pat dry again.
If you’re short on time, you can skip this step, but the texture won’t be quite as crispy.
Step 3: Season Your Seeds
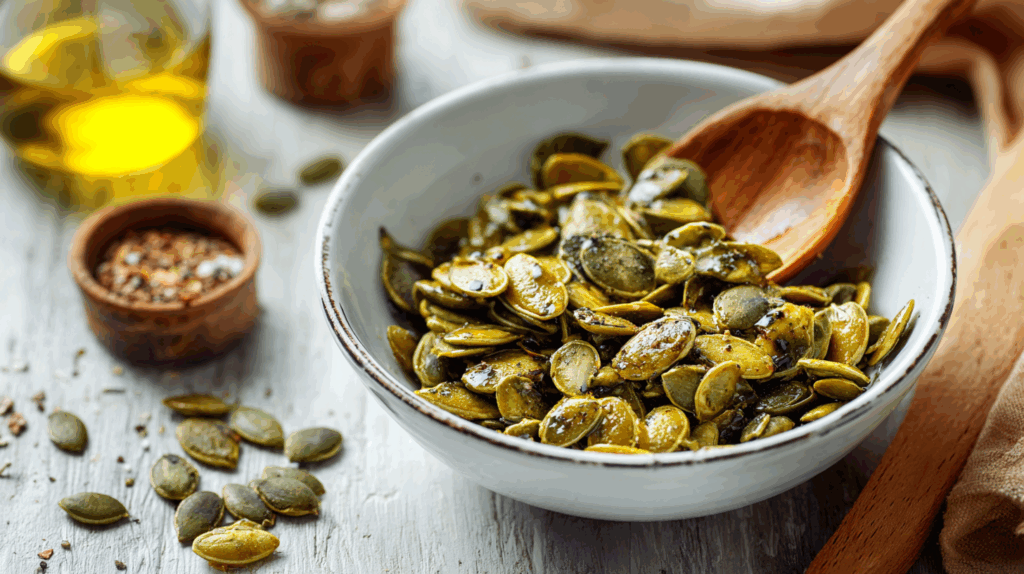
Preheat your oven to 300°F. Toss the dried seeds with olive oil or melted butter—just enough to coat them lightly. Add salt and any other seasonings you like. Some popular options include:
- Garlic powder and paprika
- Cinnamon and sugar for a sweet version
- Ranch seasoning mix
- Parmesan cheese and black pepper
- Cajun spice blend
Mix everything well so the seeds are evenly coated.
Check out more seasoned, roasted pumpkin seed ideas here!
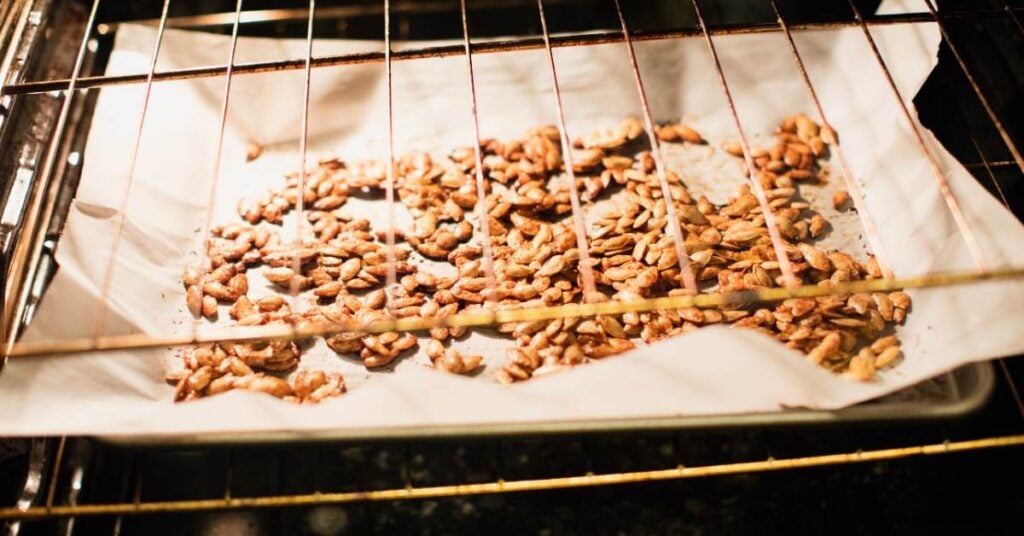
Step 4: Roast Until Golden
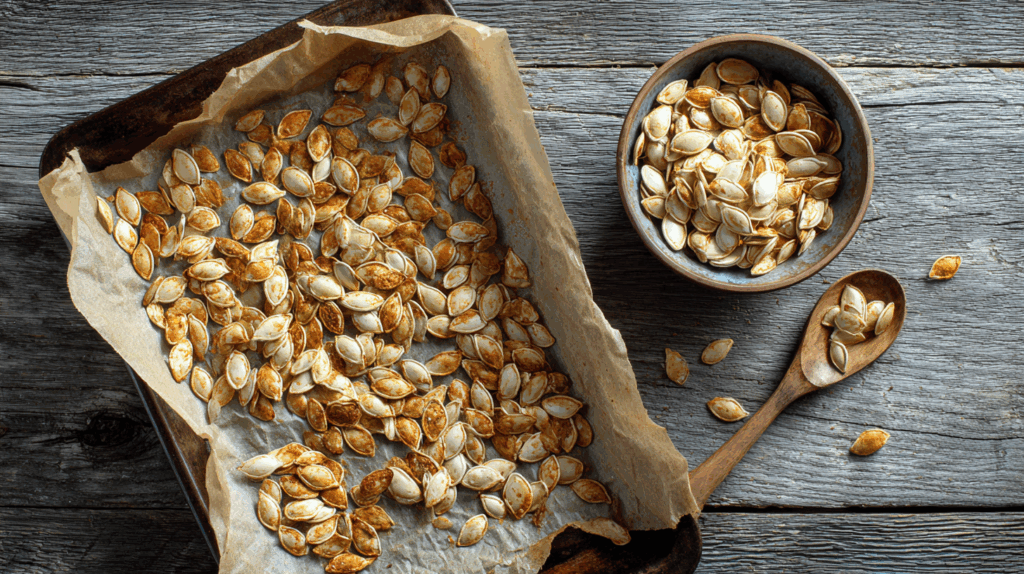
Spread the seeds in a single layer on a parchment-lined baking sheet. Make sure they’re not crowded—this helps them crisp up properly.
Roast for 30-40 minutes, stirring every 10-15 minutes to ensure even browning.

Prices pulled from the Amazon Product Advertising API on:
Product prices and availability are accurate as of the date/time indicated and are subject to change. Any price and availability information displayed on [relevant Amazon Site(s), as applicable] at the time of purchase will apply to the purchase of this product.
They’re done when they’re golden brown and crunchy. Keep in mind that they’ll continue to crisp up a bit as they cool, so don’t wait until they’re completely hard in the oven.
Step 5: Cool and Store
Let the seeds cool completely on the baking sheet. They’ll get crunchier as they sit. Once cool, store them in an airtight container at room temperature for up to a week, or refrigerate them for up to a month.
Tips for Success
Don’t overcrowd the pan. If you have a lot of seeds, use two baking sheets. Crowded seeds steam instead of roast.
Lower temperature, longer time. Roasting at 300°F instead of a higher temperature prevents burning and gives you crunchier results.
Taste as you go. Ovens vary, so start checking your seeds around the 25-minute mark.
Try different pumpkin varieties. Seeds from larger pumpkins tend to be bigger and meatier, while smaller sugar pumpkins have more delicate seeds. Both are delicious.
Roasting pumpkin seeds is one of the easiest ways to make use of your fall pumpkins before they go bad.
With just a few simple steps and basic pantry ingredients, you’ll have a healthy, crunchy snack that’s way better than anything store-bought.
Plus, you can experiment with different flavor combinations until you find your favorite.