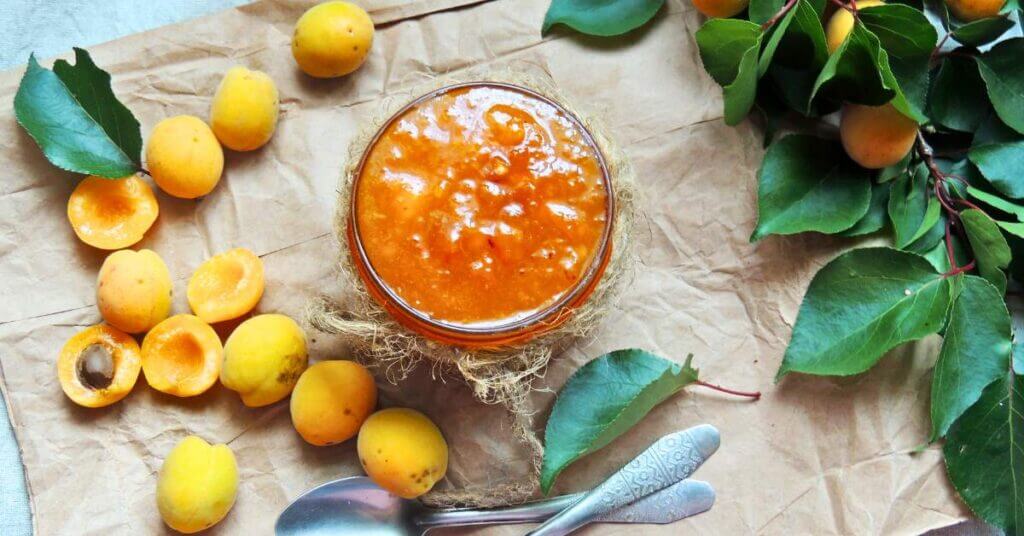
Whether you’re spreading it on toast, stirring it into yogurt, or using it as a glaze, homemade apricot jam is both delicious and rewarding to make.
This guide will walk you through the steps to create and can your own apricot jam, ensuring you can enjoy the taste of fresh apricots year-round.
Ingredients
To make apricot jam, you’ll need the following ingredients:
- 4 cups of fresh apricots, pitted and chopped
- 2 cups of granulated sugar
- 2 tablespoons of lemon juice
- 1 package of fruit pectin (optional, depending on the natural pectin content of your apricots)
Equipment
Gather the necessary equipment for making and canning your jam:
- Large pot or Dutch oven
- Half-pint canning jars with lids and bands
- Canning funnel
- Jar lifter
- Ladle
- Clean kitchen towels
- Water bath canner or large stockpot with a rack

Prices pulled from the Amazon Product Advertising API on:
Product prices and availability are accurate as of the date/time indicated and are subject to change. Any price and availability information displayed on [relevant Amazon Site(s), as applicable] at the time of purchase will apply to the purchase of this product.
How to Make Apricot Jam
1. Prepare the Apricots
Wash and Pit: Begin by thoroughly washing the apricots. Cut them in half, remove the pits, and chop the fruit into small pieces.
Measure: Measure out 4 cups of chopped apricots. This will be the base for your jam.
2. Cook the Jam
Combine Ingredients: In a large pot, combine the apricots, sugar, and lemon juice. Stir well to ensure the sugar is evenly distributed.
Heat: Place the pot over medium heat and bring the mixture to a boil, stirring frequently to prevent burning.
Boil: Once boiling, reduce the heat slightly and continue to cook, stirring often, until the mixture thickens. This should take about 20-30 minutes. If you’re using pectin, add it according to the package instructions.
Test Consistency: To test if the jam is ready, place a small spoonful on a chilled plate. If it sets and wrinkles when pushed with your finger, it’s done. If not, continue cooking and testing every few minutes.
Video Demonstration: How to Tell When Jam Has Set

How to Can Apricot Jam
1. Prepare the Jars
Clean: While the jam is cooking, clean your half-pint canning jars and lids. Since the jam will process for 10 minutes, we don’t have to pre-sterilize.
Keep Warm: Keep the jars warm until you’re ready to fill them to prevent them from breaking when hot jam is added.
2. Fill the Jars
Ladle Jam: Using a ladle and a canning funnel, carefully fill the warm jars with hot jam, leaving about 1/4 inch of headspace at the top.
Remove Air Bubbles: Gently tap the jars or use a non-metallic spatula to remove any air bubbles.
Wipe Rims: Wipe the rims of the jars with a clean, damp cloth to ensure a good seal.
Apply Lids: Place the lids on the jars and screw on the bands until they are fingertip-tight.
3. Water Bath Can
Water Bath: Place the filled jars into a water bath canner or a large pot with a rack. Make sure the jars are covered by at least 1-2 inches of water.
Boil: Bring the water to a boil and process the jars for 10 minutes. Adjust for altitude if necessary.
Cool: Carefully remove the jars using a jar lifter and place them on a clean kitchen towel to cool. Do not disturb them for 12-24 hours.
4. Check the Seals
Test Seals: After the jars have cooled, check the seals by pressing down on the center of each lid. If it doesn’t pop back, the jar is sealed. If it does, refrigerate the jar and use it within a few weeks.
Label and Store: Label the jars with the date and contents, and store them in a cool, dark place. Properly sealed jars can last for up to a year.
Making and canning your own apricot jam is a rewarding process that allows you to preserve the delicious taste of summer apricots.
With a few simple ingredients and some basic equipment, you can enjoy homemade jam all year long. Enjoy the fruits of your labor!
Print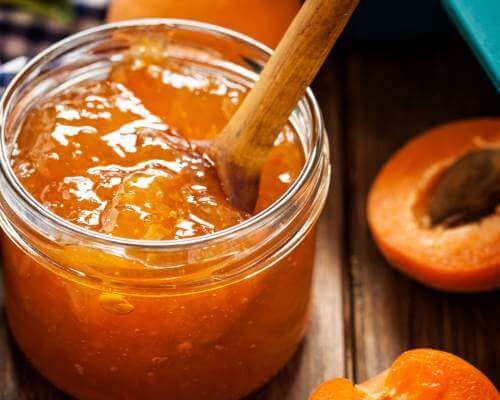
Canning Apricot Jam
This apricot jam recipe captures the essence of fresh, ripe apricots in a jar, providing a delicious and versatile spread for any occasion. With simple ingredients and easy-to-follow steps, you can enjoy homemade jam that’s flavorful, customizable, and perfect for gifting.
- Total Time: 1 hour
- Yield: 4 half-pints 1x
Ingredients
- 4 cups of fresh apricots, pitted and chopped
- 2 cups of granulated sugar
- 2 tablespoons of lemon juice
- 1 package of fruit pectin
Instructions
- Begin by thoroughly washing the apricots. Cut them in half, remove the pits, and chop the fruit into small pieces. Measure out 4 cups of chopped apricots.
- In a large pot, combine the apricots, sugar, and lemon juice. Stir well to ensure the sugar is evenly distributed. Place the pot over medium heat and bring the mixture to a boil, stirring frequently to prevent burning.
- Once boiling, reduce the heat slightly and continue to cook, stirring often, until the mixture thickens, about 20-30 minutes. If using pectin, add it according to the package instructions. To test if the jam is ready, place a small spoonful on a chilled plate. If it sets and wrinkles when pushed with your finger, it’s done. If not, continue cooking and testing every few minutes.
- While the jam is cooking, clean 5 half-pint canning jars, and keep the jars warm until you’re ready to fill them. (The recipe may only yield 4 half-pints, but keep that 5th jar on standby just in case.)
- Using a ladle and a canning funnel, carefully fill the warm jars with hot jam, leaving about 1/4 inch of headspace at the top. Gently tap the jars or use a non-metallic spatula to remove any air bubbles. Wipe the rims of the jars with a clean, damp cloth to ensure a good seal. Place the lids on the jars and screw on the bands until they are fingertip-tight.
- Place the filled jars into a water bath canner or a large pot with a rack, making sure the jars are covered by at least 1-2 inches of water. Bring the water to a boil and process the jars for 10 minutes, adjusting for altitude if necessary.
- Carefully remove the jars using a jar lifter and place them on a clean kitchen towel to cool. Do not disturb them for 12-24 hours.
- After the jars have cooled, check the seals by pressing down on the center of each lid. If it doesn’t pop back, the jar is sealed. If it does, refrigerate the jar and use it within a few weeks. Label the jars with the date and contents, and store them in a cool, dark place. Properly sealed jars can last for a year or more.
- Prep Time: 20
- Canning Time: 10
- Cook Time: 30