Here’s something the gardening industry doesn’t want you figuring out: you don’t need to spend hundreds of dollars to grow an incredible garden.
The fertilizer. The grow lights. The specialty seed-starting trays. The bags of mulch dyed fire-engine red for some mysterious reason. It all adds up fast—and most of it is completely optional.
Many of the most powerful gardening tools are already hiding in your kitchen, your recycling bin, or your neighbor’s curb. Today I’m sharing seven frugal garden hacks that deliver results without the retail price tag.
Let’s dig in.
1. Become Your Neighborhood’s Leaf Collector
Every gardening resource says the same thing: start with compost. And that’s true—it really is the foundation of a healthy garden. But that foundation can cost a small fortune if you’re buying bag after bag from the store.
The thing is, nature gives it away for free.
Every fall, your neighbors rake their leaves, stuff them in black garbage bags, and set them on the curb like trash. To you? That’s gardener’s gold.
Fallen leaves are loaded with carbon and trace minerals that trees pull up from deep in the earth. As they break down, they create leaf mold—also called humus—which lightens heavy soil, helps it hold moisture, and feeds all the good microbes that keep your garden healthy.
Here’s the plan:
- Ask your neighbors for their bagged leaves. Most will be thrilled to have you haul them away.
- Shred the leaves by running a lawn mower over them a few times—smaller pieces break down faster. No rush? Skip this step.
- Store the bags in a corner of your yard. The black plastic concentrates heat and speeds up composting.
When you’re ready to make full-blown compost, layer those leaves—your “browns”—with kitchen scraps like coffee grounds, veggie peels, and grass clippings—your “greens.” Keep the pile as damp as a wrung-out sponge and flip it every few weeks.
In 6–12 months, you’ll have rich, dark, crumbly compost—the same stuff garden centers charge a premium for. And it didn’t cost you a dime.
2. Build a Mini Greenhouse from Your Recycling Bin
Every spring, garden centers make a killing selling grow lights, heat mats, and complicated seed-starting setups. They’re some of their most profitable products.
But a much cheaper solution is probably sitting in your recycling bin right now: a humble plastic milk jug.
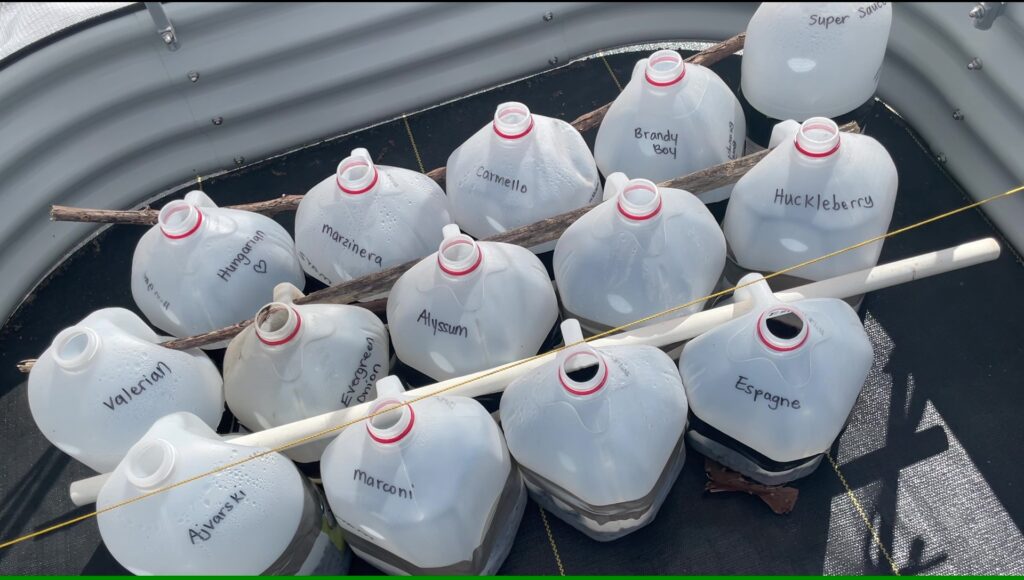
This method is called winter sowing, and I’ve been using it for years with great success. You start seeds outside in the middle of winter, using nature’s freeze-thaw cycles to spark germination. The seedlings grow up stronger and already used to the outdoors—which means hardening off takes just 1–2 days instead of the usual week or two.
Here’s how:
- Grab a clean, translucent milk jug. Cut it horizontally almost all the way around—leave the handle intact to act as a hinge.
- Drill or cut several drainage holes in the bottom.
- Fill with potting mix 4–6 inches deep. Potting mix—not seed-starting mix.
- Plant seeds shallowly—about as deep as your pinky fingertip.
- Water in, flip the top closed, and seal with duct tape.
- Leave the plastic cap OFF. This allows air circulation and lets rain and snow water your seeds naturally.
- Label your jug and set it outside in full sun.
Come early spring, peek inside and you’ll find dozens of healthy seedlings just waiting to be transplanted. We have a whole dedicated video on the nuances of this—linked below.
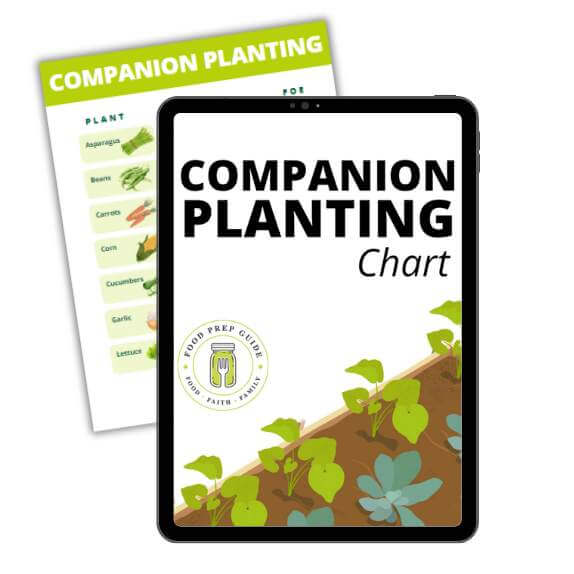
And if you need help figuring out what to grow, grab our FREE Staples Garden Plan!
Dream of Filling Your Pantry with Homegrown Staples?
Plan your garden with our FREE PRINTABLE—Staples Garden: What to Plant to Feed Your Family for a Year!
3. Stop Buying Seeds You’re Already Buying
Seed packets are definitely cheaper than buying seedlings, but the cost adds up when you’re growing enough food to feed a whole family. Here’s something I wish someone had told me sooner:
Many of the seeds you need, you’re already buying—just in a different form.
The fruits and veggies in your grocery cart right now have perfectly good seeds hiding inside them. Stick with organic and heirloom varieties because they grow “true to type”—the fruit you get will look and taste just like the one you bought.
Some easy ones to start with:
- Tomatoes: Cut a slice and plant it directly in a container. It’ll produce all the seedlings you need. Thin them out once they’re a few inches tall.
- Peppers, squash, cucumbers: Scrape out the seeds, rinse well, and let them dry thoroughly before planting or storing.
- Dry beans: That one-pound bag of black beans in your pantry? Those are seeds. Just drop them in the ground.
- Potatoes: Pre-sprout them and cut chunks around the “eyes” to get multiple plants from one potato. Dedicated video linked below.
4. Protect Seedlings from Cutworms with Aluminum Foil
There is nothing more gut-wrenching than planting a row of seedlings, going to bed feeling good about yourself, and walking out the next morning to find them all chopped down at the base. I’ve been there.
That’s cutworm damage. Garden centers will gladly sell you chemical pesticides for it—but that stuff can be rough on your pets, your beneficial insects, and your soil.
The free, non-toxic fix? Aluminum foil. It’s sitting in your kitchen drawer right now.
Here’s how to make a foil collar:
- Cut a strip of foil about 3 inches wide.
- Wrap it loosely around the base of your seedling—leave a little room for the stem to grow.
- Push it about an inch into the soil, leaving a couple inches above ground.
The cutworm crawls along the soil surface, hits the foil, can’t cut through it, and moves on. Bonus: the shiny surface reflects light upward, which also confuses flying pests like aphids. They hate the glare.
Free, non-toxic, and it genuinely works.
5. Get Free Mulch Delivered to Your Driveway
Walk into any garden center and you’ll see enormous bags of wood chip mulch—often dyed strange shades of red and black—selling for a price that makes my frugal heart hurt. And I’ll be honest: mulch is non-negotiable in my garden. It keeps weeds down, retains moisture, and regulates soil temperature.
But there is no reason to pay for it.
Call your local arborist or power company. Tree service crews who clear branches from power lines produce mountains of wood chips every single week. Hauling it away costs them time and money. You could be the solution to their problem.
Many companies are genuinely happy to drop a full truckload in your driveway for free. There’s even a service called Chip Drop that connects gardeners directly with local tree companies. One delivery can be up to 20 cubic yards—potentially enough for your entire garden.
A few things to keep in mind:
- Spread a 3–4 inch layer around your plants—on top of the soil only.
- Do NOT mix it into your soil. It’ll leach nitrogen away from your plants if incorporated.
- For garden walkways, go about a foot deep and lay cardboard underneath first to smother weeds.
- If you’re in fire ant country like I am—they love wood chips. Natural fire ant tutorial linked below.
6. Grow 20–40 Sweet Potato Plants from One Grocery Store Potato
Sweet potato slips—the starter plants—can be surprisingly expensive. The industry treats them like a specialty item. But a single organic sweet potato from the grocery store can give you 20 to 40 free plants.
One important note: make sure it’s organic. Conventional sweet potatoes are often sprayed with a chemical that prevents sprouting on the shelf—which means they won’t sprout for you either.
Two methods to grow your own slips:
The water method (classic): Stick a few toothpicks into the potato and suspend it pointy-end down in a jar of water on a sunny windowsill, bottom half submerged. In about a month, you’ll see roots below and leafy slips growing from the top. When a slip reaches about 6 inches, gently twist it off and set it in its own jar of water to develop roots before transplanting.
The soil method (faster): Fill a shallow tray with moist potting soil. Lay the sweet potato on its side, buried halfway to three-quarters. Keep warm and damp. Soon it’ll be covered in slips you can harvest. One potato can easily give you an entire garden bed’s worth of plants.
7. Brew Your Own Fertilizer
Those plastic jugs of liquid fertilizer are a recurring expense—and often full of synthetic chemicals that can damage your soil over time.
What if one of the most powerful liquid fertilizers you could use is growing in your backyard right now, disguised as a weed?
Meet comfrey.
Comfrey is what’s called a dynamic accumulator. Its deep taproot pulls potassium, nitrogen, and other nutrients up from the subsoil where other plants can’t reach, then stores all of that goodness in its leaves—making it perfect for homemade fertilizer tea.
- Harvest a bunch of comfrey leaves and chop them up.
- Stuff them into a 5-gallon bucket and fill with water.
- Cover with a lid and let it sit in the sun for 2 weeks up to a month (or even 6 weeks).
- Fair warning: it will smell terrible. That means it’s working.
- Strain out the leaves and toss them in your compost pile—zero waste.
- Dilute before using: 1 part comfrey tea to 10 parts water. It’s very potent straight.
- Feed to your heavy feeders—tomatoes, peppers, squash. Watch what happens.
Free fertilizer, no synthetic chemicals, brewed from a backyard weed. That’s good stewardship right there.
A More Self-Sufficient Garden Is Closer Than You Think
Every one of these hacks replaces a product the industry wants you to believe you can’t garden without. But with a little creativity and a willingness to work with what you already have, a productive garden is absolutely within reach—for practically nothing.
You know how to turn curbside leaves into compost, start seedlings in milk jugs, get free mulch delivered, clone sweet potatoes, and brew your own fertilizer. That’s real self-sufficiency.
REMOVE THE GUESSWORK FROM GARDENING!
These garden plans include 10 themed garden blueprints—complete with beneficial pairings, proper spacing & more!