This two-hour bread beat all the rest of the bread recipes I’ve tried.
If you want a bread recipe that is:
- quick ( 1 1/2 to 2 hours from start to finish)
- basic yet delicious
- uses only pantry ingredients
- doesn’t crumble or fall apart when you cut it
Then this is the recipe for you!
FREE FOOD STORAGE PLAN!

Does gathering and storing a year’s worth of food for your family seem overwhelming and unachievable?
Make it easy with our step-by-step plan. Subscribe to our weekly newsletter & we’ll send it to you FREE!
Tips for Making Quick 2-Hour Bread
This bread recipe does NOT double in size during its rising phase. If you are an experienced bread-baker, that can seem weird and “wrong.” (At least it did to me, at first.)
Since proofing (rise time) is impacted by environmental factors, you can go longer than the recommended duration of 25-minutes.
Sometimes, I’ve allowed this bread to rise as long as an hour.
One of the reasons this bread only takes two hours from start to finish is because it only rises once.
Because of that, this recipe does not create an extra-tall loaf. Still, I’ve found it perfectly satisfactory for sandwich bread and toast.
If you prefer video, there is a video tutorial at the bottom of this post. Enjoy!
Print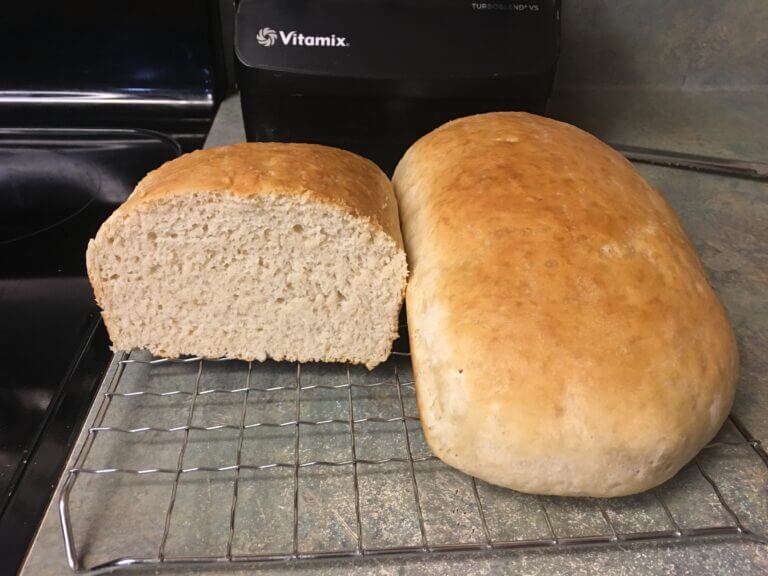
Quick 2-Hour Sandwich Bread
This simple sandwich bread takes only 2 hours to make from start to finish. Plus, it only uses cheap, shelf-stable pantry ingredients!
- Total Time: 1 hour 20 minutes
- Yield: 2 loaves 1x
Ingredients
- 5 1/4 cups flour
- 4 tablespoons sugar
- 1 1/2 teaspoons salt
- 1 1/2 tablespoons coconut oil (or oil of choice)
- 2 1/4 cup warm water
- 2 1/4 teaspoon yeast
Instructions
- Mix all of your dry ingredients together, including the yeast.
- Add the oil. Then add the warm water.
- Mix well. Use your hands if you need to.
- Plop the dough onto a lightly floured or oiled surface.
- Spray (or grease) your hands with a little oil, and begin to knead. Knead the dough for approximately 5 minutes.
- After 5 minutes of kneading, if the dough is still too sticky, add a little more flour until it is no longer sticky.
- Cut the dough into two equal halves, and place them into loaf pans.
- Cover with a grocery bag, and let them sit to rise in a warm area for about 25 minutes, but you can go up to 45 minutes. (I proof bread in my dehydrator at 110 degrees F.)
- Preheat oven to 350 degrees F. Allow it to preheat for 5 minutes.
- Place loaves in the oven, and bake for 20 minutes.
- After 20 minutes, take them out, and run the tops with butter.
- Place back in the oven, and bake for 5 more minutes.
- Allow to cool before slicing.

Notes
Test the water for proper temperature like you would a baby's bottle. Let a trickle of the water run on your wrist until it is barely warm on your skin. It should be equal to – or slightly above – body temperature.
- Prep Time: 20 minutes
- Additional Time: 35 minutes
- Cook Time: 25 minutes