You know those days when the fridge feels like a barren wasteland, the kids are “starving,” and your brain is too fried to even think about a proper meal plan?
This recipe was born out of one of those days. I pulled out a half-used bag of tortilla chips, some leftover taco meat, and started tossing things onto a sheet pan like a woman on a mission.
Fifteen minutes later, we had dinner on the table—and you would’ve thought I’d served up a five-course feast with how excited everyone was.
Now it’s become a go-to in our home. It’s fast, budget-friendly, endlessly customizable, and—let’s be real—who doesn’t love a big tray of cheesy nachos that you can eat with your hands?
So if you’re looking for a no-fuss meal that feeds your people and keeps your budget intact, pull out a baking sheet and let’s get to it.
Ingredients:
- 1 bag (10–12 oz) tortilla chips (sturdier is better)
- 1–2 cups cooked seasoned ground beef, chicken, or beans (leftovers work great)
- 1½ cups shredded cheese (cheddar, Monterey Jack, or a blend)
- ½ cup black beans, drained and rinsed
- ½ cup corn (fresh, canned, or frozen)
- 1 small red onion, diced
- 1 small tomato, diced
- 1 jalapeño, sliced (optional)
- Salt and pepper to taste
Topping Ideas (add after baking)
- Sour cream or plain Greek yogurt
- Salsa or pico de gallo
- Guacamole or sliced avocado
- Fresh cilantro
- Lime wedges
- Pickled onions or olives
Instructions:
- Preheat your oven to 400°F (204°C). Line a large baking sheet with parchment paper or foil for easier cleanup.
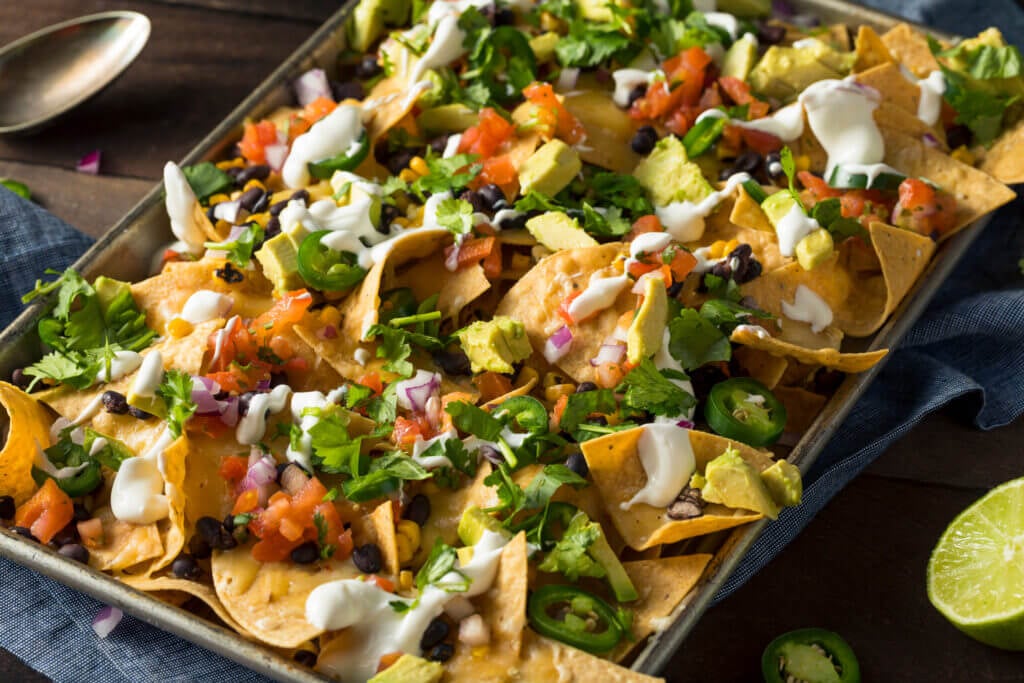
- Spread the tortilla chips evenly across the sheet pan. You want a nice, solid base—think single-ish layer with a little overlap.
- Sprinkle on the protein, beans, corn, diced onion, and any other “bake-safe” toppings you like (hold the fresh stuff ‘til after).
- Add the cheese—go generous here.
- Bake for 8–10 minutes, or until the cheese is melted and bubbly. Keep a close eye on it—burned nachos are a sad thing.
- Remove from the oven and finish with your favorite fresh toppings. Let everyone build their own plate (or eat straight from the pan—we don’t judge).
Ideas to Customize
- Stretch your protein: Combine ground beef with black beans or lentils to make your meat go further.
- Double layer it: For extra-loaded nachos, do a layer of chips, toppings, then repeat before baking.
- Fridge clean-out friendly: Don’t overthink it. If it sounds good on nachos, toss it on.
- Make it a meal: Serve with a big green salad or rice on the side to round it out.
Sheet pan nachos check every single box. They’re as low-fuss as it gets, but they still feel like a fun, “treat yourself” meal!
Print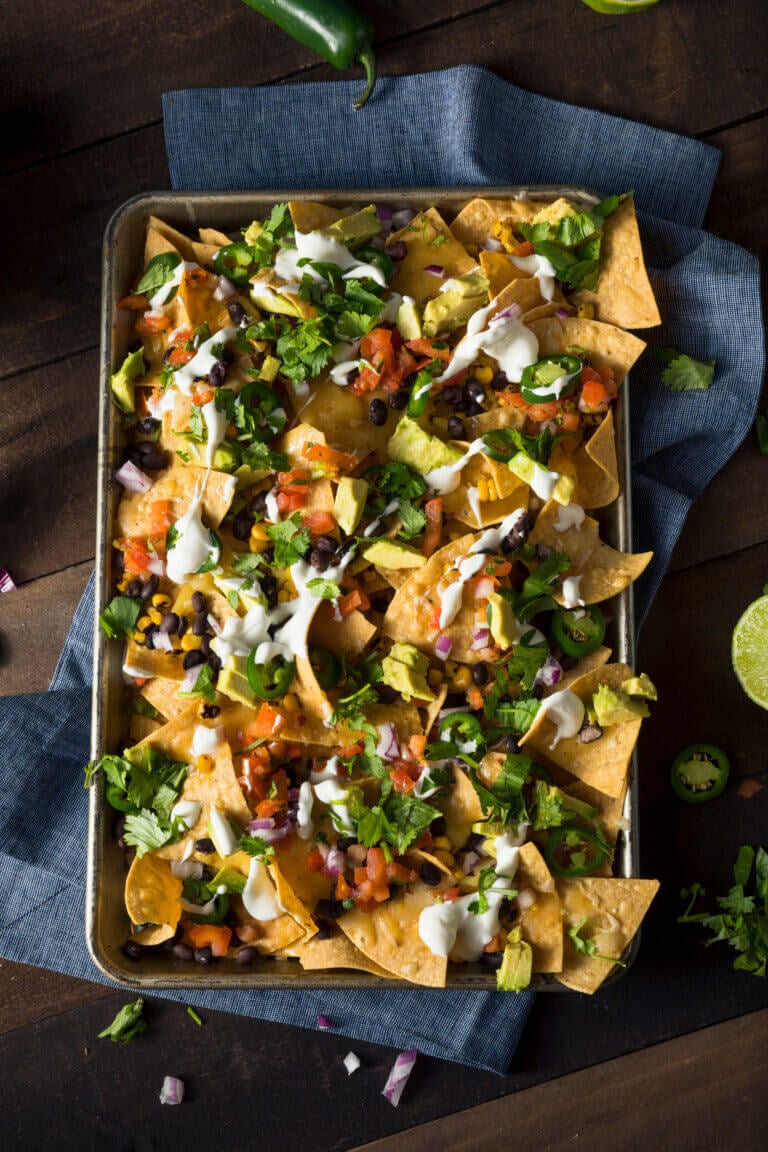
Sheet Pan Nachos
Easy sheet pan nachos made with pantry staples and leftovers—ready in 20 minutes and perfect for busy weeknights, game days, or last-minute guests.
- Total Time: 20 minutes
- Yield: 4-6 1x
Ingredients
-
1 bag (10–12 oz) tortilla chips (sturdier is better)
-
1–2 cups cooked seasoned ground beef, chicken, or beans (leftovers work great)
-
1½ cups shredded cheese (cheddar, Monterey Jack, or a blend)
-
½ cup black beans, drained and rinsed
-
½ cup corn (fresh, canned, or frozen)
-
1 small red onion, diced
-
1 small tomato, diced
-
1 jalapeño, sliced (optional)
-
Salt and pepper to taste
Instructions
- Preheat your oven to 400°F (204°C). Line a large baking sheet with parchment paper or foil for easier cleanup.
- Spread the tortilla chips evenly across the sheet pan. You want a nice, solid base—think single-ish layer with a little overlap.
- Sprinkle on the protein, beans, corn, diced onion, and any other “bake-safe” toppings you like (hold the fresh stuff ‘til after).
- Add the cheese—go generous here.
- Bake for 8–10 minutes, or until the cheese is melted and bubbly.
- Remove from the oven and finish with your favorite fresh toppings. Let everyone build their own plate (or eat straight from the pan—we don’t judge).
- Prep Time: 10 minutes
- Cook Time: 10 minutes