Raise your hand if you’ve ever paid $5 for a loaf of bread at the store, knowing you could make it yourself for pennies.
I’ve been there. And honestly? The only thing stopping most of us from baking homemade bread more often is time.
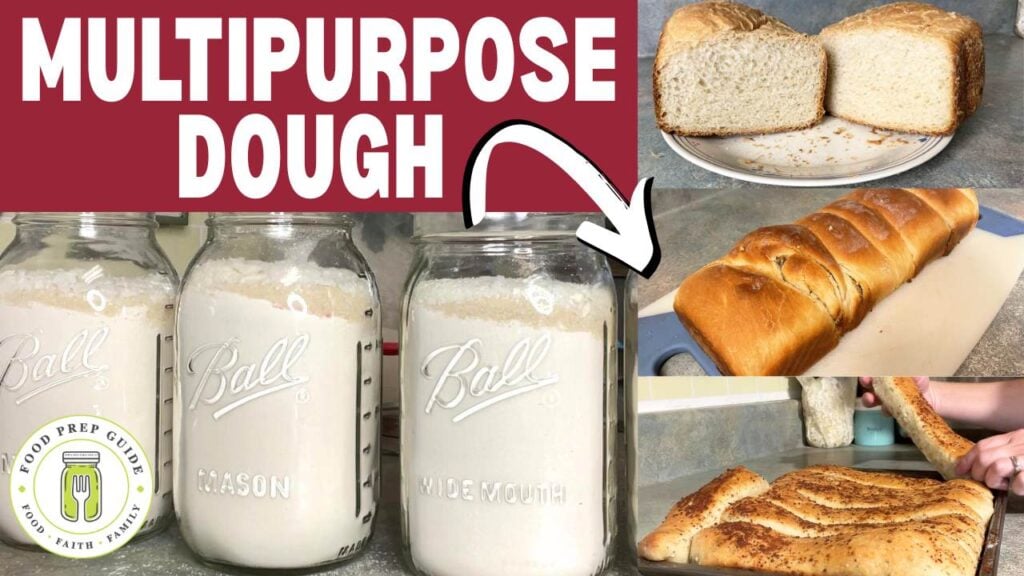
That’s why this master bread dough mix has become one of my most-used pantry prep strategies. We’re talking about one base mix—that can be “meal prepped” in bulk—that turns into sandwich bread, pull-apart garlic bread, breadsticks, dinner rolls—you name it.
Today I’m walking you through how to prep this mix in jars and transform it into three different recipes.
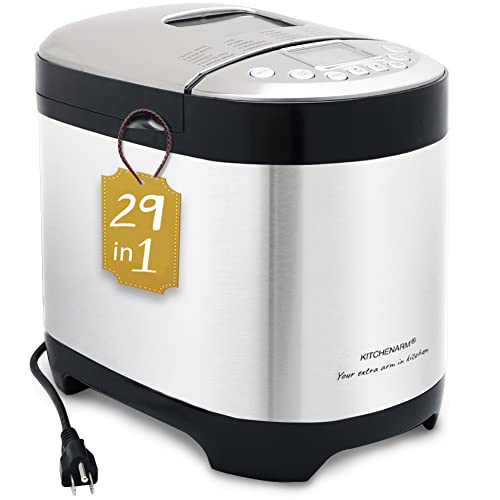
If you have a bread machine, this becomes even easier (but you absolutely don’t need one—I’ll explain why).
Ready to simplify your side dishes and save some serious money? Let’s get started.
The Master Mix: Four Simple Ingredients
Here’s what makes this mix so practical—you only need four basic ingredients you probably already have:
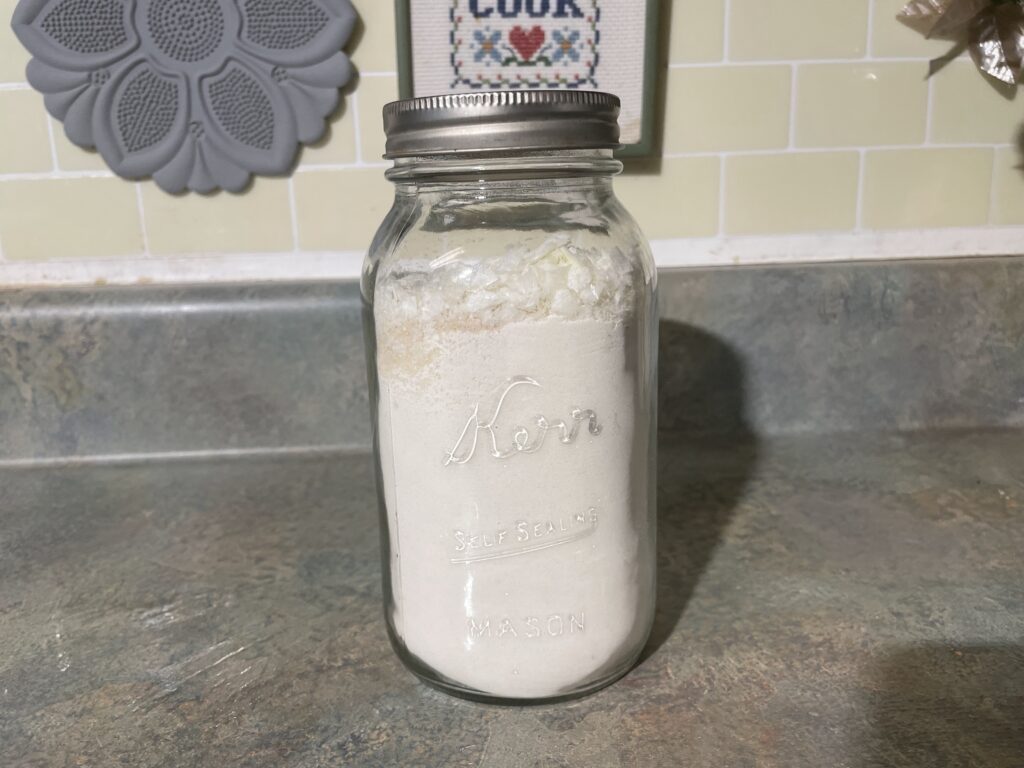
Per jar, you’ll need:
- 3 ¼ cups flour
- 1 ½ teaspoons salt (fine ground works best)
- 2 tablespoons sugar
- 2 tablespoons powdered milk
That’s it. No fancy ingredients, no special trips to the store.
Now about that powdered milk. If you’ve been around our channel for a while, you’ve heard me talk about whole powdered milk.
It makes a real difference in creaminess and flavor. Before we had a freeze dryer, I used Hoosier Hill Farm or Judee’s—both have whole milk powder with just one ingredient (whole milk, no additives).

Prices pulled from the Amazon Product Advertising API on:
Product prices and availability are accurate as of the date/time indicated and are subject to change. Any price and availability information displayed on [relevant Amazon Site(s), as applicable] at the time of purchase will apply to the purchase of this product.
But here’s the deal: if instant milk is all you have, use it. Don’t let that stop you from making this recipe.
A Note About Prepping Your Jars
I prep several jars at once because if I’ve got all the ingredients out anyway, why not?
That’s the whole point of having these mixes on hand.
Simply add each ingredient to your jars, shake them down to settle, and you’re done. You can vacuum seal these if you won’t be using them for 3-4 months. Otherwise, they’re fine stored in regular jars for a month or so.

Prices pulled from the Amazon Product Advertising API on:
Product prices and availability are accurate as of the date/time indicated and are subject to change. Any price and availability information displayed on [relevant Amazon Site(s), as applicable] at the time of purchase will apply to the purchase of this product.
Recipe 1: Basic Sandwich Bread
Let’s talk bread machines for a second because I get comments every time I mention mine.
“That’s great, but I don’t have a bread machine, so I can’t use this recipe.”
Nothing about the recipe changes whether you use a bread machine or knead by hand. The bread machine just does the kneading and baking for you. That’s it.
I went with a bread machine because it makes feeding my family so much easier. My 9-year-old can make bread with this system.
Prices pulled from the Amazon Product Advertising API on:
Product prices and availability are accurate as of the date/time indicated and are subject to change. Any price and availability information displayed on [relevant Amazon Site(s), as applicable] at the time of purchase will apply to the purchase of this product.
It helps me simplify side dishes so I only have to plan supper meals—which reduces decision fatigue big time.
When you can simplify your sides down to just a few really easy choices, life gets so much easier. And that’s what a bread machine does for me. Garlic bread, breadsticks, dinner rolls, pizza dough—all ready extremely quickly.
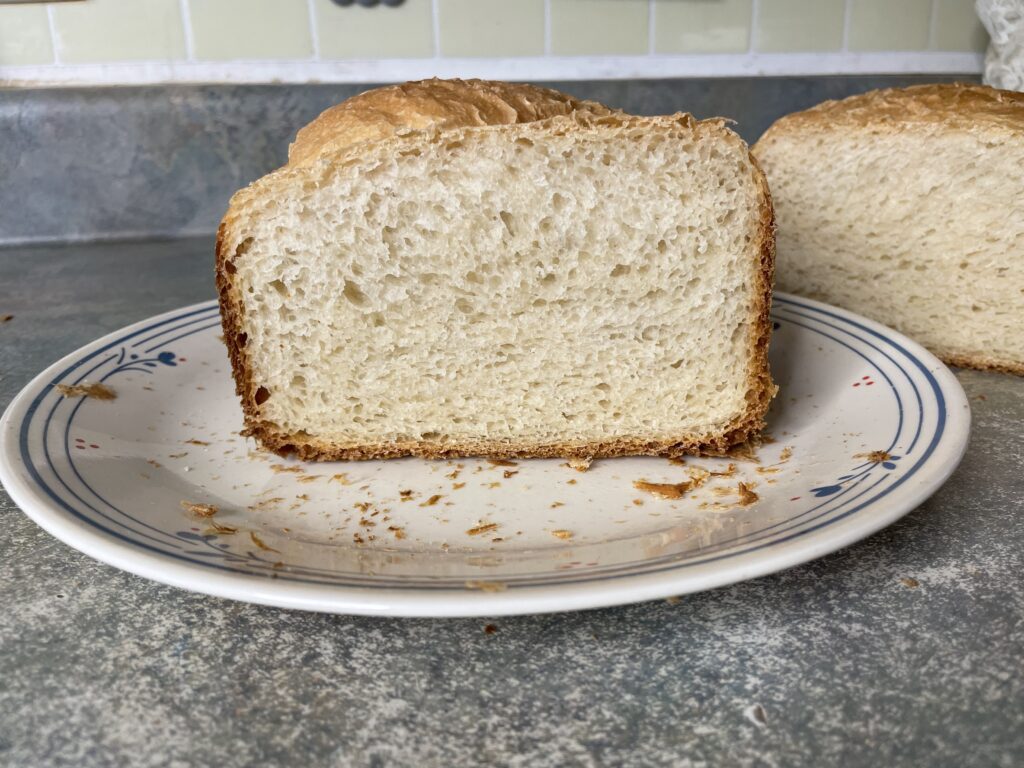
Making the Bread
If using a bread machine:
- Add 1 ¼ cups warm water
- Add 1 ½ tablespoons oil (I use avocado or coconut oil)
- Dump in your jar mix
- Make a small well in the flour and add 2 teaspoons instant yeast
Set to your basic bread setting and let it do its thing.
If kneading by hand:
- Mix all ingredients in a bowl (order doesn’t matter)
- Knead for about 5 minutes
- Let rest, then knead again if desired
- Let rise in a warm place until doubled in size, shape, do a 2nd rise for 30 minutes, and bake as usual
The result? Soft, spongy sandwich bread that’s perfect for lunches.

Recipe 2: Pull-Apart Garlic Bread
This is one of those side dishes that makes any meal feel special. And it’s so simple with this mix.
The Dough
Start the same way as sandwich bread, but use 2 tablespoons of butter instead of oil. If you’re using a bread machine, you don’t have to melt or soften the butter—just cut it into chunks and drop it in. Hand kneading? Go ahead and soften it first.
Run the dough cycle on your bread machine, or knead by hand and let it rise.
By the way, this master bread dough is just one of the MANY jar recipes inside our Mix in Jars Cookbook!
Get the Mix in Jars Cookbook!
Want to save money and eat clean—but still enjoy convenience? Cook from scratch in half the time with homemade pantry mixes that are cleaner, cheaper, and just as convenient as store-bought.
The Garlic Butter
While the dough’s going, make your garlic butter mixture:
- ½ cup softened butter
- 2 tablespoons minced garlic (I use freeze-dried, but fresh works great)
- ½ tablespoon Italian seasoning
Mix it all together. If you want cheesy garlic bread, add shredded cheese on top of this mixture before rolling.

Assembly
Roll your dough out like you’re making cinnamon rolls. Spread the garlic butter over the surface, leaving a little room on the edges. Roll it up, pinch the seams, and scrunch it to about the width of your loaf pan.
Here’s the tricky part: slice it into 1 ½ to 2-inch pieces, keeping them in a row. Then carefully transfer the whole row into your greased loaf pan.
Let rise in a warm spot for 40 minutes. I always just use my oven with the light on. Toward the end, preheat to 375°F.
Bake for 35 minutes or until golden brown. When it comes out, brush the top with butter.
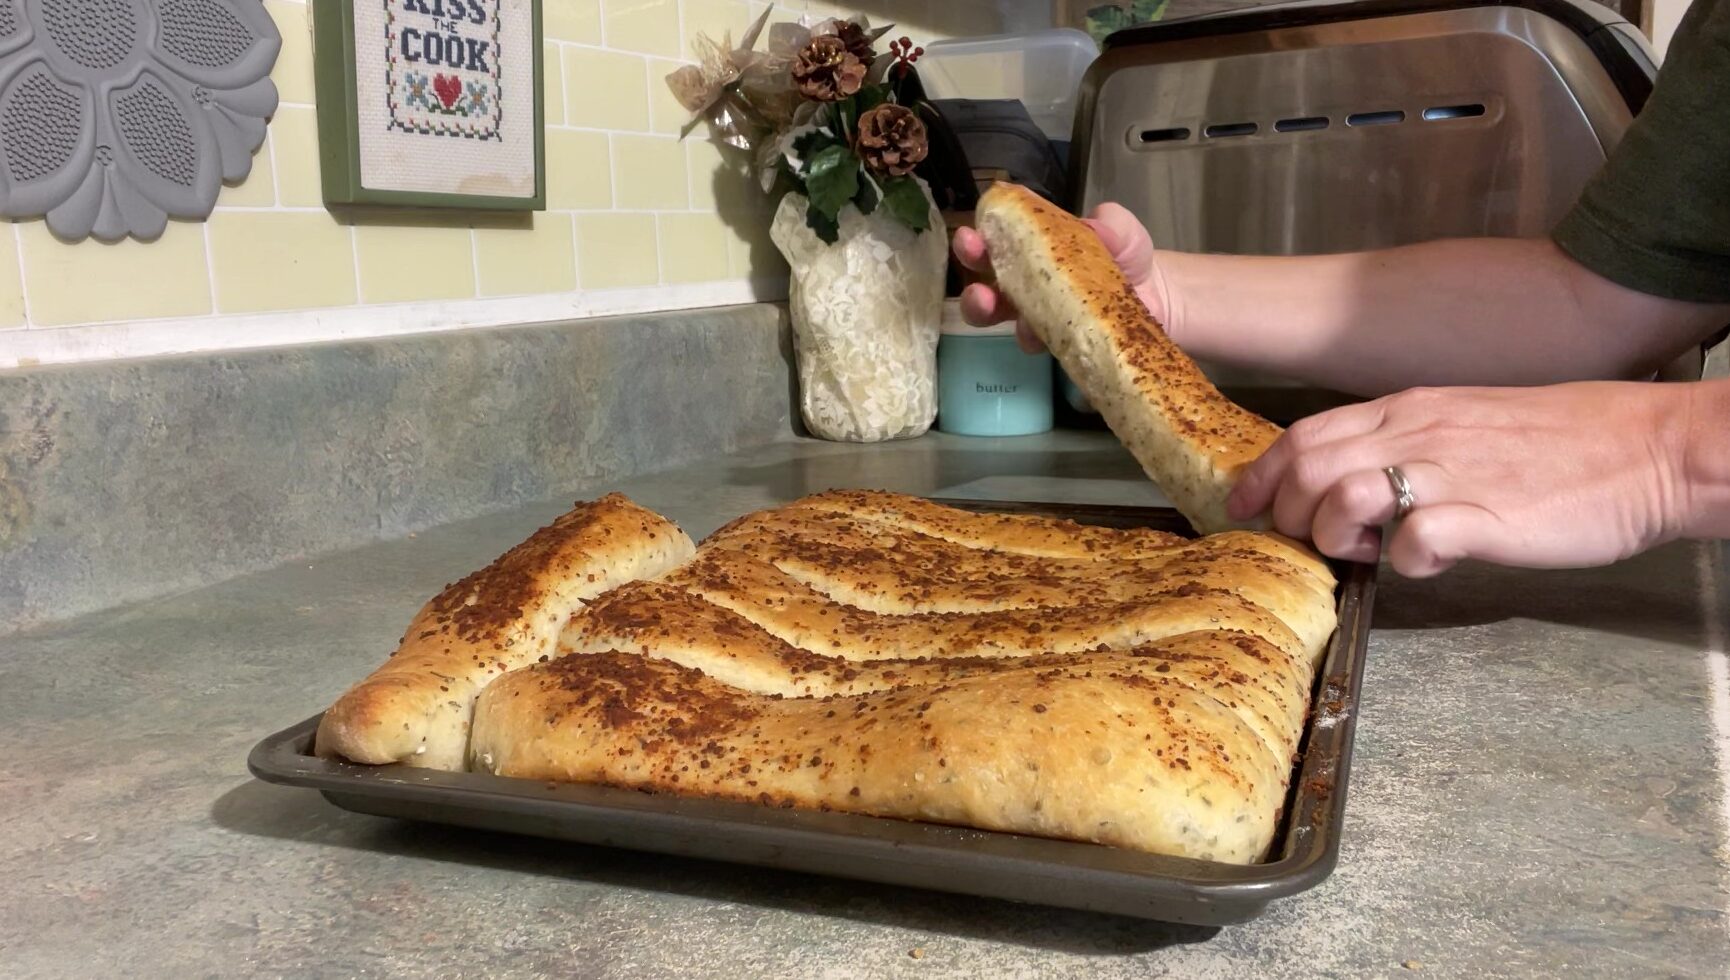
The result? Pull-apart pieces loaded with garlic butter that smell absolutely incredible. Quick and easy side dish for any meal.
Recipe 3: Parmesan Herb Breadsticks
Our third option turns this same mix into restaurant-style breadsticks.
The Seasoned Dough
Start with:
- 1 ¼ cups warm water
- 1 ½ tablespoons oil (avocado oil is my pick)
- 3 tablespoons Italian seasoning blend
- 1 tablespoon garlic powder (or slightly less freeze-dried minced garlic)
- 1 teaspoon onion powder
- Your jar mix
- 2 teaspoons instant yeast
I know 3 tablespoons of Italian seasoning seems like a lot, but this makes a 2-pound batch of dough—you need that flavor punch.
Run the dough cycle or knead by hand.
Shaping and Baking
Roll the dough into a rectangle—size depends on how many breadsticks you want and how long. I don’t worry about perfection here.
Slice into 1-inch strips and place on a greased baking sheet. Let rise in a warm spot for 20 minutes. I use my oven with the light on, but on top of a dehydrator or near a sunny window works too.
Preheat oven to 400°F. Brush risen breadsticks generously with 3 tablespoons melted butter, then top with Parmesan cheese. Fresh grated is ideal, but use what you have.
Bake for 15 minutes. Let cool for 10 minutes before tearing into them.
Why This System Works
What I love about this master mix approach is the efficiency. You prep once, measure once, and then you have quick homemade bread options anytime you need them.
A loaf of sandwich bread at the store? Probably $3-4. This mix makes the same loaf for less than $1.
Frozen garlic bread? $5-6. You just made it for about $2.
Restaurant breadsticks? $7-8. Yours cost maybe $2.
Plus, you know exactly what’s going into your family’s food. No preservatives, no weird ingredients you can’t pronounce.
This is the kind of practical, frugal strategy that makes stewarding your resources well actually doable. You’re not spending hours in the kitchen, but you’re still providing real, wholesome food for your family.
Give this master mix a try. Prep a few jars this weekend, and you’ll have quick bread options ready whenever you need them!
Print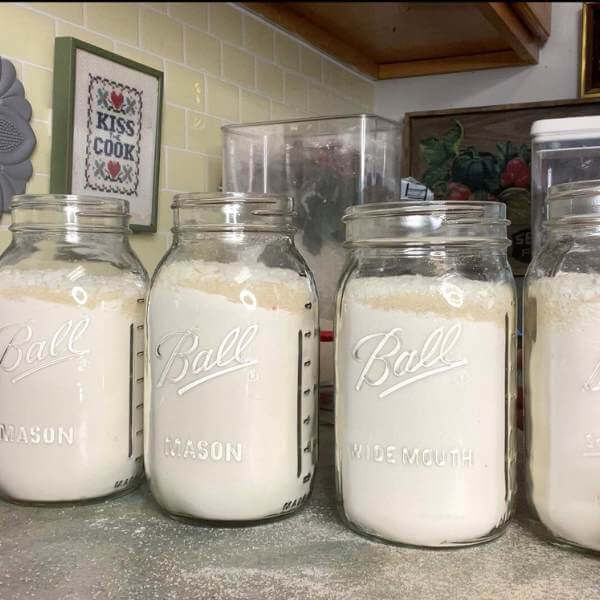
Master Bread Dough: One Mix, Endless Possibilities
Ingredients
- 3¼ cups all-purpose flour
- 1½ tsp salt
- 2 Tbs sugar
- 2 Tbs whole milk powder
Instructions
For Sandwich Bread
- 1 ¼ cups warm water
- 1 ½ Tbs oil of choice
- 1 jar mix
- 2 tsp instant yeast
- Add ingredients to a bread machine in the order
given (or in a mixing bowl if kneading by hand). - Following your bread machine’s user manual,
select the appropriate cycle to bake bread. - If baking manually, bake for 30 minutes at 375°F
(or until a toothpick comes out clean).
For Pull-Apart Garlic Bread
- 1 ¼ cups warm water
- 2 Tablespoons butter
- 1 jar mix
- 2 tsp instant yeast
- 2 Tbs minced garlic
- 1/2 Tbs Italian seasoning
- ½ cup butter, softened
- Add water, 2 Tbs butter, mix, and yeast to a bread
machine in the order given (or in a mixing bowl if
kneading by hand). - Following your bread machine’s user manual, select
the “Dough” cycle. - When complete, roll out dough into a rectangle. Mix
seasonings with the softened butter, and spread
evenly onto the dough. Roll up, and cut into 7-8
slices. - Carefully scoop up the dough all together and place
into a greased loaf pan. Let rise in a warm place for
40 minutes, then bake in a preheated, 375°F oven
for 35 minutes or until golden brown.
For Parmesan-Herbed Breadsticks
- 1¼ cups warm water
- 1½ Tbs oil of choice
- 2 Tbs Italian seasoning
- 1 Tbs garlic powder
- 1 tsp onion powder
- 1 jar mix
- 2 tsp instant yeast
- 3 Tbs butter, melted
- ¼ cup+ parmesan cheese, grated
- Add ingredients (except butter and cheese) to a
bread machine in the order given (or in a mixing
bowl if kneading by hand). - Following your bread machine’s user manual, select
the “Dough” cycle. - When complete, roll out dough into a rectangle. Cut
into strips 1-inch wide. Place on greased or parchment-lined baking sheets. - Let rise in a warm place for 20 minutes. Brush tops
with melted butter and sprinkle tops with parmesan cheese. - Baked in a preheated, 400°F oven for 15 minutes or
until golden brown.