


Known chemically as magnesium sulfate, Epsom salt is touted for its ability to rejuvenate plants by providing essential nutrients that promote growth, increase flower production, and intensify greenery.
But what exactly is Epsom salt, and how does it benefit your garden?
In today’s post, we’ll explore the ins and outs of using Epsom salt in gardening.
From the basic understanding of its composition to practical advice on its application, we’ll help you optimize plant health and maximize garden performance using this time-honored supplement.
Whether you’re battling magnesium-deficient soil or simply looking to give your plants a healthy boost, understanding when and how to use Epsom salt can be a game changer in your gardening practices.
Let’s get started….
What Is Epsom Salt?
Epsom salt, or magnesium sulfate, is a naturally occurring mineral compound that has been used for centuries both therapeutically for humans and as a supplement in gardening.

Prices pulled from the Amazon Product Advertising API on:
Product prices and availability are accurate as of the date/time indicated and are subject to change. Any price and availability information displayed on [relevant Amazon Site(s), as applicable] at the time of purchase will apply to the purchase of this product.
Unlike table salt, which consists mainly of sodium chloride, Epsom salt is composed of magnesium, sulfur, and oxygen—elements that are vital to plant health:
- Magnesium: This is a critical macronutrient for plants, essential for the production of chlorophyll, which plants use to convert sunlight into food. It also plays a role in the activation of many plant enzymes needed for growth.
- Sulfur: Important for the production of vitamins, amino acids, and proteins in plants, sulfur also helps in photosynthesis and enhances the efficiency of other nutrients, like nitrogen and phosphorus.
When it comes to gardening, Epsom salt is typically used as a corrective measure for magnesium-deficient soils, especially in regions with heavy rainfall where magnesium can be leached from the soil.
When to Use Epsom Salt
Using Epsom salt in gardening isn’t just about knowing how to apply it, but also when—and if it’s even needed in the first place.
It’s possible to overdo it on minerals like magnesium.
Recognizing Magnesium Deficiency in Plants
Before applying Epsom salt, it’s important to recognize the signs of magnesium deficiency:
- Interveinal Chlorosis: The most common symptom where leaves turn yellow between the veins while the veins themselves remain green.
- Leaf Curling: Magnesium-deficient plants often exhibit upward curling of the leaves.
- Reduced Yield: Plants lacking in magnesium may produce fewer and smaller flowers and fruits.
These symptoms typically appear first on the lower leaves and gradually affect newer leaves as the deficiency worsens.
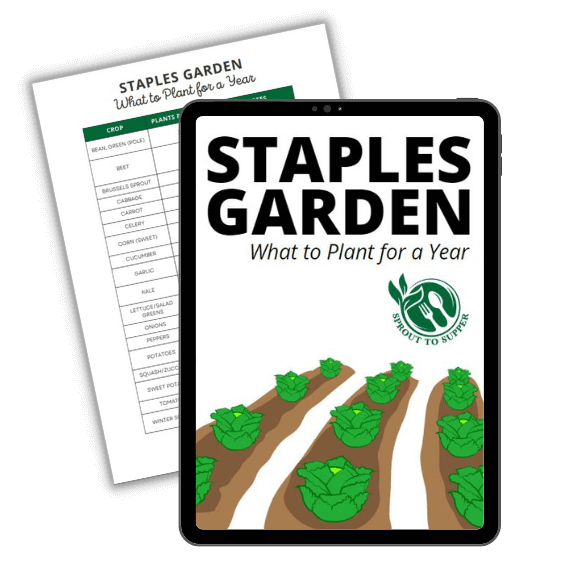
Dream of Filling Your Pantry with Homegrown Staples?
Plan your garden with our FREE PRINTABLE—Staples Garden: What to Plant to Feed Your Family for a Year!
Key Growth Stages & Epsom Salt Application
Timing is crucial, as the benefits of Epsom salt can be maximized when it’s used during specific stages of plant growth or under certain conditions.
Once you’ve determined that Epsom salt is needed, let’s look at the “when and how” to incorporate it into your garden.
- Seeding Stage: Epsom salt can help in the germination process by strengthening cell walls and improving seedlings’ ability to take up vital nutrients. A light sprinkle of Epsom salt in the soil at planting time or a soak for seeds before planting can increase seed germination rates and give seedlings a healthy start.
- Flowering Stage: As plants transition to the flowering stage, magnesium becomes crucial for the production of flowers and fruits. Applying Epsom salt when plants begin to flower can boost chlorophyll levels, contributing to higher energy and healthier floral development.
- Fruit Setting Stage: For plants like tomatoes and peppers, adding Epsom salt during the fruit setting stage can help in the development of larger, tastier fruits. Magnesium aids in the production of fruiting bodies and can be a vital supplement during periods of rapid growth or when the fruits begin to form.
How to Use Epsom Salt on Your Plants
Epsom salt can be applied to plants in several ways, depending on the specific needs of the plants and the garden’s conditions.
Here are step-by-step instructions for the most common methods of application—soil application, foliar spray, and soaking seeds.
Soil Application
Soil application is straightforward and effective for boosting magnesium levels in the ground where your plants can absorb it directly through their roots.
- Measurement: Use about one tablespoon of Epsom salt per gallon of soil. This ratio can vary slightly depending on the specific needs of your plants and the existing soil magnesium levels.
- Mixing: If you are preparing a new garden bed or potting soil, mix the Epsom salt evenly with the soil before planting. For existing plants, sprinkle the Epsom salt around the base of the plant.
- Watering: After applying the Epsom salt, water your plants thoroughly. This helps dissolve the salt and facilitates its uptake by the roots. Repeat this application once a month during the growing season to maintain adequate magnesium levels.
Foliar Spray
Foliar spraying is an effective method for treating magnesium deficiency symptoms quickly, as it allows plants to absorb nutrients directly through their leaves.
- Preparation: Dissolve two tablespoons of Epsom salt in a gallon of water. Ensure the salt is fully dissolved to prevent leaf burn.
- Application: Use a spray bottle or garden sprayer to apply the solution. Spray the leaves of the plant, covering both the tops and undersides of the leaves where the stomata are more concentrated.
- Timing: Apply the spray in the early morning or late afternoon to avoid the intense sun, which can cause the leaves to burn when wet. Repeat every two weeks, or as needed, to correct visible deficiency symptoms.
Soaking Seeds
Soaking seeds in an Epsom salt solution can improve germination and give seedlings a healthy start.
- Preparation: Mix one tablespoon of Epsom salt into one gallon of water until fully dissolved.
- Soaking: Place the seeds in the Epsom salt solution and let them soak for at least 12 hours but no more than 24 hours. This process helps to break down the seed coat and boost magnesium levels right from germination.
- Planting: After soaking, plant the seeds as you normally would. There’s no need to rinse them; just plant directly into the soil.
Situations Where Epsom Salt Is Particularly Beneficial
Epsom salt is particularly beneficial for plants that are heavy feeders of magnesium—one of the key components of Epsom salt.
Here are some plants that often respond the best to Epsom salt:
- Tomatoes and Peppers: These plants are particularly prone to magnesium deficiencies, often displayed as yellowing leaves with green veins. Epsom salt can be beneficial both as a preventative measure and as a treatment during the growing season to promote strong growth and vibrant fruits.
- Roses: Known for their need for substantial nutrients, roses benefit greatly from Epsom salt applications. It can enhance their color and help in stronger bloom production. Spraying rose bushes with Epsom salt solution can help in absorbing nutrients more effectively, particularly in alkaline soils.
- Potatoes and Carrots: Root vegetables like potatoes and carrots benefit from Epsom salt as it can help in the development of healthier, more robust root systems.
- Lawns: Epsom salt can help in creating a lusher, greener lawn by providing magnesium for chlorophyll production. It is especially useful in restoring a lawn that looks yellow or has been stressed by weather conditions.
- Gardenias and Azaleas: Both of these shrubs love acidic soils and can benefit from the sulfur in Epsom salt, which can help lower pH levels slightly and provide necessary nutrients.
From lush tomatoes to vibrant roses and hearty root vegetables, the benefits of incorporating Epsom salt into your gardening routine can be substantial.
However, like any garden supplement, the key to success with Epsom salt lies in its proper use. It’s crucial to apply it thoughtfully, based on the specific needs of your plants and the existing conditions of your soil.
Always consider starting with a soil test to ensure that your plants truly need the extra magnesium, and follow recommended guidelines for application to avoid the potential pitfalls of overuse.


Thank you for the information. I am looking forward to having beautiful, healthy and nutritious vegetables.
Thank you will try on my lawn as well as Hydrangeas.
Did it help your hydrangeas? I can’t get mine to flower.
What plants should not put on?
My rhubarb is 7 in. Tall but the stalks are pale and thin. Will this help that. It was great before. Sue to a neighbour’s tree, my garden is now shady.
I don’t grow rhubarb, so I can’t speak from personal experience. In theory, it should work.
If it were me, I’d only apply to one plant and watch for a week or so for any negative reactions. If none, apply to the rest. 🙂
My outdoor foxtail ferns? Not as green as before, will this help make bigger & greener plants?
I don’t have any experience with foxtail ferns, unfortunately.
Works well for fig trees–now getting baseball size fruit. One cup per gallon of water, once a month. I start in April through fall.
Good to know! Thanks!
When your saga palm turns yellow apply a hand full of Epsome salt. ThenWater Sylvia
I have a 4 ft Anne Magnolia tree. The leaves turned yellow would espsonsalt help it?
Unfortunately, I’m not familiar with caring for Magnolia trees, and I don’t want to advise you incorrectly.
Like Elsie above I was wondering about Camellias, which seem to like similar conditions as Magnolias?
Lemon trees? No Fruit and curling leaves. Gets plenty of water and fertilizer
Yes! It works!
My citrus in the orchard love the epsom salts sprinkled around the drip line and then I water it in or sprinkle before rain is due. Trish in NZ
A friend told me to put Epsom salt on my tomato plant. She said it looked “sick”. So I did and 2 days later it looks so much better! And now I’ve learned that I can use it on my lawn as well! So thankful for all this information!
I added a handful to the base of my arberbity. I started on tax day and stopped on labor day, once a month. Results were tall, green, healthy evergreens.
How would you put this on your lawn? Spread directly or water spray?
WHAT ABOUT HOUSE PLANTS? PATHOS,, SANSEVERA, SPIDER, WANDERING JEW.
My expertise lies in the garden—not houseplants. Hopefully you can find the answer you’re looking for with an internet search. Wish I could be of more help!
Jordan:
Thank you for the Epsom Salt document.
Hopefully I can apply this to my garden failing Desert Rose.
As well as my ginger and turmeric plant.
I was curious about Epsom salt prior to reading your article. 👍🏾