Did you know you can produce dozens of strawberry plants for free using your existing plants?
This time-tested strategy has been used by strawberry farmers for decades to cut costs on their farms.
If you already have strawberry plants, you have everything you need to multiply them without buying new ones year after year!
Why Propagate Strawberry Runners?
There are two main benefits to propagating strawberry runners:
Create New Plants for Future Harvests: You’ll have bonus free plants to continue harvesting in seasons to come, expanding your strawberry patch without any additional cost.
Improve Your Current Crop: These runners actually take a lot of energy away from your strawberry plants.
When runners divert energy from strawberry production, your primary crop may not produce as many berries. By removing these runners, you trigger the plants to put all their energy into strawberry production instead.
What You’ll Need
The materials for this project are simple and you probably already have them on hand:
- Small pots or containers (3-4 inches deep with drainage holes)
- Potting mix or raised bed soil (avoid seed starting mix as it lacks nutrition)
- Stakes to hold runners in place (staples from a staple gun, paper clips, bobby pins, or short yard staples)
Important: Make sure your containers have drainage holes. These plantlets will sit in containers for about 3 weeks, which is plenty of time for them to get waterlogged without proper drainage.

Step 1: Prepare Your Containers
Fill your small pots with soil, aiming for about 3-4 inches of depth. You can use raised bed soil, potting mix, or a mixture of kitchen compost, aged horse manure, and worm castings.
The key is avoiding seed starting mix since these plantlets need more nutrition than seed starting mix provides.
Prepare one pot for each plantlet you want to root.

Prices pulled from the Amazon Product Advertising API on:
Product prices and availability are accurate as of the date/time indicated and are subject to change. Any price and availability information displayed on [relevant Amazon Site(s), as applicable] at the time of purchase will apply to the purchase of this product.
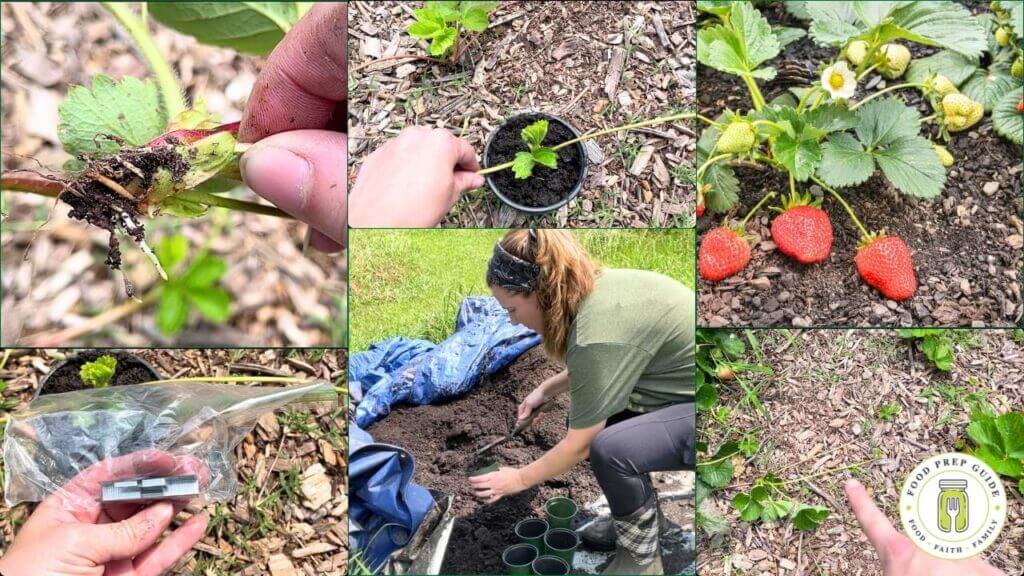
Step 2: Locate Healthy Runners
Head out to your strawberry patch and look for runners – these are long stems that grow out from your mature strawberry plants. You want to find runners that:
- Start from the main plant and have little baby plants (called plantlets) at the ends
- Look healthy and green (not brown or wilted)
- Already show signs of attempting to root (you’ll see little white roots forming)
The runners that are already starting to form roots are perfect candidates and should be prioritized since they’re ready to establish themselves.
Step 3: Position the Plantlets
Take one of your prepared pots and place the plantlet right in the center. Here’s the crucial part: do not disconnect the plantlet from the mother plant yet.
These plantlets can’t survive on their own at this stage, so keeping the stem connection intact is vital.

REMOVE THE GUESSWORK FROM GARDENING!
These garden plans include 10 themed garden blueprints—complete with beneficial pairings, proper spacing & more!
Step 4: Secure the Plantlets
Strawberry plantlets don’t stay put very well, so you need to help them along with some sort of stake.
Use staples from a staple gun, paper clips, bobby pins, or short yard staples to tack the stem down into the soil while keeping it attached to the mother plant.
Step 5: Wait for Root Development
Now comes the waiting period—about 3 weeks for roots to form.
You’ll know the roots have developed when you gently wiggle the base of the plant and feel resistance.
To double-check that your plantlet is ready, you can:
- Remove the staple and gently dust away some dirt to see the formed roots
- Test the resistance by gently wiggling the plant base
Step 6: Transplant Your New Plants
After about 3 weeks, once you’ve confirmed root development, you can cut the stem away from the mother plant. Your new strawberry plant is now ready for transplanting.
The soil in your little pot is usually sufficient for direct planting, though you can add it to whatever soil you’re already using in raised beds or containers.
Critical Planting Tip: Don’t Bury the Crown
When transplanting strawberries, it’s extremely important not to cover the crown of the strawberry plant. The crown is the thick, knotty-looking area right at the base of the plant where the stems meet the roots.
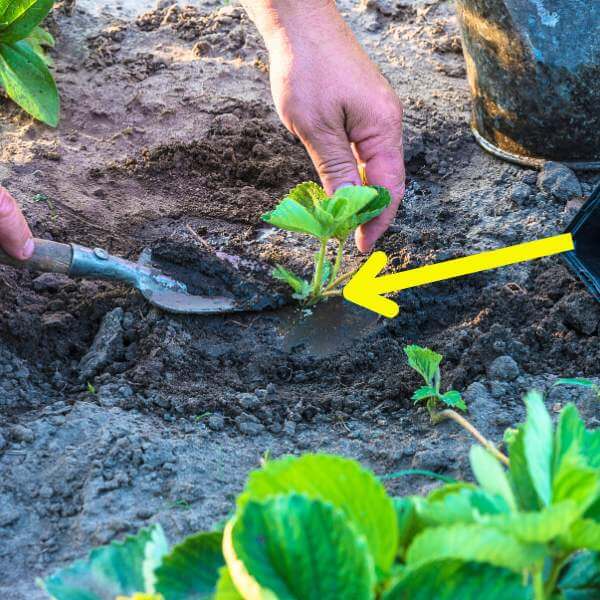
Plant strawberry plants very shallowly – it’s actually beneficial to leave just a little bit of the top of the roots exposed.
If you can see a tiny bit of root, you’re guaranteed not to accidentally bury the crown, which would be fatal for the plant.
Expanding Your Strawberry Patch
This method allows you to systematically expand your strawberry growing area. Simply continue this process throughout your strawberry patch, examining runners and looking for opportunities to start new plants.
Before you know it, you’ll have transformed a few strawberry plants into a thriving patch that will provide harvests for years to come.
This simple propagation technique puts the power of plant multiplication directly in your hands, saving money while building a more productive garden!