
Herbs are a kitchen staple, bringing vibrant flavors and aromas to dishes.
However, fresh herbs often have a short shelf life, making it challenging to keep them on hand.
Drying herbs is a fantastic solution, allowing you to preserve their flavor for long-term storage.
Whether you have a flourishing herb garden or simply want to make the most of store-bought herbs, this guide will walk you through the best methods to dry and store your herbs properly.
Best Herbs for Drying
While almost any herb can be dried, some hold up better than others.
Here are some of the best herbs for drying:
3 Most Effective Methods for Drying Herbs
1. Air Drying
This drying method works particularly well for sturdy herbs like rosemary, thyme, and oregano.

How To:
- Harvest: Cut the herbs mid-morning after the dew has dried but before the sun is too hot.
- Clean: Gently shake off any dirt or insects. Rinse lightly and pat dry with a paper towel, or use a salad spinner.
- Bundle: Gather small bunches of herbs and tie the stems together with a piece of string or a rubber band.
- Hang: Hang the bundles upside down in a warm, dry, and well-ventilated area away from direct sunlight.
- Wait: Allow the herbs to dry for about 1-2 weeks. They are ready when the leaves crumble easily between your fingers.
GET THE BOOK!
Food Prep Guide: A Plan for Money-Saving, Self-Sustaining Abundance in Hard Times is a book of strategies & tutorials that help you build a long-term pantry that sustains your family on a budget—even in the midst of rising food costs.
Includes detailed tutorials for dehydrating!
2. Oven Drying
Oven drying is great for herbs like basil, mint, and parsley.
How To:
- Harvest and Clean: Follow the same steps as for air drying but don’t bundle the herbs.
- Preheat Oven: Set your oven to its lowest setting, typically around 150°F (65°C).
- Prepare Herbs: Spread the herbs in a single layer on a baking sheet lined with parchment paper.
- Dry: Place the baking sheet in the oven and leave the oven door slightly ajar to allow moisture to escape. Check the herbs every 30 minutes and remove when they are dry and crumbly (usually 1-2 hours).
3. Using a Dehydrator
When you need to dry large quantities or delicate herbs that require controlled drying conditions, opt for a dehydrator.
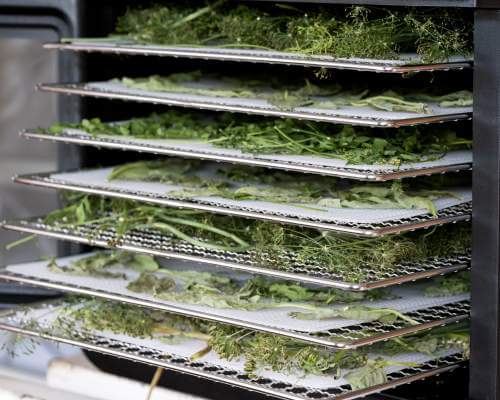
How To:
- Harvest and Clean: As with other methods, clean and dry your herbs before starting.
- Arrange: Place the herbs in a single layer on the dehydrator trays.
- Set Temperature: Set the dehydrator to around 95°F (35°C).
- Dry: Dry the herbs for 1-4 hours, checking periodically until they are completely dry and crumbly.

Prices pulled from the Amazon Product Advertising API on:
Product prices and availability are accurate as of the date/time indicated and are subject to change. Any price and availability information displayed on [relevant Amazon Site(s), as applicable] at the time of purchase will apply to the purchase of this product.
How to Store Dried Herbs
Once your herbs are dried, proper storage is key to maintaining their flavor and potency.
Follow these tips for the best results:
FREE FOOD STORAGE PLAN!

Does gathering and storing a year’s worth of food for your family seem overwhelming and unachievable?
Make it easy with our step-by-step plan. Subscribe to our weekly newsletter & we’ll send it to you FREE!
Store dried herbs in airtight containers, such as glass jars with tight-fitting lids. Keep the containers in a cool, dark place away from direct sunlight and heat sources.
Be sure to label each container with the herb’s name and the date it was dried. (Many herbs look oddly similar once dehydrated!)
For maximum flavor, use dried herbs within a year. That said, as long as the herbs were thoroughly dried, they will not “spoil” like other foods.
Over time, they simply lose potency, so be generous with your quantities if using older dried herbs.
For more detailed information, read our complete guide to storing herbs.
By following these methods and tips, you can enjoy the taste and aroma of garden-fresh herbs all year round. Happy drying!