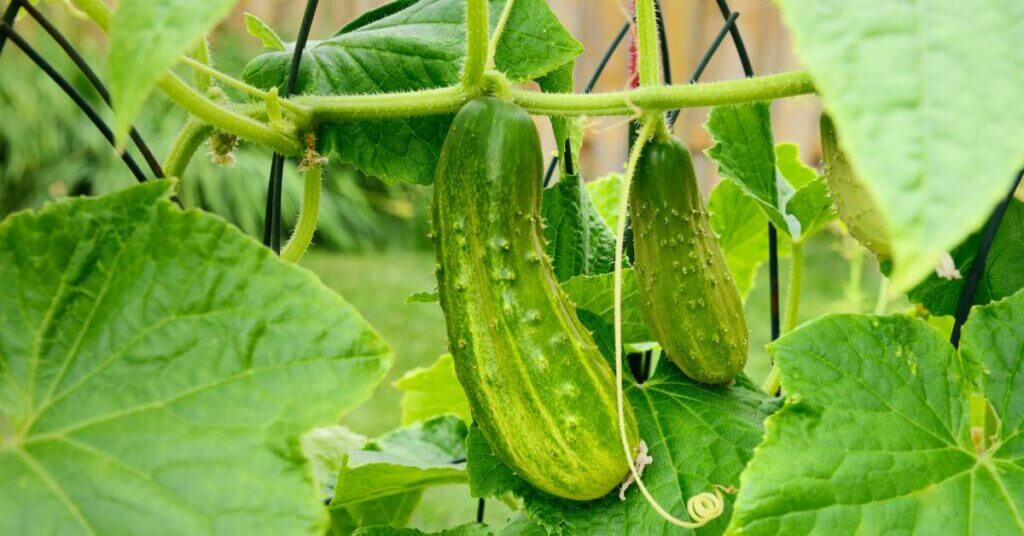
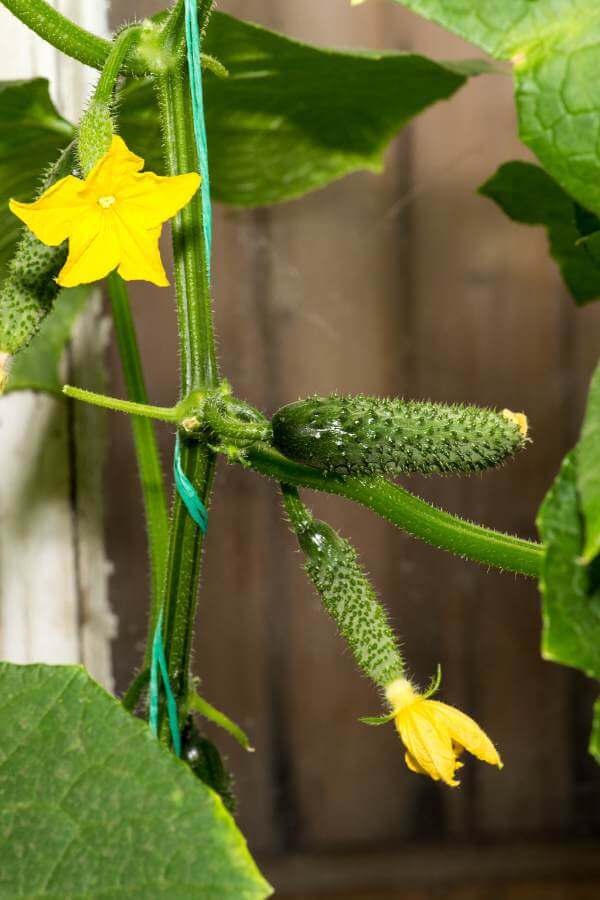
Cucumbers are a favorite in many gardens, but they often need support to grow their best.
Trellising not only helps in maximizing space but also keeps the fruit clean and easy to harvest!
Here are 10 DIY cucumber trellis ideas to inspire your next garden project:
1. A-Frame Trellis
An A-frame trellis is a versatile and efficient structure for supporting cucumber plants.
Here’s how to build and utilize an A-frame trellis for your garden.
Materials Needed:
- Wooden Stakes or Poles: Four sturdy stakes or poles, preferably 6-8 feet long.
- Wire or Mesh: Chicken wire, garden netting, or a similar type of mesh.
- Zip Ties or Twine: For securing the wire or mesh to the frame.
- Hammer and Nails or Screws and a Drill: For securing the frame.
- Measuring Tape: To ensure the dimensions are accurate.
- Saw: If you need to cut the stakes or poles to size.

Prices pulled from the Amazon Product Advertising API on:
Product prices and availability are accurate as of the date/time indicated and are subject to change. Any price and availability information displayed on [relevant Amazon Site(s), as applicable] at the time of purchase will apply to the purchase of this product.
Step-by-Step Instructions:
- Prepare the Stakes:
- Cut the stakes or poles to the desired length, ensuring they are equal in size. For a typical A-frame trellis, 6-8 feet in height is ideal to provide enough vertical space for the cucumber vines.
- Create the A-Frame Structure:
- Take two stakes and form an “A” shape by crossing them at the top. Secure them together at the top with a nail or screw, leaving enough overlap so that the stakes can form a stable base when spread apart at the bottom.
- Repeat the process with the other two stakes to create the second side of the A-frame.
- Connect the Frames:
- Place the two A-shaped frames parallel to each other, about 2-3 feet apart (depending on the width you want).
- Use additional stakes or poles to connect the two frames at the top and the base, creating a stable A-frame structure.
- Attach the Wire or Mesh:
- Cut the wire or mesh to fit the frame. It should cover the entire vertical space between the stakes.
- Secure the wire or mesh to the A-frame using zip ties or twine. Make sure it is taut and well-secured to support the weight of the cucumber vines.
- Install the Trellis:
- Position the A-frame trellis in your garden where you plan to plant cucumbers. Ensure it is stable and securely anchored to the ground. You can drive additional stakes into the ground at the base of the A-frame for extra stability.
- Planting Cucumbers:
- Plant cucumber seeds or seedlings at the base of the A-frame trellis, spacing them according to the seed packet instructions.
- As the cucumber plants grow, guide the vines to climb the trellis. They will naturally cling to the wire or mesh, but you can gently tie them with garden twine if needed.
Dream of Filling Your Pantry with Homegrown Staples?
Plan your garden with our FREE PRINTABLE—Staples Garden: What to Plant to Feed Your Family for a Year!
2. Ladder Trellis
Repurposing an old ladder as a cucumber trellis is an excellent way to support your plants while giving new life to a common household item.
This approach not only saves money but also adds a rustic charm to your garden!
Materials Needed:
- Old Ladder: Any old wooden or metal ladder that is no longer safe for climbing.
- Sandpaper or Sander: To smooth any rough edges.
- Paint or Wood Stain (optional): To protect the wood and enhance its appearance.
- Garden Twine or Zip Ties: For securing cucumber vines if needed.
- Anchors or Stakes (optional): To secure the ladder in place.
Step-by-Step Instructions:
- Prepare the Ladder:
- Clean the ladder thoroughly to remove any dirt or debris.
- If the ladder is wooden, use sandpaper or a sander to smooth out any rough edges or splinters.
- Paint or Stain the Ladder (Optional):
- If you want to protect the wood from the elements or give the ladder a fresh look, apply a coat of paint or wood stain. Allow it to dry completely before proceeding.
- Position the Ladder in Your Garden:
- Choose a sunny spot in your garden where you plan to grow cucumbers.
- Lean the ladder against a sturdy support, such as a fence or wall, or place it securely in the ground. Ensure it is stable and won’t tip over. If necessary, use stakes or anchors to secure the ladder in place.
Now you’re ready to plant your cucumbers at the base of the ladder!
Bonus: Tips to Make the Most of a Ladder Trellis
- Dual Purpose: Use the steps of the ladder to place potted plants or garden decorations for added visual interest.
- Vertical Garden: Attach small pots or planters to the rungs of the ladder for a vertical garden effect. This is perfect for growing herbs or flowers alongside your cucumbers.
- Lighting: Hang outdoor fairy lights or lanterns on the ladder for a charming evening garden ambiance.
- Seasonal Decorations: Decorate the ladder with seasonal elements like wreaths, ribbons, or holiday ornaments to add a festive touch to your garden.
3. String Trellis
A string trellis offers a minimalistic approach using heavy-duty string or twine to create a vertical growing space, allowing cucumbers to climb freely and with plenty of airflow.
Materials Needed:
- Heavy-Duty String or Twine: Choose a durable material that can withstand the weight of the cucumber vines and the outdoor elements.
- Support Poles or Stakes: Two tall, sturdy poles or stakes (6-8 feet) to support the strings.
- Horizontal Support Bar (optional): A bar or rod to run across the top of the poles for additional stability.
- Garden Hooks or Nails: For securing the string to the poles and ground.
- Hammer or Mallet: To drive the stakes into the ground.
- Measuring Tape: To ensure even spacing between the strings.
- Scissors: To cut the string.
Step-by-Step Instructions:
- Install the Support Poles:
- Select a sunny location in your garden where you want to grow cucumbers.
- Drive the two support poles or stakes into the ground, approximately 4-6 feet apart. Ensure they are firmly in place and stable.
- Attach the Horizontal Support Bar (Optional):
- If using a horizontal support bar, secure it across the top of the two poles. This adds extra stability and helps keep the strings taut.
- Attach the String to the Top of the Poles:
- Cut the string or twine into lengths that will reach from the top of the poles to the ground.
- Tie one end of each string securely to the top of one pole, spacing them evenly along the length of the pole. Repeat this process for the second pole if not using a horizontal bar.
- Secure the String to the Ground:
- Stretch each string down to the ground, keeping it taut.
- Secure the end of each string to the ground using garden hooks, nails, or by tying them to smaller stakes driven into the ground.
Tips for Expanding a String Trellis
- Trellis Frames: For added stability, consider creating a frame using additional poles or stakes to form a rectangular structure, with strings running vertically within the frame.
- Double Rows: If you have more space, set up two parallel rows of string trellises with a walkway in between. This allows for better access to your plants and makes harvesting easier.
- String Materials: Use biodegradable twine for an eco-friendly option. If using synthetic string, ensure it’s UV-resistant to withstand sun exposure.
- Adjustable Strings: Use hooks or carabiners at the top and bottom to make the strings adjustable. This allows you to tighten or loosen them as needed throughout the growing season.
4. Cattle Panel Trellis
Cattle panels, typically made of galvanized steel, are strong and long-lasting, making them perfect for heavy-bearing plants like cucumbers.
Video Tutorial: Installing a Cattle Panel Trellis

Materials Needed:
- Cattle Panel: A single cattle panel, usually 16 feet long and 50 inches tall.
- T-posts, Rebar, or Metal Stakes: Four sturdy T-posts or metal stakes to support the panel.
- Zip Ties, Wire, or Twine: For securing the panel to the stakes.
- Post Driver or Hammer: To drive the T-posts or stakes into the ground.
- Bolt Cutters or Hacksaw (Optional): If you need to cut the cattle panel to fit your space.
- Measuring Tape: To ensure accurate placement of the posts.
- Gloves: To protect your hands while handling the cattle panel.
Step-by-Step Instructions:
- Select and Prepare the Site:
- Choose a sunny location in your garden where you plan to grow cucumbers.
- Measure and mark the area where you’ll install the trellis, ensuring it’s level and free of obstructions.
- Install the T-Posts or Stakes:
- Drive the T-posts or metal stakes into the ground at the corners of your marked area. Space them about 4 feet apart, ensuring they are securely anchored.
- Use a post driver or hammer to drive the posts deep enough into the ground for stability.
- Position the Cattle Panel:
- Stand the cattle panel upright and position it between the T-posts or stakes.
- If the panel is too long for your space, use bolt cutters or a hacksaw to trim it to the desired length. Wear gloves to protect your hands from sharp edges.
- Secure the Panel to the Posts:
- Attach the cattle panel to the T-posts or stakes using zip ties, wire, or twine. Secure it at multiple points along each post to ensure it’s firmly in place.
- Make sure the panel is taut and stable, with no significant movement when pushed. At this point, you’re ready to prepare the soil and plant at the base of the cattle panel!
Ideas for Using Your Cattle Panel Trellis
- Arched Trellis: For a more decorative and functional structure, bend the cattle panel into an arch. Secure each end to a pair of T-posts or stakes, creating an archway that cucumbers can climb over.
- Multiple Panels: If you have a larger garden, use multiple cattle panels arranged in a series or connected in different shapes to create a more extensive trellis system.
- Companion Planting: Plant other climbing plants like beans or peas alongside cucumbers to maximize the use of your trellis space.
- Season Extension: Attach shade cloth or plastic sheeting to the cattle panel to create a temporary greenhouse or shade structure during different growing seasons.
5. PVC Pipe Trellis
A PVC pipe trellis is a lightweight, durable, and cost-effective option for supporting cucumber plants.
PVC pipes are easy to work with, resistant to weather, and can be configured into various shapes to suit your garden needs!
Materials Needed:
- PVC Pipes: 1-inch diameter PVC pipes are ideal. The length depends on the height and width of your trellis.
- PVC Elbow and T-Joints: To connect the pipes and create the structure.
- PVC Pipe Cutter or Saw: For cutting the pipes to the desired length.
- Zip Ties or Garden Twine: For attaching the netting or mesh.
- Plastic Netting or Mesh: To provide a climbing surface for the cucumber vines.
- PVC Glue (Optional): For extra stability in the joints.
- Measuring Tape: To measure and cut the pipes accurately.
- Marker: To mark cutting points on the pipes.
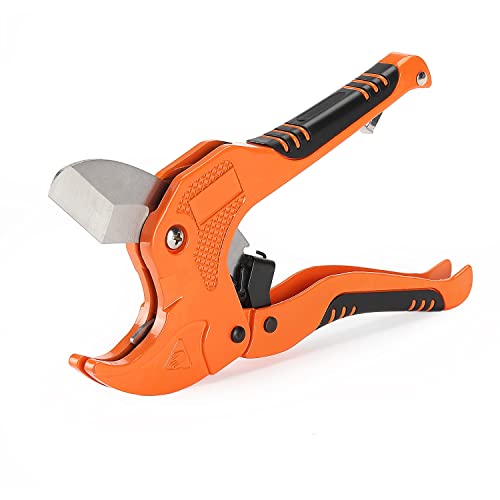
Prices pulled from the Amazon Product Advertising API on:
Product prices and availability are accurate as of the date/time indicated and are subject to change. Any price and availability information displayed on [relevant Amazon Site(s), as applicable] at the time of purchase will apply to the purchase of this product.
Step-by-Step Instructions:
- Design Your Trellis:
- Decide on the dimensions of your trellis. A typical size might be 6 feet tall and 4 feet wide, but you can adjust based on your garden space.
- Sketch a simple design, noting where you’ll need elbow joints (for corners) and T-joints (for intersections).
- Cut the PVC Pipes:
- Measure and mark the PVC pipes according to your design. For a 6×4 feet trellis, you might need:
- Four 6-foot pieces for the vertical supports.
- Four 4-foot pieces for the horizontal supports.
- Additional shorter pieces if creating crossbars for extra support.
- Use a PVC pipe cutter or saw to cut the pipes to the desired lengths.
- Measure and mark the PVC pipes according to your design. For a 6×4 feet trellis, you might need:
- Assemble the Frame:
- Start with the base. Connect the horizontal and vertical pipes using T-joints at the base and elbow joints at the corners.
- Assemble the top frame separately, then attach it to the vertical supports using additional T-joints.
- If you want extra stability, add crossbars in the middle of the trellis using T-joints.
- Secure the Joints:
- For added stability, you can apply PVC glue to the joints before connecting them. This step is optional but recommended if you want a more permanent structure.
- Attach the Netting or Mesh:
- Cut the plastic netting or mesh to fit the frame of your trellis.
- Use zip ties or garden twine to attach the netting to the PVC frame. Ensure it is taut and securely fastened at multiple points.
- Install the Trellis in Your Garden:
- Position the trellis in your garden where you plan to grow cucumbers. Make sure it is stable and firmly anchored. If needed, drive additional stakes into the ground and attach them to the trellis for extra support.
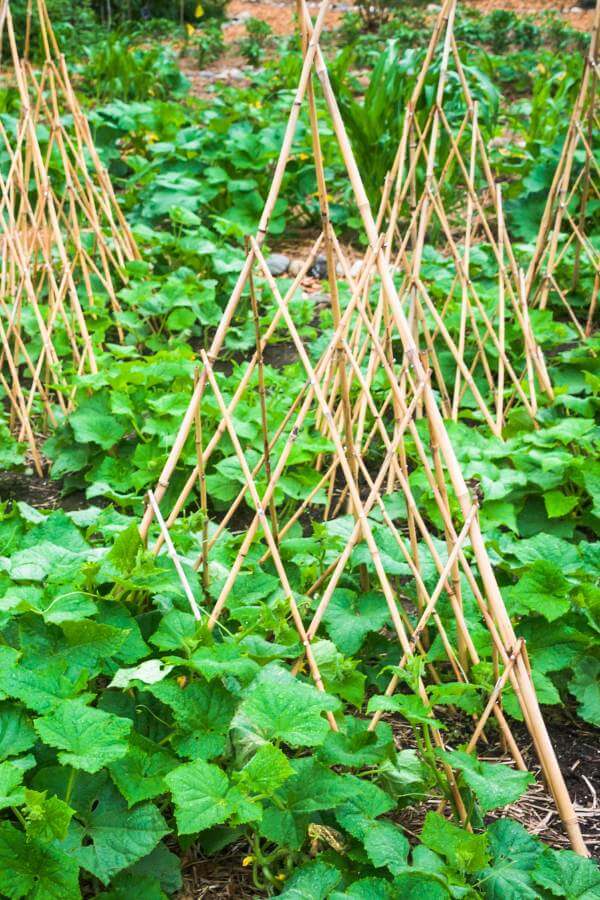
6. Teepee Trellis
A teepee trellis is a simple, rustic, and highly effective structure for supporting cucumber plants.
Its conical shape provides excellent stability and maximizes vertical space, making it ideal for small gardens.
Materials Needed:
- Bamboo Poles or Wooden Stakes: Six to eight poles, each about 6-8 feet long.
- Garden Twine or Rope: For tying the poles together.
- Garden Twine or Netting: For additional support if needed.
- Scissors: To cut the twine or rope.
- Measuring Tape: To ensure even spacing and pole length.
Step-by-Step Instructions:
- Prepare the Poles:
- Gather six to eight bamboo poles or wooden stakes. Ensure they are all roughly the same length.
- Position the Poles:
- Choose a sunny spot in your garden where you plan to grow cucumbers.
- Arrange the poles in a circle with an even spacing of about 2-3 feet in diameter. The wider the base, the more stability the teepee will have.
- Form the Teepee:
- Gather the tops of the poles together and tie them securely with garden twine or rope about 6-12 inches from the top. Wrap the twine tightly several times and knot it securely to ensure the structure is stable.
- Spread the bottoms of the poles out to form a conical teepee shape. Ensure that the structure is stable and evenly balanced.
- Secure the Poles in the Ground:
- Push the bottom ends of the poles into the ground to anchor the structure. If the soil is hard, you can dig small holes for each pole to make it easier to insert them.
- Add Additional Support (Optional):
- If desired, create additional horizontal supports by tying garden twine or attaching netting horizontally around the teepee at various heights. This provides more surfaces for the cucumber vines to climb.
- Start at the bottom and work your way up, spacing the horizontal supports about 1 foot apart.
- Once done, you’re ready to plant!
7. Arbor Trellis
An arbor trellis is a beautiful and functional garden structure that not only supports cucumber plants but also serves as a charming focal point in your garden.
An arbor trellis can create a stunning entryway or garden pathway, providing both aesthetic appeal and practical support for climbing plants.
Materials Needed:
- Wooden or Metal Arbor Kit: You can purchase a pre-made arbor kit or build your own using wooden beams and posts.
- Wood Screws or Nails: For assembling the arbor.
- Hammer or Drill: To drive the screws or nails.
- Measuring Tape: To ensure accurate measurements.
- Level: To ensure the structure is even and balanced.
- Garden Twine or Netting: For additional climbing support.
- L-Brackets or Corner Braces (Optional): For added stability at the joints.
- Paint or Wood Stain (Optional): To protect and decorate the wood.
Step-by-Step Instructions:
- Choose the Location:
- Select a sunny spot in your garden where you want to place the arbor trellis. Ensure it’s positioned to create a beautiful entryway or pathway.
- Prepare the Materials:
- If using a pre-made arbor kit, follow the manufacturer’s instructions for assembly.
- If building from scratch, measure and cut the wooden beams and posts to the desired dimensions. A typical arbor might be around 7-8 feet tall and 3-4 feet wide.
- Assemble the Arbor:
- Start by constructing the side panels. Attach the vertical posts to the horizontal beams using wood screws or nails. Ensure the joints are secure and stable.
- Use a level to make sure the structure is even.
- If desired, add L-brackets or corner braces at the joints for extra stability.
- Install the Arbor:
- Dig holes for the vertical posts to ensure the arbor is anchored firmly in the ground. The holes should be about 1-2 feet deep, depending on the height of your arbor.
- Place the posts into the holes and fill with soil, packing it down firmly to secure the posts.
- Alternatively, you can use concrete to set the posts for additional stability.
- Add Climbing Support:
- Attach garden twine or netting to the sides and top of the arbor to provide additional surfaces for the cucumber vines to climb.
- Secure the twine or netting tightly to ensure it can support the weight of the plants.
- At this point, you can plant or paint/stain the arbor.
- Paint or Stain the Arbor (Optional):
- If you want to protect the wood and enhance the appearance of your arbor, apply a coat of paint or wood stain. Allow it to dry completely before planting.
Creative Ways to Use an Arbor Trellis
- Dual Purpose: Use the arbor trellis as a support for other climbing plants like beans, peas, or flowering vines to create a lush, green archway.
- Seasonal Decorations: Decorate the arbor with lights, ribbons, or seasonal decorations to enhance its visual appeal throughout the year.
- Garden Seating: Place a bench or garden seating under the arbor to create a cozy, shaded spot for relaxation.
- Integrated Planters: Attach small planters or hanging baskets to the sides of the arbor for additional planting space.
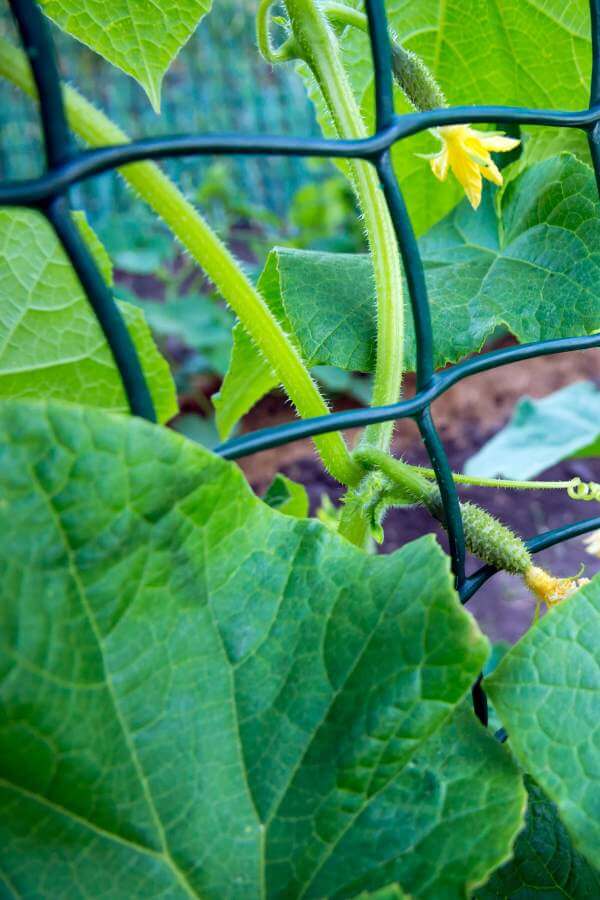
8. Wire Mesh Trellis
Wire mesh is easy to work with and can be adapted to fit various garden spaces and configurations. They work particularly well for supporting vining crops like cucumbers!
Materials Needed:
- Wire Mesh: Galvanized wire mesh or hardware cloth, with openings large enough for cucumber vines to pass through. A roll of mesh about 3-4 feet wide and as long as needed for your trellis.
- Wooden or Metal Posts: Four to six posts, depending on the length of your trellis.
- Wire Cutters: For cutting the wire mesh to size.
- Staple Gun or Wire Ties: For attaching the mesh to the posts.
- Hammer or Mallet: To drive the posts into the ground.
- Measuring Tape: To measure the dimensions of your trellis.
- Gloves: To protect your hands while handling the wire mesh.
Step-by-Step Instructions:
- Select the Location:
- Choose a sunny spot in your garden where you plan to grow cucumbers. Ensure the area is level and free of obstructions.
- Measure and Cut the Wire Mesh:
- Measure the length and height you want for your trellis.
- Use wire cutters to cut the wire mesh to the desired dimensions. Wear gloves to protect your hands from sharp edges.
- Prepare the Posts:
- Determine the spacing for your posts. For a sturdy trellis, space the posts about 3-4 feet apart.
- Drive the posts into the ground at the designated spots, ensuring they are firmly anchored and aligned.
- Attach the Wire Mesh to the Posts:
- Starting at one end, attach the wire mesh to the first post using a staple gun or wire ties. Ensure the mesh is taut and secure.
- Continue attaching the mesh to each subsequent post, pulling it tight as you go to maintain tension.
- If using a staple gun, staple the mesh at multiple points along each post. If using wire ties, wrap them around the post and mesh, tightening securely.
- Secure the Top and Bottom:
- For added stability, attach horizontal supports at the top and bottom of the posts. You can use additional wire mesh, wooden strips, or metal bars.
- Secure the mesh to these horizontal supports using staples or wire ties. You’re ready to plant!
Tips and Ideas:
- Trellis Shapes: Wire mesh can be shaped into arches, tunnels, or lean-to structures for added visual interest and functionality.
- Protective Coating: Consider using PVC-coated wire mesh for added durability and protection against rust.
- Companion Planting: Plant other climbing plants like beans or peas alongside cucumbers to maximize the use of your trellis.
- Decorative Elements: Add decorative elements like wind chimes, hanging baskets, or fairy lights to enhance the aesthetic appeal of your wire mesh trellis.
9. Garden Netting Trellis
A garden netting trellis is an economical and flexible solution for supporting cucumber plants.
Garden netting is lightweight, easy to install, and can be adapted to various spaces and configurations. You can even use bird netting or that type of plastic fencing that’s used to keep deer out of your garden.
Materials Needed:
- Garden Netting: Durable, UV-resistant netting with openings large enough for cucumber vines to pass through.
- Wooden or Metal Stakes/Posts: Four to six stakes or posts, depending on the length of your trellis.
- Zip Ties, Twine, or Clips: For securing the netting to the posts.
- Hammer or Mallet: To drive the stakes into the ground.
- Measuring Tape: To measure the dimensions of your trellis.
- Scissors: To cut the netting to the desired size.
Step-by-Step Instructions:
- Select the Location:
- Choose a sunny spot in your garden where you plan to grow cucumbers. Ensure the area is level and free of obstructions.
- Prepare the Stakes/Posts:
- Determine the spacing for your stakes. For a sturdy trellis, space the stakes about 3-4 feet apart.
- Drive the stakes into the ground at the designated spots, ensuring they are firmly anchored and aligned.
- Measure and Cut the Netting:
- Measure the length and height needed for your trellis. Ensure the netting will cover the entire area between the stakes.
- Use scissors to cut the netting to the desired dimensions.
- Attach the Netting to the Stakes:
- Starting at one end, secure the top corner of the netting to the first stake using zip ties, twine, or clips. Ensure the netting is taut and at the desired height.
- Continue attaching the netting to each subsequent stake, pulling it tight as you go to maintain tension.
- Secure the bottom edge of the netting to the stakes or to additional stakes driven into the ground if necessary.
- Secure the Sides:
- Ensure the sides of the netting are securely attached to the stakes. This helps maintain the structure’s stability and prevents the netting from sagging.
How to Make the Most of Your Garden Netting Trellis
- Double Layer: For added support, especially if you have heavy-bearing plants, consider using a double layer of netting.
- Adjustable Height: Use taller stakes and attach the netting at different heights to accommodate the growth of your plants.
- Portable Trellis: For a portable option, create a frame using PVC pipes or wooden strips and attach the netting to the frame. This can be moved around the garden as needed.
- Protective Cover: In addition to supporting plants, garden netting can also be used to cover the plants and protect them from pests or harsh weather conditions.
10. Recycled Bike Wheel Trellis
A recycled bike wheel trellis is an innovative and eco-friendly way to support cucumber plants while giving new life to old bicycle wheels.
This unique trellis adds a particularly whimsical and artistic element to your garden!
Materials Needed:
- Old Bike Wheels: Two or more wheels, depending on the height and design of your trellis.
- Metal or Wooden Poles/Posts: Two tall, sturdy poles or posts to support the wheels.
- Wire, Zip Ties, or Heavy-Duty Twine: For attaching the wheels to the poles.
- Wire Cutters: To cut wire or twine to size.
- Hammer or Mallet: To drive the posts into the ground.
- Measuring Tape: To measure spacing and alignment.
- Gloves: To protect your hands while handling the bike wheels.
Step-by-Step Instructions:
- Prepare the Bike Wheels:
- Clean the bike wheels to remove any dirt or grease.
- Remove any remaining spokes if desired, though leaving them can provide additional climbing surfaces for the cucumber vines.
- Select the Location:
- Choose a sunny spot in your garden where you plan to grow cucumbers. Ensure the area is level and free of obstructions.
- Install the Support Poles:
- Drive the metal or wooden poles into the ground at your chosen location. Ensure they are firmly anchored and evenly spaced. The distance between the poles should be slightly less than the diameter of the bike wheels.
- Use a level to make sure the poles are vertical and stable.
- Attach the Bike Wheels to the Poles:
- Position the first bike wheel at the desired height on the poles. This can be at ground level or higher, depending on your design.
- Secure the bike wheel to the poles using wire, zip ties, or heavy-duty twine. Wrap the wire or twine around the wheel and poles tightly to ensure stability.
- Repeat the process for additional wheels, spacing them evenly up the height of the poles. Ensure each wheel is securely attached and level.
- Create Additional Climbing Supports:
- If desired, run additional wire or twine between the bike wheels or across the spokes to create more climbing surfaces for the cucumber vines.
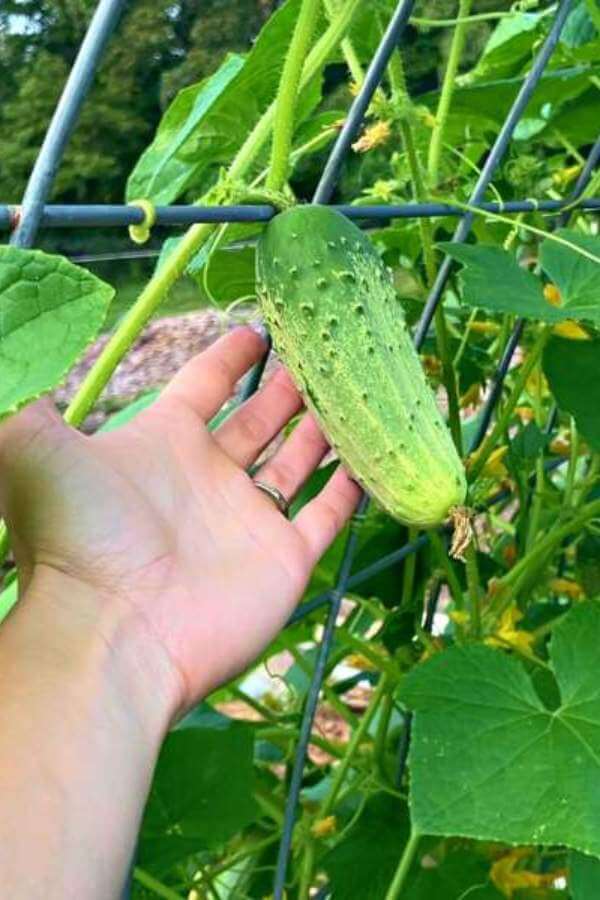
Vertical trellises are one of my favorite ways to maximize garden space. And, because cucumbers are especially susceptible to fungal diseases caused by restricted airflow, I always grow cucumbers on a trellis because of its “airy” nature.
Plus, growing cucumbers on a trellis makes it WAY easier (& fun!) to harvest.
By following the detailed guides and incorporating the tips and ideas provided, you can build a sturdy and effective trellis that will support your cucumber plants throughout the growing season.
Enjoy watching your cucumbers thrive and relish the ease of harvesting fresh, homegrown produce!