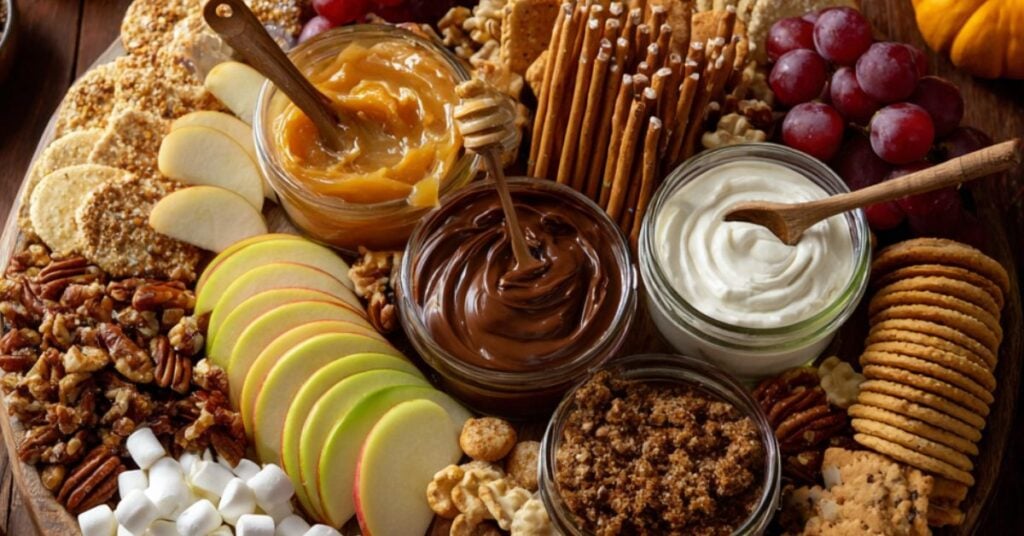
Fall dessert tables just got a major upgrade with this caramel apple charcuterie board that brings together all the cozy flavors of the season in one stunning spread.
Think beyond traditional apple pie and create an interactive dessert experience that lets everyone build their perfect autumn treat.
This board captures everything we love about caramel apples but makes it infinitely more shareable and customizable. Your guests can dip, drizzle, and combine flavors to their heart’s content while you sit back and watch the magic happen.
The best part? No baking required, which means you can put together an impressive dessert spread in under 30 minutes.
Why You’ll Love This Recipe
This dessert charcuterie board takes all the work out of fall entertaining while delivering maximum visual impact. You can prep everything ahead of time and assemble it right before guests arrive.
Kids and adults alike will love the interactive element of building their own dessert combinations. It’s like having a DIY caramel apple bar that looks absolutely gorgeous on your table.
The variety means everyone finds something they love, from simple apple slices with caramel to elaborate combinations with cookies and candies.
Plus, it’s naturally gluten-free friendly with plenty of options for different dietary needs.
Ingredients
Fresh Fruits
- 4-5 Honeycrisp apples, cored and sliced
- 2 Granny Smith apples, cored and sliced
- 2 tablespoons fresh lemon juice
- 1 cup red grapes
- 1 cup dried apple chips
Dips & Drizzles
- 1 1/2 cups warm caramel sauce
- 1 cup cream cheese fruit dip
- 1/2 cup Nutella or chocolate hazelnut spread
- 1/4 cup peanut butter (warmed slightly)
- 1/4 cup maple syrup

Prices pulled from the Amazon Product Advertising API on:
Product prices and availability are accurate as of the date/time indicated and are subject to change. Any price and availability information displayed on [relevant Amazon Site(s), as applicable] at the time of purchase will apply to the purchase of this product.
Cookies & Sweets
- 12 gingersnap cookies
- 10 vanilla wafers
- 8 oatmeal cookies, broken into pieces
- 1 cup mini marshmallows
- 1/2 cup butterscotch chips
- 1/2 cup mini chocolate chips

Prices pulled from the Amazon Product Advertising API on:
Product prices and availability are accurate as of the date/time indicated and are subject to change. Any price and availability information displayed on [relevant Amazon Site(s), as applicable] at the time of purchase will apply to the purchase of this product.
Nuts & Toppings
- 1 cup chopped pecans
- 1/2 cup chopped walnuts
- 1/4 cup crushed graham crackers
- 1/4 cup cinnamon sugar
- 2 tablespoons sea salt flakes
Extras
- 12-15 caramel candies, unwrapped
- 1/2 cup toffee bits
- Small wooden skewers or toothpicks
- Pretzel rods for dipping
Prices pulled from the Amazon Product Advertising API on:
Product prices and availability are accurate as of the date/time indicated and are subject to change. Any price and availability information displayed on [relevant Amazon Site(s), as applicable] at the time of purchase will apply to the purchase of this product.
Instructions
Start by preparing your apples since they’ll take up the most space on your board. Slice them into wedges and immediately toss with lemon juice to prevent browning.
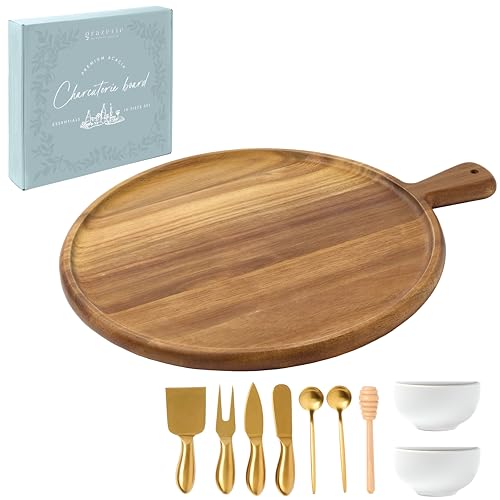
Choose your largest wooden board or stone slab – you’ll need plenty of room for all these components. A 24-inch round or rectangular board works perfectly.
Place your small bowls around the board first for the caramel sauce, cream cheese dip, Nutella, peanut butter, and maple syrup. This helps you visualize the layout before adding everything else.
Arrange the apple slices in fan patterns around the bowls, alternating between Honeycrisp and Granny Smith for color contrast. Keep some slices near each dip for easy access.
Add the grapes in small clusters throughout the board, using them to fill gaps and add pops of color between other elements.
Position cookies around the board in small stacks and scatter some broken oatmeal cookie pieces for texture. The different shapes and sizes create visual interest.
Sprinkle the nuts in small piles near the dips – they’re perfect for rolling caramel-dipped apples through for extra crunch.
Fill small spaces with mini marshmallows, chocolate chips, and butterscotch chips. These tiny elements help tie everything together visually.
Add the dried apple chips standing upright behind other elements for height and texture variation.
Scatter the unwrapped caramel candies and toffee bits throughout the board as little surprise treats.
Create small piles of graham cracker crumbs and cinnamon sugar for rolling dipped apples. Put the sea salt flakes in a tiny pinch bowl for those who love sweet and salty combinations.
Tuck pretzel rods around the edges – they make excellent dippers and add a salty contrast to all the sweetness.
Place small spoons in each dip bowl and scatter toothpicks around the board for easy grabbing.
Serving Tips
Serve immediately after assembly for the freshest apple slices. The caramel sauce should be warm but not hot – it thickens as it cools, making it perfect for dipping.
Provide small plates so guests can build their creations without making a mess. Consider having wet wipes nearby since things can get delightfully sticky!
Print
Caramel Apple Dessert Charcuterie Board
This board features fresh apple slices alongside warm caramel sauce, cream cheese dip, Nutella, and an array of cookies, nuts, and sweet toppings. Perfect for 10-12 people!
- Total Time: 25 minutes
- Yield: 10–12 servings 1x
Ingredients
Fresh Fruits
- 4–5 Honeycrisp apples, cored and sliced
- 2 Granny Smith apples, cored and sliced
- 2 tablespoons fresh lemon juice
- 1 cup red grapes
- 1 cup dried apple chips
Dips & Drizzles
- 1 1/2 cups warm caramel sauce
- 1 cup cream cheese fruit dip
- 1/2 cup Nutella or chocolate hazelnut spread
- 1/4 cup peanut butter (warmed slightly)
- 1/4 cup maple syrup
Cookies & Sweets
- 12 gingersnap cookies
- 10 vanilla wafers
- 8 oatmeal cookies, broken into pieces
- 1 cup mini marshmallows
- 1/2 cup butterscotch chips
- 1/2 cup mini chocolate chips
Nuts & Toppings
- 1 cup chopped pecans
- 1/2 cup chopped walnuts
- 1/4 cup crushed graham crackers
- 1/4 cup cinnamon sugar
- 2 tablespoons sea salt flakes
Extras
- 12–15 caramel candies, unwrapped
- 1/2 cup toffee bits
- Small wooden skewers or toothpicks
- Pretzel rods for dipping
Instructions
- Start by preparing your apples since they’ll take up the most space on your board. Slice them into wedges and immediately toss with lemon juice to prevent browning.
- Choose your largest wooden board or stone slab – you’ll need plenty of room for all these components. A 24-inch round or rectangular board works perfectly.
- Place your small bowls around the board first for the caramel sauce, cream cheese dip, Nutella, peanut butter, and maple syrup. This helps you visualize the layout before adding everything else.
- Arrange the apple slices in fan patterns around the bowls, alternating between Honeycrisp and Granny Smith for color contrast. Keep some slices near each dip for easy access.
- Add the grapes in small clusters throughout the board, using them to fill gaps and add pops of color between other elements.
- Position cookies around the board in small stacks and scatter some broken oatmeal cookie pieces for texture. The different shapes and sizes create visual interest.
- Sprinkle the nuts in small piles near the dips – they’re perfect for rolling caramel-dipped apples through for extra crunch.
- Fill small spaces with mini marshmallows, chocolate chips, and butterscotch chips. These tiny elements help tie everything together visually.
- Add the dried apple chips standing upright behind other elements for height and texture variation.
- Scatter the unwrapped caramel candies and toffee bits throughout the board as little surprise treats.
- Create small piles of graham cracker crumbs and cinnamon sugar for rolling dipped apples. Put the sea salt flakes in a tiny pinch bowl for those who love sweet and salty combinations.
- Tuck pretzel rods around the edges – they make excellent dippers and add a salty contrast to all the sweetness.
- Place small spoons in each dip bowl and scatter toothpicks around the board for easy grabbing.
- Prep Time: 25 minutes
- Cook Time: 0 minutes