Today we’re tackling a topic that’s been requested more times than we can count:
How to store water for emergencies.
Whether it’s a power outage, a winter storm, or an unexpected crisis that cuts off your city water—you need a plan.
We know firsthand how stressful it can feel to be unprepared. We live on a well, and when our power goes out, so does our water. That experience lit a fire under us (no pun intended) to get serious about our water storage plan.
In this post, we’re going to walk you through five proven strategies for storing water long-term—plus practical advice on conserving it when you’re running low.
And don’t worry, we’re only sharing methods we’ve personally used and trust.
Let’s dive in.
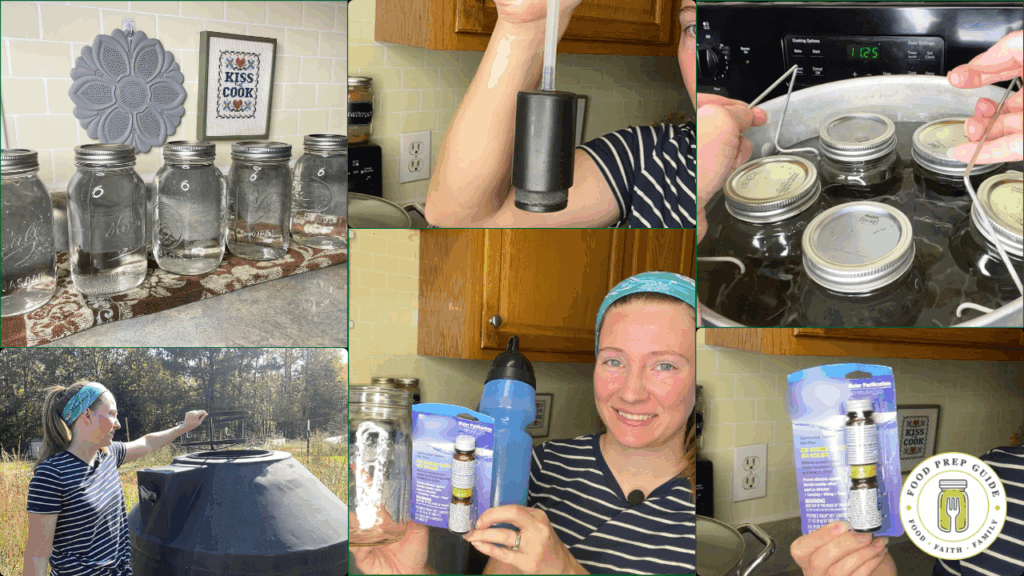
1. Canning Water (Yes, Really!)
Cost: Free if you already have jars
Best For: Clean, shelf-stable, rodent-proof water
This is hands-down our favorite starting place—especially if you’re already a canner! If you’ve got clean, filtered water and some empty mason jars lying around, you’re halfway there.
Here’s why we love it:
- It’s sealed in glass (no risk of plastic chemicals leaching in)
- It’s rodent-proof
- It becomes sterile water, ideal not just for drinking, but also for cleaning wounds in a medical emergency
💡 Quick Tips:
- Water bath for 10–20 minutes (depending on elevation)
- Use already clean/filtered water (this doesn’t purify dirty water)
- Label and store like any other canned good
📌 Bonus: Empty jars take up the same space as full ones. So fill them up and reclaim that closet or under-bed space with peace of mind.
2. Heavy-Duty Water Jugs with Spigots
Cost: ~$15–$50 each
Best For: Easy hand washing, brushing teeth, cooking

Prices pulled from the Amazon Product Advertising API on:
Product prices and availability are accurate as of the date/time indicated and are subject to change. Any price and availability information displayed on [relevant Amazon Site(s), as applicable] at the time of purchase will apply to the purchase of this product.
We love these because they’re:
- Portable
- User-friendly (thanks to the built-in spout)
- Perfect for conserving water—no wasteful pouring
Look for solid, dark-colored containers (not clear plastic) to reduce algae growth and prevent plastic degradation.
And don’t skip the spout feature! Being able to turn water on and off easily makes a huge difference when you’re trying to stretch every drop.
3. Water Filter Bottles
Cost: $20–$40
Best For: On-the-go emergencies, bug-out bags

Prices pulled from the Amazon Product Advertising API on:
Product prices and availability are accurate as of the date/time indicated and are subject to change. Any price and availability information displayed on [relevant Amazon Site(s), as applicable] at the time of purchase will apply to the purchase of this product.
These bottles have built-in filters that make water from a pond, creek, or questionable source safer to drink.
💡 Pro Tip: We still recommend a two-step process in serious emergencies:
- Boil the water for 10 minutes
- Then filter it using a bottle like LifeStraw
We’d rather be too careful than deal with waterborne illness when medical care might be out of reach.
4. Water Purification Tablets
Cost: $10
Best For: Lightweight emergency kits, backup purification

Prices pulled from the Amazon Product Advertising API on:
Product prices and availability are accurate as of the date/time indicated and are subject to change. Any price and availability information displayed on [relevant Amazon Site(s), as applicable] at the time of purchase will apply to the purchase of this product.
These little tablets are your Plan C or D—they’re perfect for bug-out bags, glove compartments, and small storage spaces. Add one to a bottle of untreated water, wait the recommended time (usually around 30 minutes), and you’ve got safer water.
They’re effective against a variety of nasties you do not want to deal with during a crisis.
5. Rainwater Collection Barrels
Cost: $50–$150
Best For: Outdoor water supply, flushing toilets, watering gardens
If you’re allowed to collect rainwater in your area (some states restrict it—don’t get us started on that rant), this is a fantastic backup.
Here’s how we use ours:
- Collect rain or pump water into it from our well when the generator is running
- Pour from the spout into our Berkey countertop filter or a pot for boiling
- Elevate it on cinder blocks or a wooden platform to make pouring easier
We recommend a black barrel with a mesh filter to reduce bacteria growth and catch debris.
Bonus Section: How to Conserve Water in an Emergency
Even with all the storage in the world, you need to stretch your supply wisely. Here are our top water-saving tips:
1. Choose Canned Over Dehydrated Foods
Dehydrated meals require water to rehydrate. Canned foods? Just pop the lid and eat. No extra water needed.
2. Reuse Gray Water
Use rinse water from dishes, hand washing, or even boiling pasta to:
- Flush toilets
- Clean tools or surfaces
3. Low-Water Cleaning Solutions
Keep vinegar, peroxide, and baking soda on hand. These powerful (and frugal) cleaners don’t require much, if any, water to disinfect and clean.
4. Use Snow (If You Have It!)
Fill your bathtub with snow during a winter emergency. It’ll melt into usable water for flushing or even filtering.
Water isn’t optional—it’s essential. And in an emergency, it quickly becomes your most precious resource.
Storing and purifying it doesn’t have to be overwhelming, expensive, or complicated. Start small. Use what you have. Build from there!